Gh i, Kl l t t – AEG Battery Charger LP 10.0 User Manual
Page 30
30
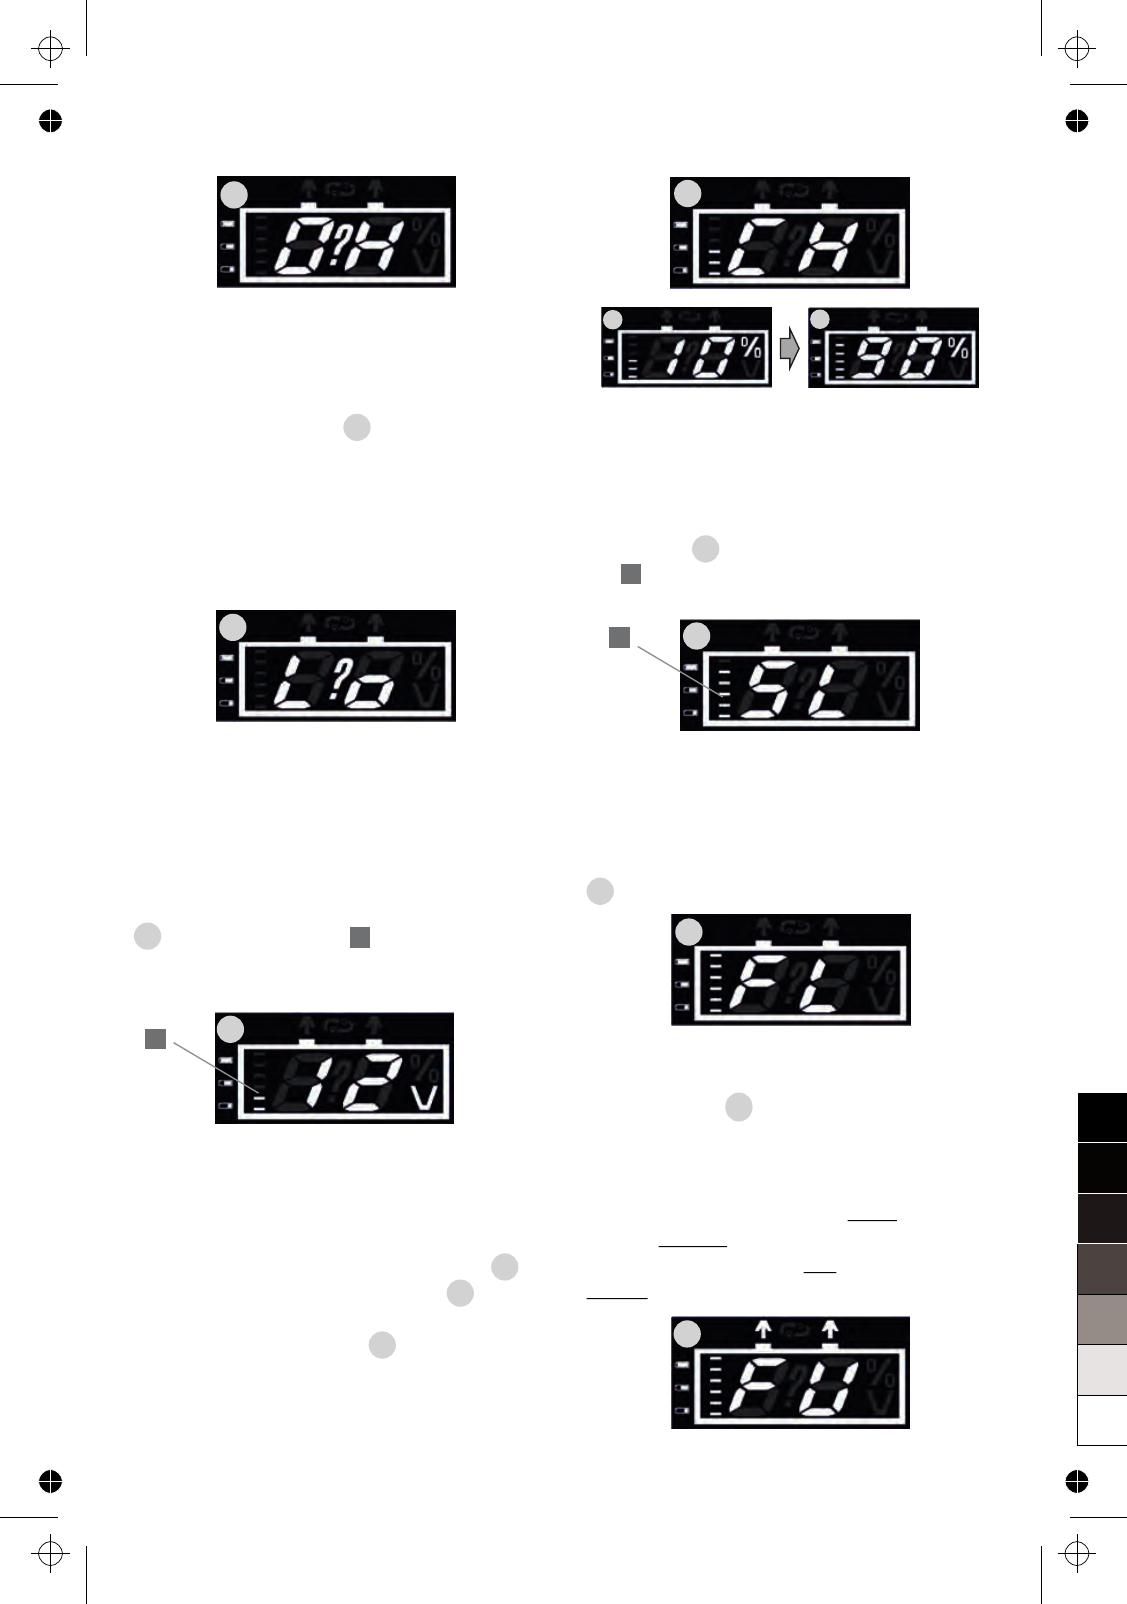
Step 11: Charging complete
L.
Once the battery charge is at 100 % the
display will read . Charging will now be
stopped and the battery can be disconnected
from the charger. Always first disconnect the
power cable from the mains current.
Then disconnect the negative (-) black clamp
from the negative (-) battery terminal. Finally,
disconnect the positive (+) red clamp from the
positive (+) battery terminal.
Step 10: Trickle charging mode
K.
Once the battery is almost fully charged the
charger will activate
“
Trickle Charging
“
mode.
The voltage and amperage will now be adjusted
for the charging process. The display will read
.
Step 9: Slow charging
J.
Once the battery charge reaches 90 % the
equipment automatically switches to slow charge.
The remaining capacity will now be gently
charged at a lower voltage. This mode will be
indicated by and the battery charging
bar .
Step 8: Charging
G, H, I.
The respective battery voltage of 6, 12
or 24 V will briefly be displayed. The charger
will start charging and the display will read
for some time. After charging to 10 % will be
displayed, charging will now continue in rapid
mode until the display reads to confirm the
charge has reached a level of 90 %.
Step 7: Battery voltage recognised
D, E, F.
If the equipment automatically detects an
operating voltage of 6, 12 or 24 V, this infor-
mation will be shown in the display. For a 12 V
battery, for example, the display will briefly read
. The battery condition will also be shown.
Charging will start after this battery review.
T.
If the battery voltage is between 1.5 V and
3.5 V the charger will attempt to increase the
voltage within a few minutes so that regular
charging can automatically be continued. If this
fails the display will read and charging will
be suspended. However, since the equipment
detected a proper connection with the battery no
further steps may be taken. The battery is
defective and can no longer be charged!
S
E
8
G
H
I
8
J
J
8
E
8
K
G
H
I
K
L
L
T
T
0
5
25
75
95
100
97100_Ladeger
t _LP_10.0 Manual _09_12_2011_print
Freitag, 9. Dezember 2011 11:11:32