Nexen 4K Hinge Top 845100 User Manual
Page 8
5
FORM NO. L-20014-L-0210
PARTS REPLACEMENT
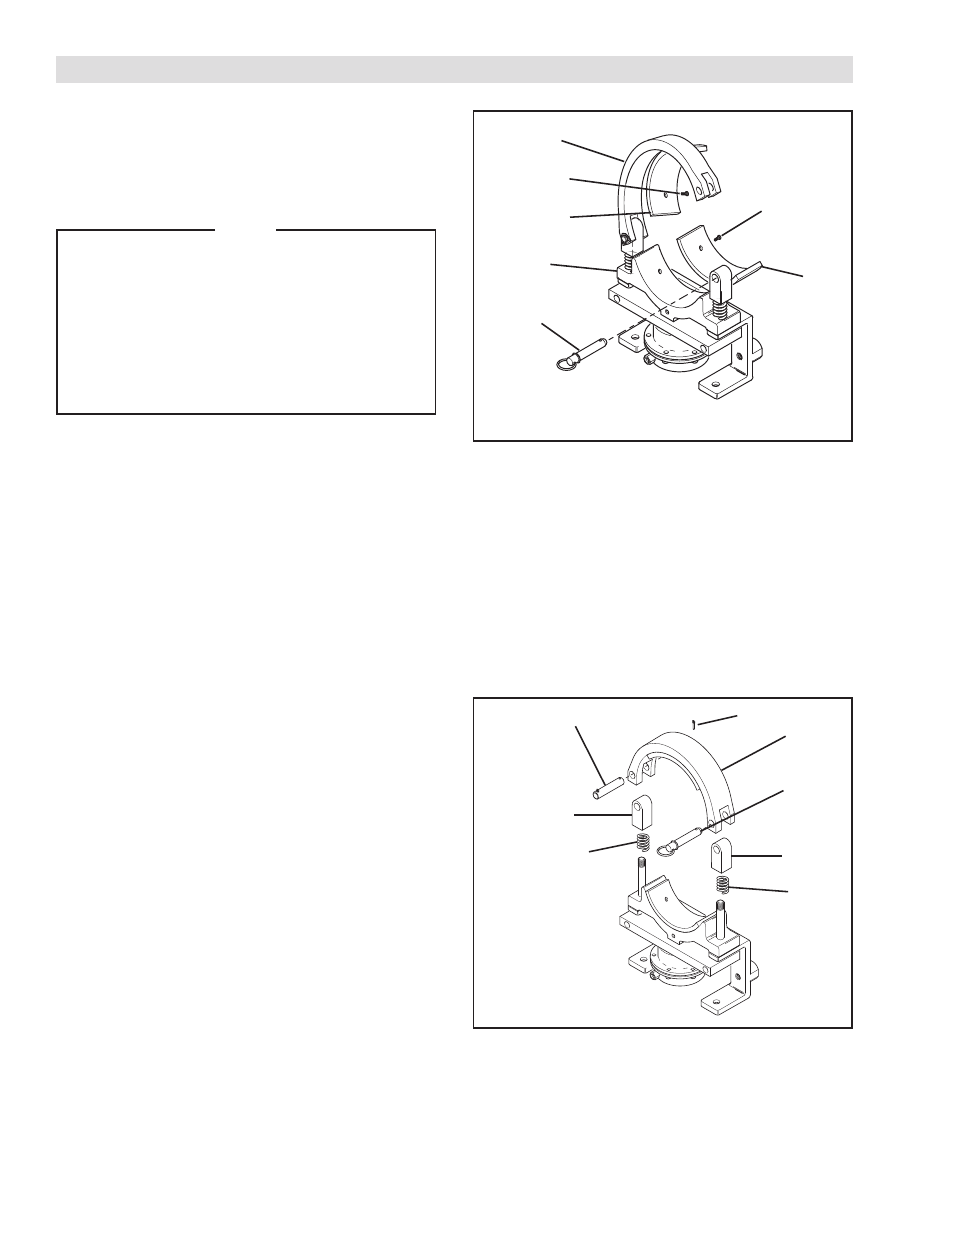
FRICTION FACINGS (ALL MODELS)
REFER TO FIGURE 4.
1. Pull the Detent Pin (Item 29) and lift the hinged Fixed
Shoe (Item 1) to the open position.
NOTE
The Flat Head Machine Screws (Item 20) are
assembled with an anaerobic locking compound.
Inserting a properly fitting screwdriver into the
head of the Flat Head Machine Screw and
striking the end of the screwdriver with a
hammer will break the crystalline structure of
the locking compound and allow removal of the
Flat Head Machine Screw. Never use an impact
wrench to remove the Flat Head Machine Screws.
2. Remove Flat Head Machine Screws (Item 20) from
the hinged Fixed Shoe (Item 1) and the Sliding Shoe
(Item 2); then, remove the Friction Facings (Item 3)
from the hinged Fixed Shoe and Sliding Shoe.
3. Using new Flat Head Machine Screws (Item 20),
secure the new Friction Facings (Item 3) to hinged
Fixed Shoe (Item 1) and Sliding Shoe (Item 2).
4. Tighten the Flat Head Machine Screws (Item 20) to
26 in-lbs [2.9 Nm] torque.
COMPRESSION SPRINGS (8K & 12K MODELS)
FIGURE 4
FIGURE 5
29
1
20
3
20
3
2
REFER TO FIGURE 5.
1. Pull the Detent Pin (Item 29) (See Figure 5).
2. Remove one Cotter Key (Item 28); then, remove the
Pin (Item 27).
3. Lift the hinged Fixed Shoe (Item 1) off the Link Pins
(Items 23 and 24); then remove the Link Pins.
4. Remove the old Compression Springs (Item 22) and
install the new Compression Springs.
5. Reinstall the Link Pins (Items 23 and 24) and
position the hinged Fixed Shoe (Item 1) in place on
the Link Pins.
6. Slide the Pin (Item 27) through the hinged Fixed
Shoe (Item 1) and one Link Pin (Item 24); then,
reinstall the Cotter Key (Item 28) removed in Step 2.
7. Close the hinged Fixed Shoe (Item 1) and install the
Detent Pin (Item 29).
1
28
27
24
23
22
22
29