Lubrication, Manual release operation – Nexen FMBES-875 827343 User Manual
Page 6
2
FORM NO. L-20323-D-0300
LUBRICATION
NOTE
Pneumatically actuated devices require clean, pressure regulated, and lubricated air for maximum performance
and long life. The most effective and economical way to lubricate Nexen FMBES is with an Air Line Lubricator, which
injects oil into the pressurized air, forcing an oil mist into the air chamber.
Locate the lubricator above and within ten feet of the FMBES, and use a low viscosity oil such as SAE-10.
Synthetic lubricants are not recommended.
LUBRICATOR DRIP RATE SETTINGS
NOTE
These settings are for Nexen supplied lubricators. If you are not using a Nexen lubricator, calibration must replicate
the following procedure.
1.
Close and disconnect the air line from the unit.
2.
Turn the Lubricator Adjustment Knob clockwise three
complete turns.
3.
Open the air line.
4.
Close the air line to the unit when a drop of oil forms in
the Lubricator Sight Gage.
5.
Connect the air line to the unit.
6.
Turn the Lubricator Adjustment Knob counterclockwise
until closed.
7.
Turn the Lubricator Adjustment Knob clockwise one-
third turn.
8.
Open the air line to the unit.
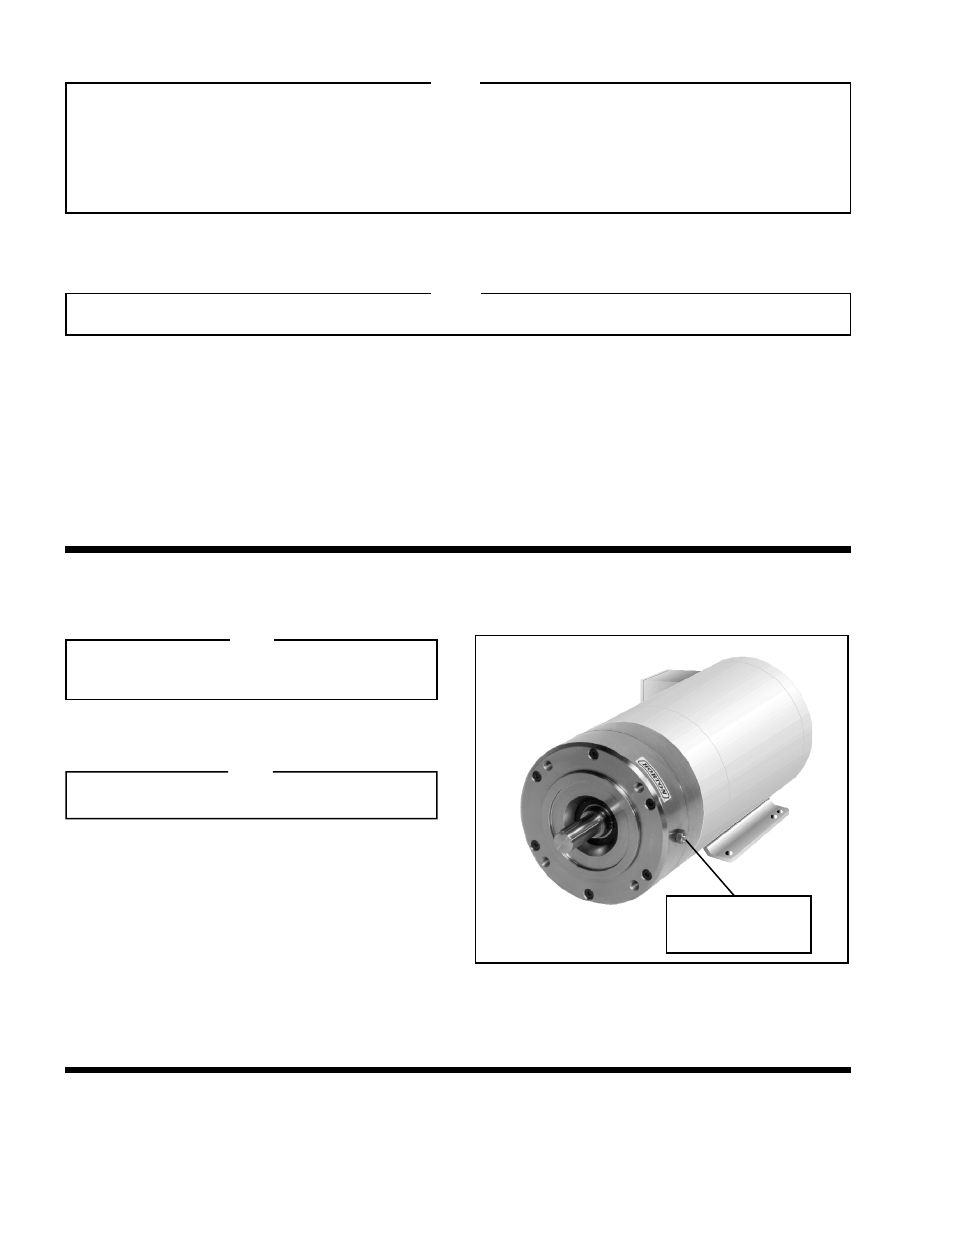
MANUAL RELEASE OPERATION
NOTE
The Manual Release Set Screws (Item 26) must be
alternately and evenly tightened to insure proper
operation of the Manual Release feature.
1.
Loosen the Jam Nuts (Item 27) until they are flush with
the tops of the two Set Screws (Item 26) (See Figure 2).
NOTE
Count and record the number of turns required for
the Set Screws (Item 26) to disengage the FMBES.
2.
Alternately and evenly turn the Set Screws (Item 26)
clockwise 1/2 turn at a time until the FMBES is released;
then, secure the two Set Screws (Item 26) by turning
the Jam Nuts (Item 27) until they are flush with the
Housing of the FMBES (See Figure 2).
3.
To engage the FMBES alternately and evenly turn the
Set Screws (Item 26) counterclockwise the same
number of turns required to release the FMBES; then,
secure the Set Screws with the Jam Nuts (Item 27) (See
Figure 2).
FIGURE 2
Set Screw (Item 26)
and
Jam Nut (Item 27)