Ch - ceiling hinge – Future Automation CH User Manual
Page 13
Page 12 of 18 // email [email protected] tel: +44 (0) 1438 833577 fax: +44 (0) 1438 833565
CH - Ceiling Hinge
S
er
vic
e D
et
ail
s
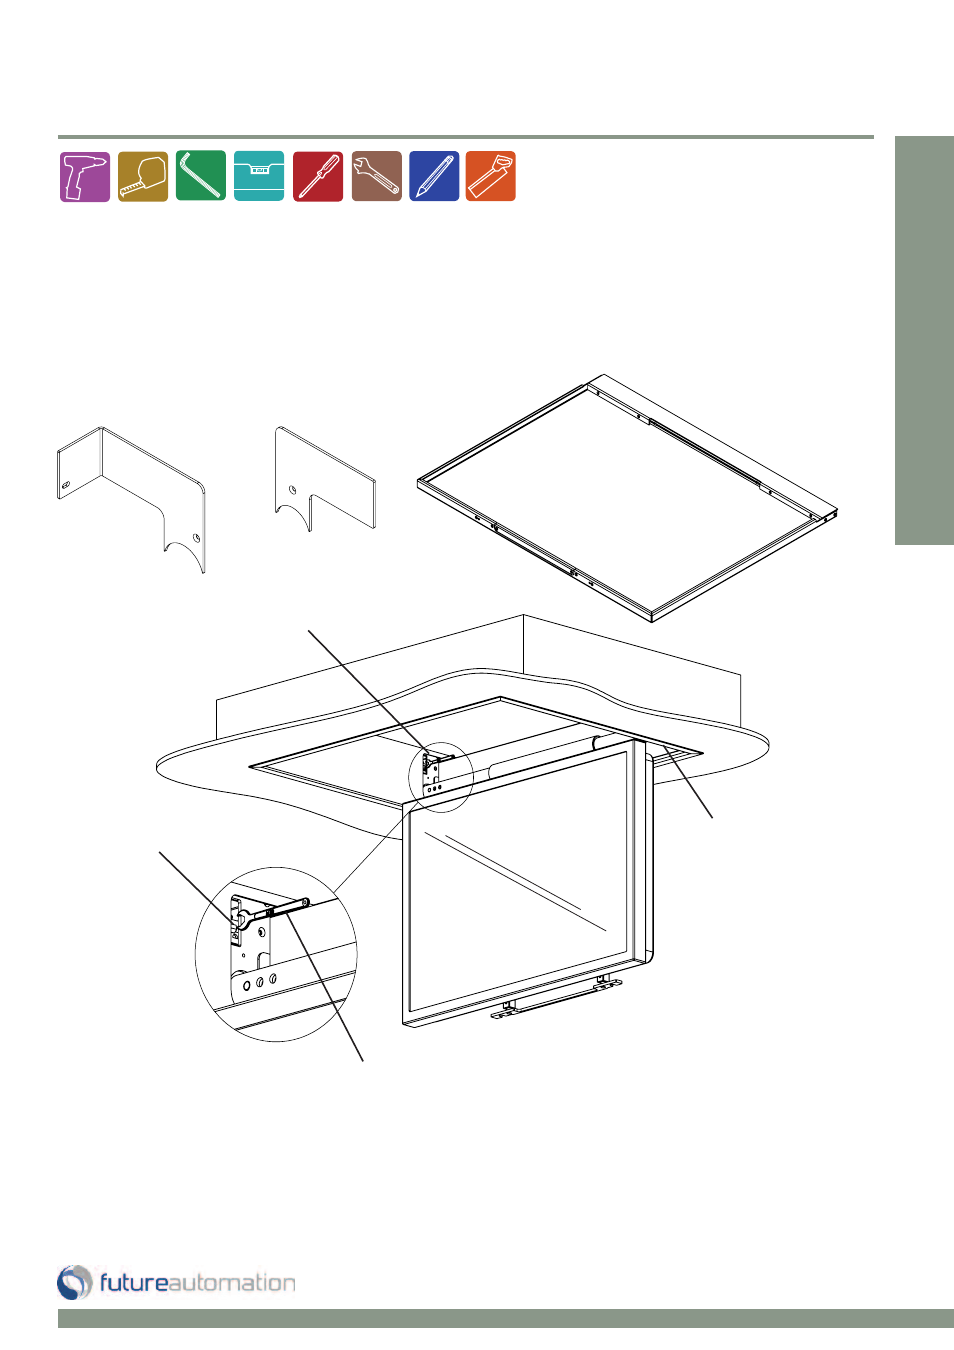
Adjustments and trim panels
Fix the top trim in position before fixing the left & right trim panels to the mechanism.
Take the mechanism up with the controller. Be very careful when it shuts for the first time.
Cover the STOP button just incase the cover panel doesn’t line up.
The closing position can be adjusted with the adjusting nut behind the left trim
panel. Take the mechanism up and down and adjust until flush when up.
Finally fix the left trim panel.
Right Trim
Left Trim
Task Order
1 - Box on
2 - Top trim on
3 - Right trim on
4 - Mount screen
5 - Connect screen
6 - Attach main tray
7 - Adjust up position
8 - Left trim on
Main tray
To adjust the height of the mechanism
in the closed position, turn the 10mm
spanner up to raise and down to lower
the hinge position.
Up adjuster
Left trim panel goes here
Right trim panel