One Systems PTB-8NP User Manual
Page 4
4
4
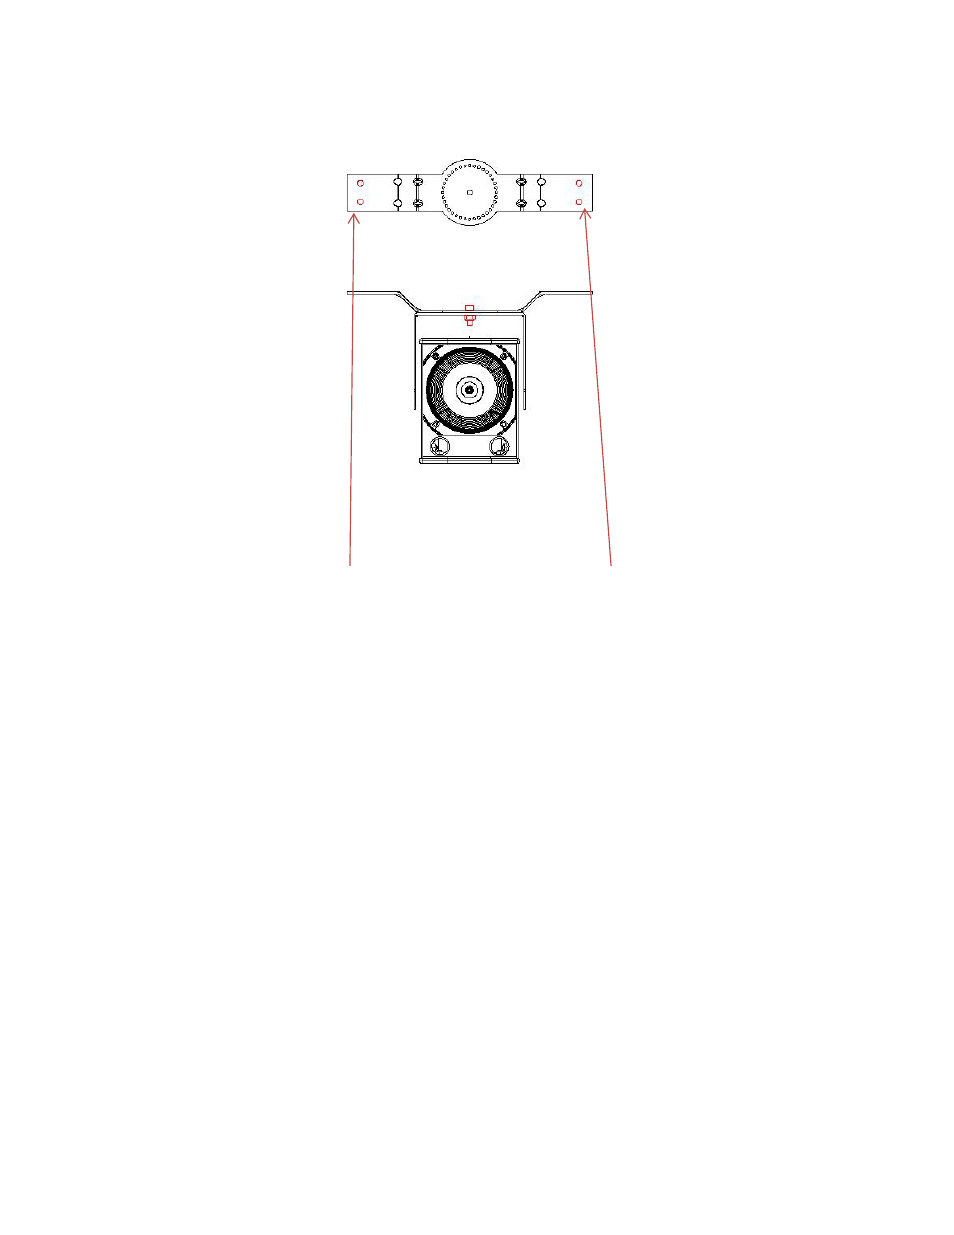
Figure 2
Figure 2 (above) shows the four (4) mounting locations to join the ceiling bracket to a
ceiling surface. These four mounting locations are designed to allow M10 diameter
hardware. The ceiling bracket section should now be mounted to the ceiling surface.
IT IS NECESSARY TO USE ALL FOUR (4) MOUNTING HOLES TO ENSURE A SAFE
AND SECURE MATE TO THE ASSOCIATED SURFACE!
All fasteners associated with the mounting of the PTB-8NP ceiling bracket to the mating
surface are the responsibility of others. The design and structural capacity of mating
surfaces (ceilings) vary greatly and specific fasteners are designed for use with specific
mating surfaces. On Point Audio does not recommend any mating fasteners and
strongly urges the installer to consult with one experienced in suspension of products
from the specific mating surfaces and the appropriate choice of fasteners for those
specific surfaces.
The ceiling bracket section should be secured firmly to the mating surface using the
appropriate fastening system. The fastening system should be determined by the
structure of the mating surface.
IT IS CRITICAL THAT THE MATING SURFACE BE CAPABLE OF SUPPORTING THE
LOAD OF THE PTB-8NP BRACKET AND THE OPA-8NP LOUDSPEAKER AND ALL
SUSPENSION HARDWARE, AS WELL AS PROVIDING THE PROPER SAFETY
FACTORS. DO NOT ATTEMPT TO SUSPEND THE BRACKET AND LOUDSPEAKER
UNTIL THE STRUCTURAL CHARACTERISTICS OF THE MATING SURFACE ARE
UNDERSTOOD. DO NOT INSTALL THE PTB-8NP BRACKET AND OPA-8NP