One Systems PTB-8NP User Manual
Page 5
5
5
LOUDSPEAKER IF THE MATING SURFACE IS NOT CAPABLE OF SUPPORTING
THE ENTIRE ASSEMBLY WEIGHT, AS WELL AS PROVIDING THE REQUIRED
SAFETY FACTORS!
After the PTB-8NP ceiling section of the bracket is securely mounted to the ceiling, the
OPA-8NP loudspeaker enclosure should be attached to the loudspeaker bracket using
the fasteners supplied. (DO NOT SUBSTITUTE FASTENERS)
NOTE: There are 2 each M8 bolts supplied in the mounting kit of the PTB-8NP.
USE EXTREME CAUTION! The loudspeaker is heavy and it is likely that the desired
mounting location is high in the air. This process should never be attempted by a single
person.
TWO OR MORE PEOPLE ARE REQUIRED TO MOUNT THE LOUDSPEAKER
ENCLOSURE TO THE PTB-8NP bracket. Safety harnesses should always be worn
when working from an elevated platform.
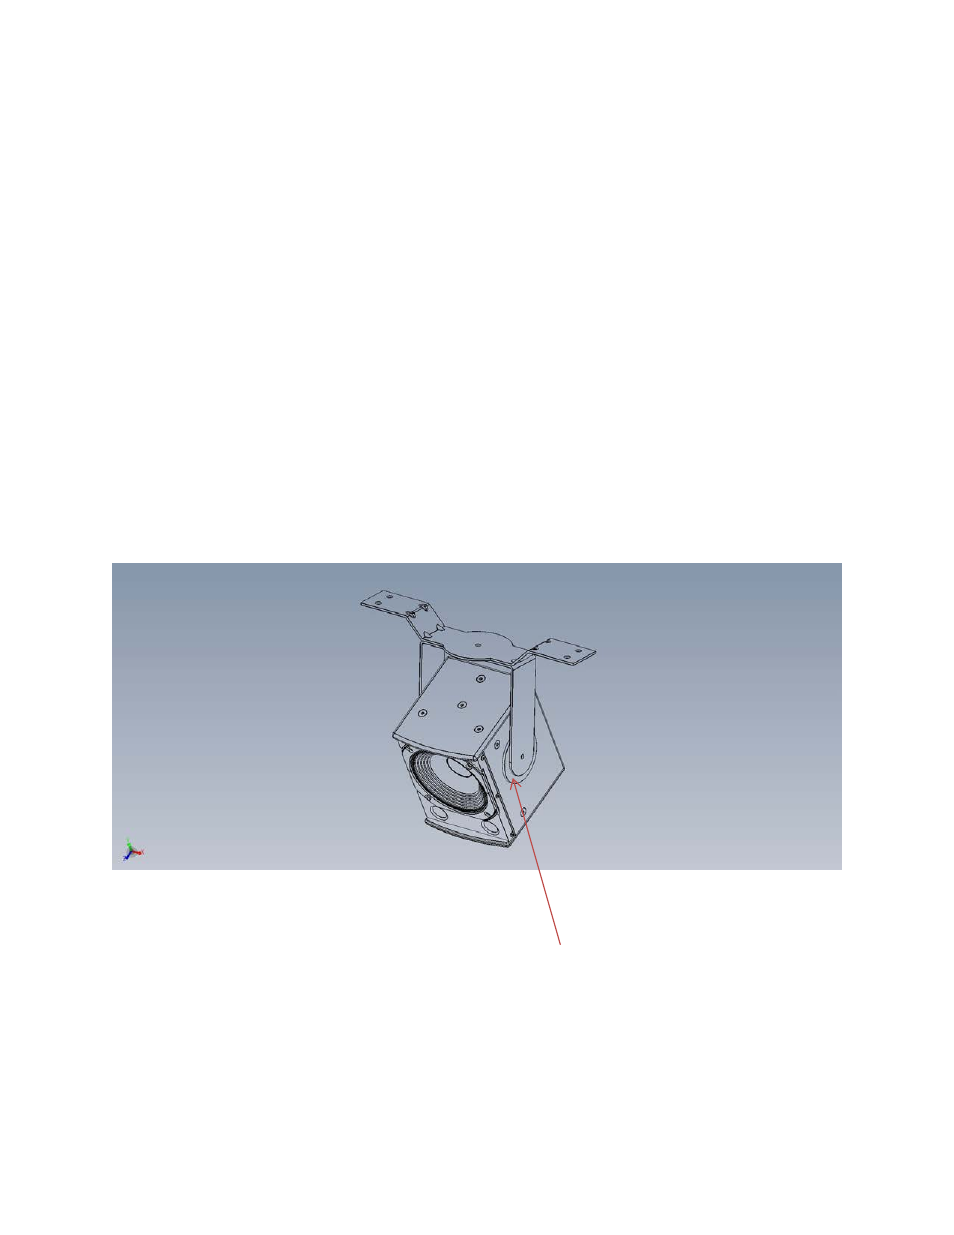
Insure that the two rubber spacers are installed between the side walls of the enclosure
and the loudspeaker bracket section of the PTB-8NP as shown below in Figure 3.
Figure 3
Install the two large rubber spacers (100mm diameter) on each side of the enclosure
between the enclosure and the loudspeaker bracket section as shown.
Then install the M8x40mm bolts (one on each side of the loudspeaker bracket) making
sure to use both the supplied M8 flat washers AND lock washers. BOTH THE FLAT
WASHERS AND LOCK WASHERS MUST BE USED! Figure 4 (Below) shows is an
image of the PRB-8NP showing the rubber spacer, loudspeaker bracket, flat washer,