页面 8, Basic operation, 11 12 replacing the battery – Tview D76TSB User Manual
Page 8
11
12
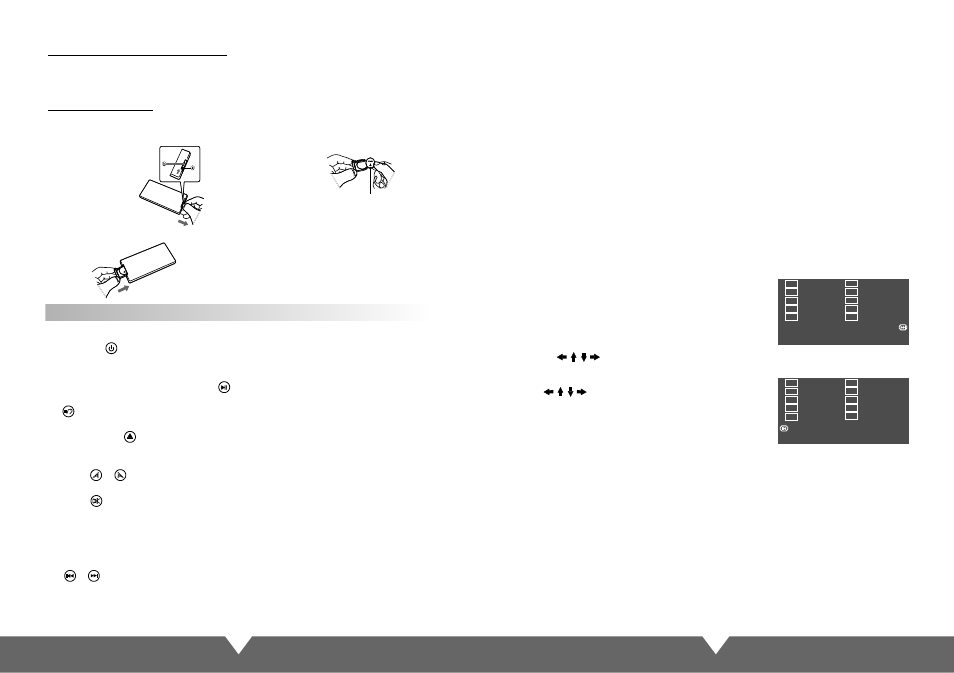
Replacing The Battery
1. Insert your finger nails into A and B on the diagram
below, press A according to the direction, then pull
out the battery holder.
2. Remove the old battery, then insert the new
battery into the battery holder with the + side
facing upwards.
3. Fit the battery holder back to its place.
Lithium battery(Cr2025)
Note:
To prevent leakage of fluid from the lithium
battery, remove the battery when not using
the remote control unit for long periods of
time(one month or more), If the battery leaks
fluid, carefully wipe it out of the battery case,
then change to a new lithium battery.
Basic Operation
Remote Control Unit Operating Range
Horizontal: ±30 degree
Vertical: ±30 degree
Distance: 6M
1. Power on /off
Press the “ ” button on remote control, enter into power on condition, press this button
again to turn off the unit.
2. PLAY/PAUSE
On normal play disc mode, press this “ ” button to pause. Press this button again to
continue playing.
3. STOP
In play mode, press it to stop playing, press “PLAY” button to resume playing.
4. DISC IN /OUT
Press to eject the disc. The disc into the disc slot, will inhale automatically.
5. Adjust panel angle
Press “ ” “ ” button on remote control, can adjust the panel angle.
6. MUTE control
Press “ ” button on remote control to turn off the sound. Press it again will resume the
previous volume level.
Note: there are some functions no work when mute.
7. Function mode switch
Press “MODE” button on remote control to switch the mode. But if the unit without disc/SD/
USB inside, can’t enter to DVD/SD/USB mode.
8. “ ” “ ”
In DVD mode, short-press for previous/next item, long-press for fast forward/fast back;
In FM mode, short-press for adjust radio frequency, long-press for manual search forward
up/down; In TV mode, short-press for previous / next channel, long-press for fine-tuned.
26
26
10.Select the subtitle
11. Press “Sub-T” to select different subtitles inherent in DVD disc.
12. Press ZOOM key for times, the picture will change in order of 2X, 3X 4X,1/2,1/3 and 1/4 of
normal size. (Note: When playing MP3/USB/SD, this button is invalid.)
13. Press SLOW on the remote control to slow playing. Change the playing speed to 1/2, 1/4,
1/8, and 1/16 through pressing SLOW button.
14.During playback press the "AUDIO" voice key, can be included on the DVD disc in a variety
of audio languages to choose.
15. “GOTO” chooses play button, Press it, the play information will show on screen, use cursor
button on the remote control to choose disctitle, chapter or time and then press “enter” button
to play.
16. Press ANGLE to select the play angle when the main unit is in play mode for DVD disc,
there is no function for other disc. It will be no working if the disc not have this function.
17. The main unit may auto play the list according to the order of title, chapter or set list;
Press ST/PROG, the menu will shown on the screen.
9. ODD:
Press the OSD remote control key, the screen will display elapsed time, remaining time,
title,chapter, time, section time, time remaining chapters, show off
NOTE:
(1). The program list will be cancel when the main unit is power off or eject the disc.
(2). There is no program function for some disc.
(3). The unit can not play the list if you select the item that does not exist in the disc.
Hint: TT is for Title, CH is for Chapter of DVD disc. DVD disc
is divided into several parts called Title. Then title is divided
into chapter; Normally one movie only corresponding to one
title. CD disc is divided into several items. For KARAOKE disc
one music corresponding to one title.
Use move cursors to “play”, press “enter” button,
the unit starts playing on the program list. Press “Play/Pause”
button or choose "Exit" button, press “enter” to exit.
Use the and number button, to input the corresponding title, chapter, same as
the picture showing:
1
2
3
4
5
6
7
8
9
10
TT: CH:
TT: CH:
TT: CH:
TT: CH:
TT: CH:
TT: CH:
TT: CH:
TT: CH:
TT: CH:
TT: CH:
EXIT
Next
11
12
13
14
15
16
17
18
19
20
TT: CH:
TT: CH:
TT: CH:
TT: CH:
TT: CH:
TT: CH:
TT: CH:
TT: CH:
TT: CH:
TT: CH:
EXIT
Previous