Adding shapes and images to titles – Adobe Premiere Elements 12 User Manual
Page 222
Adding shapes and images to titles
Create shaped objects for titles
Add images to titles
Create shaped objects for titles
You can use the drawing tools in the Monitor panel to create a variety of shapes, such as rectangles, ellipses, and lines. After you draw a shape,
you can apply a style to it, and change the fill and stroke attributes.
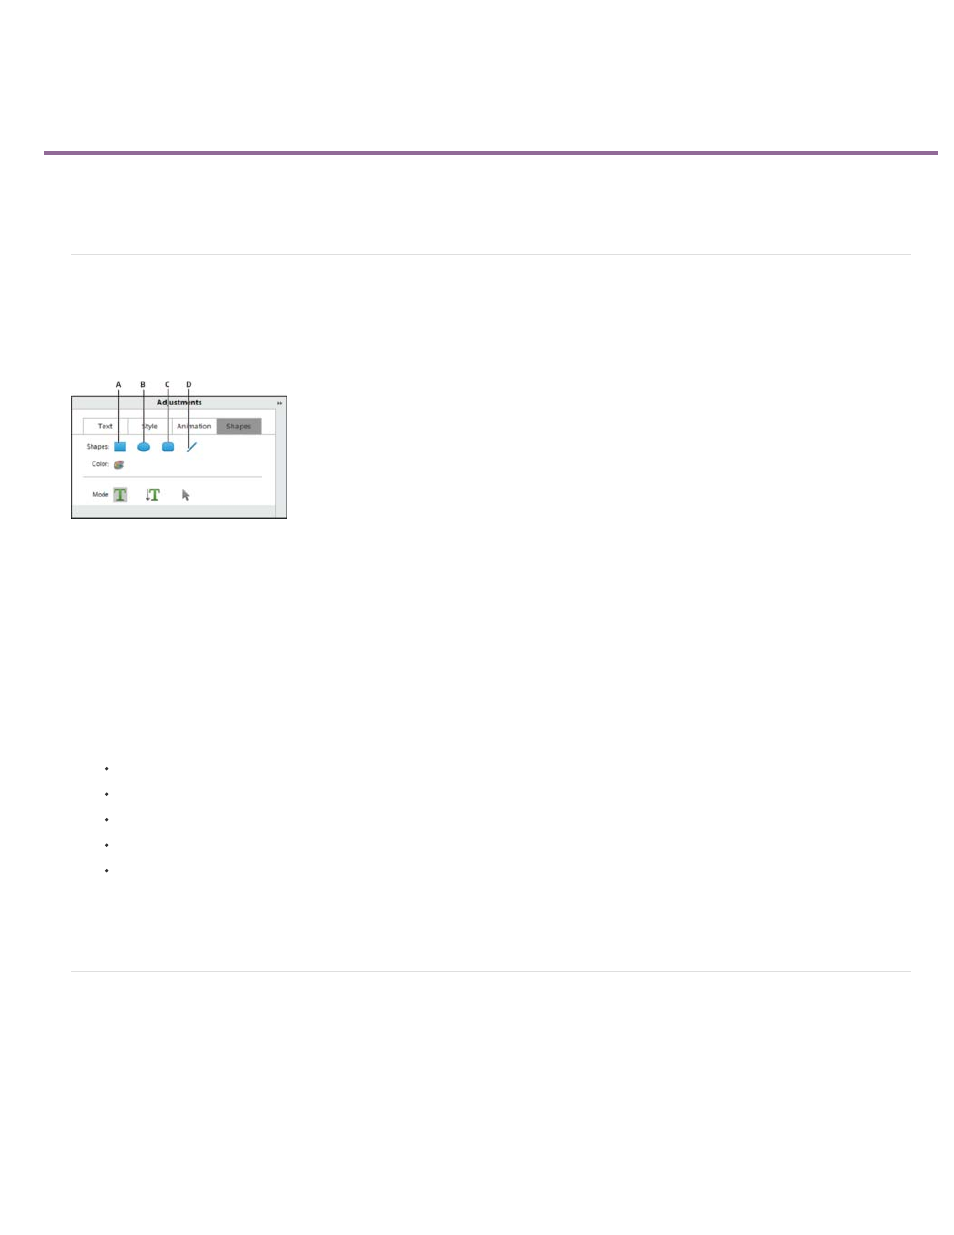
Shape tools
A. Rectangle B. Ellipse C. Rounded Rectangle D. Line
1. If necessary, double-click the title in the Expert view timeline to open it in the Monitor panel.
2. In the Monitor panel, select a shape tool.
3. Do any of the following:
Shift-drag to constrain the shape’s aspect ratio.
Alt-drag to draw from the center of the shape.
Shift+Alt-drag to constrain the aspect ratio and draw from the center.
Drag diagonally across the corner points to flip the shape diagonally as you draw.
Drag across, up, or down to flip the shape horizontally or vertically as you draw.
4. To apply a style to it, click a style object in the Style section of the Adjust panel.
Add images to titles
When adding an image to a title, you can add it as a graphic element or place it in a box to become part of the text. Premiere Elements accepts
both bitmapped images and vector-based artwork. Vector-based art is rasterized to a bitmapped version in the Monitor panel. By default, an
inserted image appears at its original size. Once inserted into a title, you can modify the image’s properties (such as scale) as you would other
objects.
note: Unlike text and graphic objects, images you add to titles aren’t embedded as part of the title. Instead, the image references the source
image file in the same way that items listed in the Project Assets panel refer to source audio and video files.
218