Installation, For qualified installers only), Travis industries – Avalon Firestyles Hideaway User Manual
Page 15
Installation
(for qualified installers only)
1 5
Travis Industries
4030612
1 0 0 - 0 1 1 4 8
Vent Installation
•
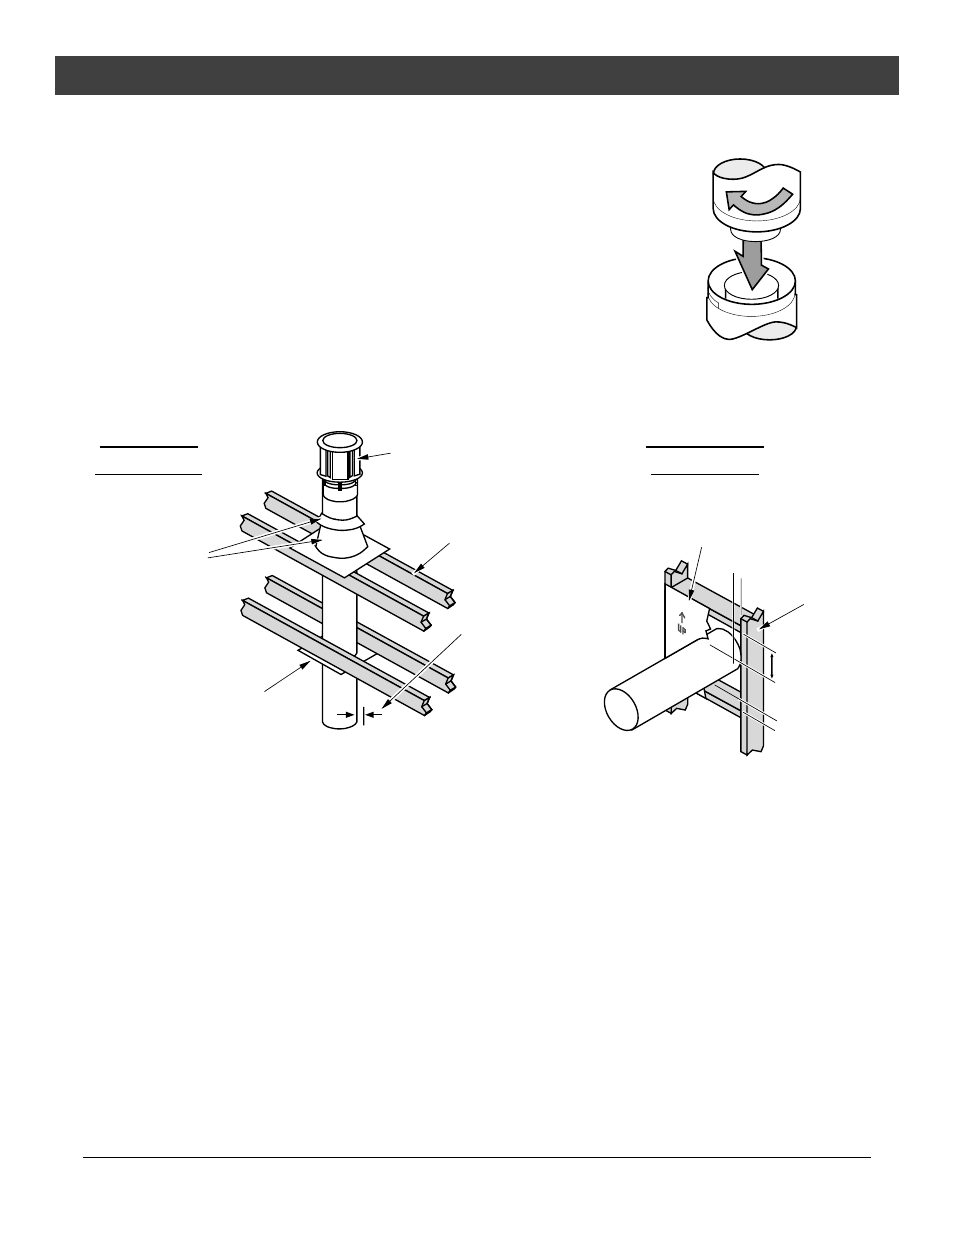
Slide the vent sections together and turn 1/4 turn until the sections lock in
place.
•
Screws are not required to secure the vent. However, three screws may be
used to secure vent sections together if desired.
•
High temperature sealant is recommended at the appliance starter section
connection (use high-temperature silicone or Mill-Pac®).
•
If disassembly is required, at time of re-assembly check to see if the vent
creates a tight fit. If it does not, apply high temperature sealant to the joints of
the affected sections.
•
Horizontal sections require a 1/4" rise every 12" of travel
•
Horizontal sections require non-combustible support every three feet (e.g.: plumbing tape)
•
In addition to the requirements below, follow the requirements provided with the vent.
Vertical Termination
(use the "High Wind Terminatin"
Use a roof flashing and
storm collar whenever
passing through the roof
Vertical Vent
Requirements
0" Clearance on vertical
Sections to combustible
surfaces (after the first
firestop).
Use a ceiling firestop whenever
passing through a ceiling (or
enclosure and at every floor
penetration.
Combustible
Framing
Use a firestop when passing through a wall. Make
sure there is a 2" clearance above the vent.
2" Min.
1" Min.
0" Clearance
Combustible
Surfaces
Horizontal Vent
Requirements