Wave stitch, Converting from normal serging to wave – Baby Lock Imagine Wave (Previous Model) (BLE3ATW) Instruction and Reference Guide User Manual
Page 35
W
A
V
E
S
T
I
T
C
H
33
Wave Stitch
The Wave Stitch provides a decorative "wavy" edging on fabric. (This is not to be confused with "Lettuce
Edge" on page 36). The upper looper thread and the lower looper thread gradually appear every 25
stitches to create a stitch that looks like a "Wave". When using different color specialty threads (see pages
46 & 47) for the upper or lower loopers, the Wave stitch creates an attractive stitch for edging.
When combining decorative threads for the Wave stitch, please sew test on a sample of the fabric you will
be sewing on before applying the Wave stitch.
For best results, heavier decorative threads should be limited to the upper or lower looper at one time. Not
both upper looper and lower looper at the same time. Wooly nylon in the corresponding looper and
maxilock thread in the right needle will make a striking combination with the heavy decorative thread.
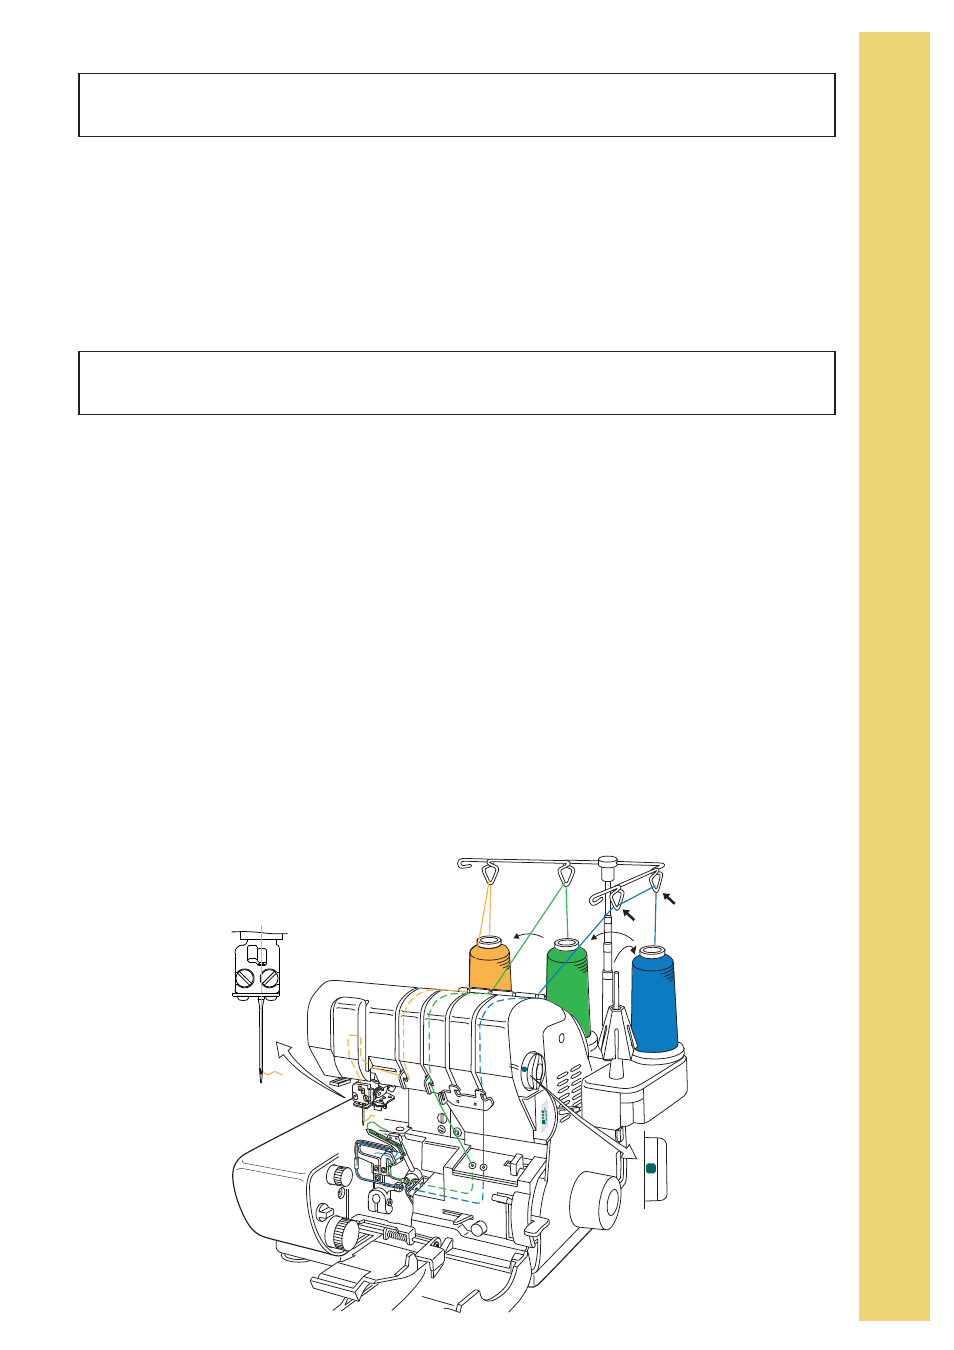
Converting from Normal Serging to Wave
1. Turn the Wave Selector dial from "O" to "W".
2. Cut the threads from the thread cones and remove from the thread paths.
3. Lock the machine for threading the loopers. (see page 10)
4. Place the right needle thread cone on the far left spool pin.
5. Slip the right needle thread into the telescopic thread guide directly above the thread. Follow the left
needle threading path down to the right needle.
6. Thread the right needle using the needle threader set on "R". (see page 13)
7. Place the upper looper thread cone on the 2nd from left spool pin.
8. Slip the upper looper thread into the telescopic thread guide directly above the thread. Follow the top
threading path for the right needle thread, down the front threading path, to the left of the chrome thread
guide, and directly to the "U" jet air threading port for the upper looper. Set the Looper Threader Selector
on "U". Thread the upper looper. (see page 11)
9. Place the right needle thread and upper looper thread under the presser foot and to the back.
10.Place the lower looper thread cone on the 3rd from left spool pin.
11. Slip the lower looper thread into the telescopic thread guide directly above the thread, then slip the
thread into the lower looper telescopic thread guide to avoid the thread getting tangled while sewing.
Take the thread through the standard lower looper threading path to the "L" jet air threading port for the
lower looper. Set the Looper Threader Selector on "L". Thread the lower looper. (see page 10)
12.Set Stitch Selector for Wave Stitch or Rolled Wave Stitch. (see page 34 or 35 for correct setting)
13.Set Stitch Length and Stitch Width following the illustration on page 34 and 35).
A
B
C
D
W
W