Thread reversed wave stitch – Baby Lock Evolve (Previous Model) (BLE8W) Instruction and Reference Guide User Manual
Page 45
O
V
E
R
L
O
C
K
S
T
I
T
C
H
E
S
E
X
P
R
E
S
S
43
3-thread Reversed Wave Stitch
NEEDLES
O-2
LENGTH
1.0-2.5
WIDTH
5.0
STITCH
SELECTOR
B
WAVE
SELECTOR
W
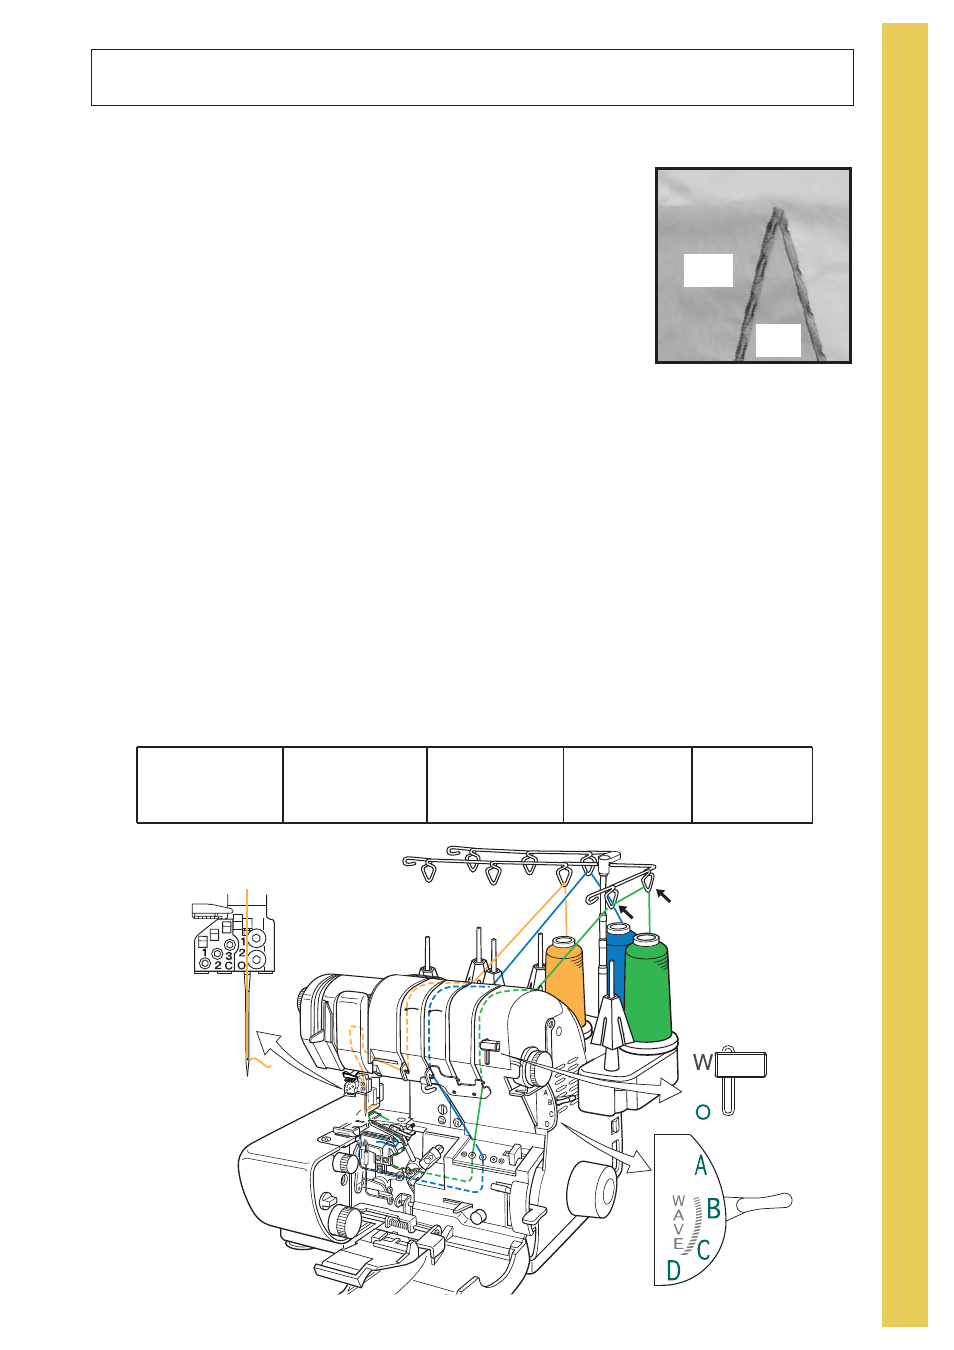
You can also get the wave stitch in the back of fabric by crossing the upper and lower looper threads
before the threading port. This Reversed Wave Stitch is attractive for expressive stitch with decorative
cover stitches. (see figure A)
1. Move the Wave Selector lever from "O" to "W".
2. Cut the threads from the thread cones and remove from the thread paths.
3. Lock the machine for threading the loopers. (See page19.)
4. Place the right needle thread cone on the OVERLOCK NEEDLE 2 spool
pin.
5. Slip the right needle thread into the telescopic thread guide directly above
the thread. Follow the left overlock needle threading path down to the
right overlock needle.
6. Thread the O-2 needle using the needle threader. (See page 24.)
7. Place the upper looper thread cone on the upper looper spool pin.
8. Slip the upper looper thread into the telescopic thread guide directly above the thread. Follow the top
threading path for the right overlock needle thread, down the front threading path, to the left of the
chrome thread guide, and directly to the "L" jet air threading port for the lower looper. Set the Looper
Threader Selector on "L". Thread the lower looper. (See page 20.)
Note: This upper looper thread which goes into lower looper through "L" jet air threading port appears as
wave stitch in the back side of fabric.
9. Place the needle thread and thread from the lower looper under the presser foot and to the back.
10. Place the lower looper thread cone on the lower looper spool pin.
11. Slip the lower looper thread into the telescopic thread guide directly above the thread, then slip the
thread into the chain looper telescopic thread guide to avoid the thread getting tangled while sewing.
Take the thread through the standard lower looper threading path to the "U" jet air threading port for
the upper looper. Set the Looper Threader Selector on "U". Thread the upper looper. (See page 20.)
12. Set Stitch Selector on "B" for Wave Stitch.
13. Set Stitch Length and Stitch Width following the illustration below.
Note: It is not recommended to use reversed rolled wave.
A
Right
Side
Wrong
Side