Install ceiling bracket read before installing – Cetacea Sound Astronaut XL Quick Start Guide User Manual
Page 3
Recommended Tools
Phillips head screwdriver
Hand drill with ¼" and ½" bits
Measuring tape
INSTALL CEILING
BRACKET
READ BEFORE
INSTALLING
For in-depth safety, installation,
and operational procedures, read or
download the Astronaut XL Owner’s
Manual at www.cetaceasound.com.
ASTRONAUT
™
XL
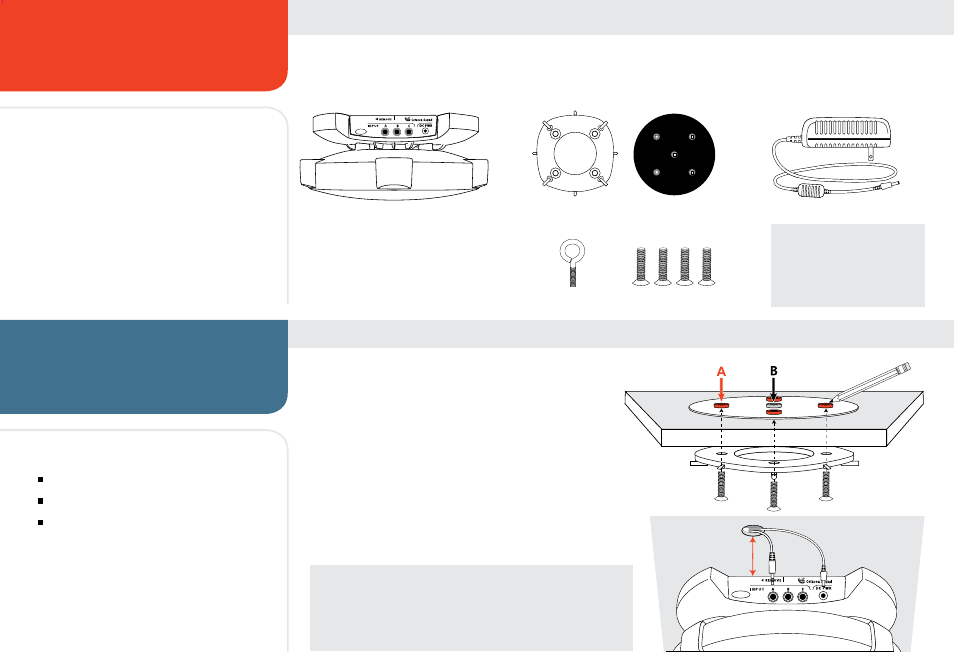
SYSTEM CONTENTS
Ceiling Mount Kit
Power Supply
Mounting Bracket
Aluminum Bolts (4)
Ceiling Plate
Eye Bolt
NOTE
Power supply style will vary
depending on the system
number you ordered.
NOTE: FOR HARD SURFACE CEILINGS
Ceiling plate
C
is not required for solid ceiling installations.
Modifi cation to the bracket
D
is required. Refer to the Owner’s
Manual at www.cetaceasound.com for instructions.
6 in.
D
C
CEILING
TILE
1. Remove a ceiling tile and set it on a fi rm surface.
2. Use the ceiling plate as a guide to mark 5 holes
A
&
B
.
3. Drill or tap ¼" holes for the 4 aluminium bolts
A
. Drill the
½" center hole
B
for the security eye bolt (optional).
4. If cable will be routed above the ceiling, cut a 1" hole about
6" away from the front of the speaker (optional).
5. Fasten the ceiling plate
C
to the top and ceiling bracket
D
to
the bottom of the tile using the provided 4 aluminum bolts.
FOR INSTALLATION TO FALSE CEILINGS
Astronaut XL Speaker