8 expansion connector – Cloud Electronics CX242 User Manual
Page 9
CX242: I
NSTALLATION AND OPERATION MANUAL
8
8 Expansion
Connector
Two CX242's can be linked by fitting the optional 'Expansion Connector Kit'. The multi-
core link duplicates the two mic and four line signals derived from the source CX242 onto
the respective input stages of a second CX242. This simplifies the interconnection of two
units which are required to control the same input signals and distribute these to four
stereo zones.
It is possible by utilising a custom interconnection cable to link more than two CX242’s
together. If required only the signals that are to be shared can be linked and other signal
sources or microphones can be connected directly, to achieve the desired configuration;
refer to the following wiring chart for further details:
When using a customised interconnecting cable the appropriate number of 15 way D
connector cable assemblies (part number wj960319) should be obtained from our spares
department. One cable assembly fits inside each CX242 in the system to facilitate the
connection of the link cable.
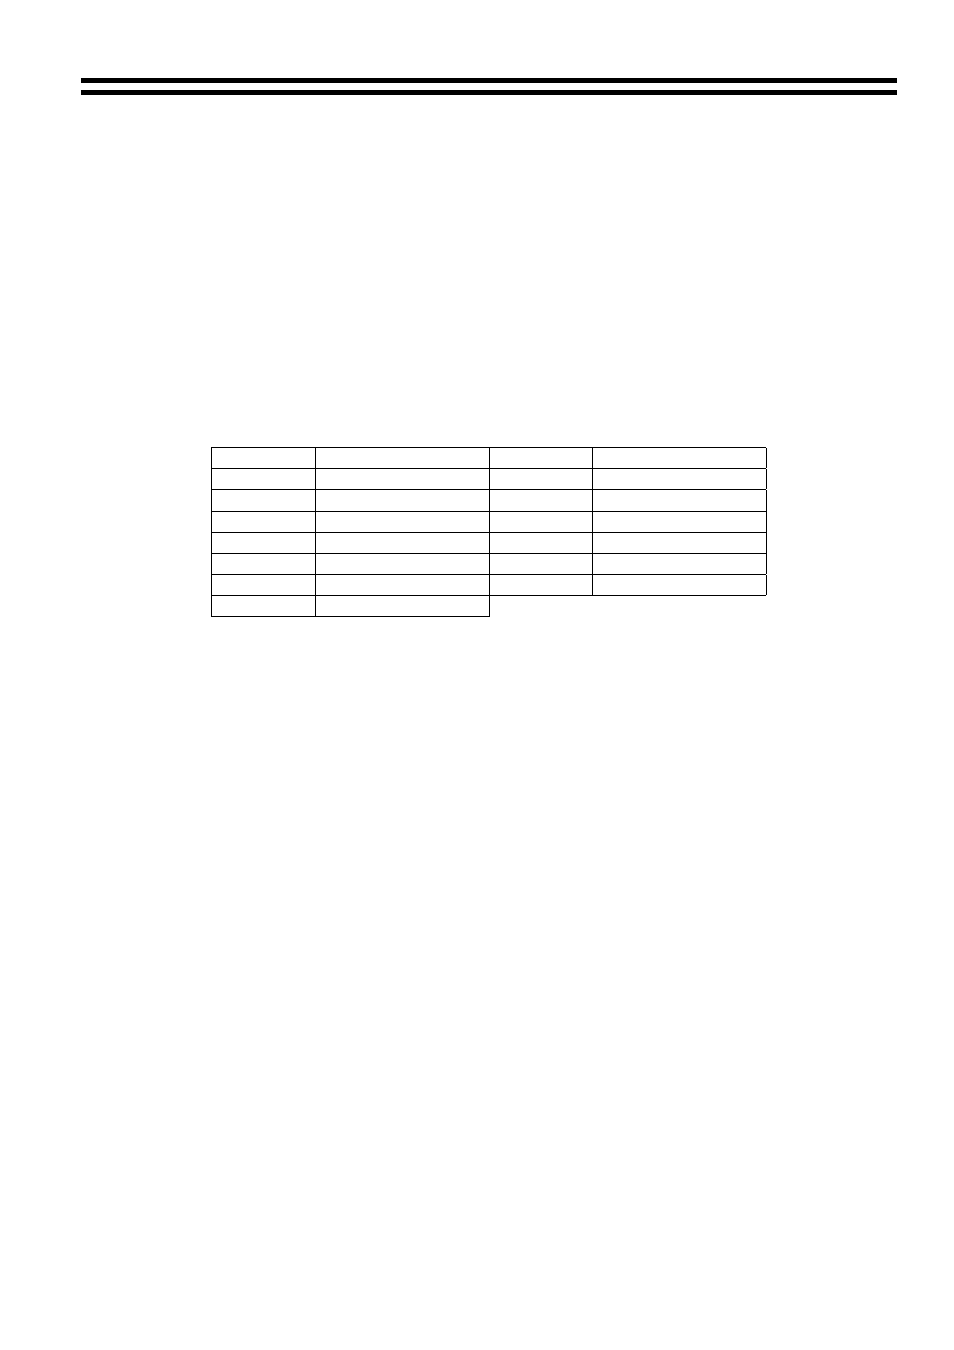
Pin 1
Line 2 – left
Pin 2
Line 2 - right
Pin 3
Line 1 – right
Pin 4
Line 1 - left
Pin 5
0V
Pin 6
0V
Pin 7
0V
Pin 8
Mic 2
Pin 9
Line 3 – left
Pin 10
Line 3 - right
Pin 11
Line 4 – right
Pin 12
Line 4 - left
Pin 13
0V
Pin 14
0V
Pin 15
Mic 1
Installation of standard “Expansion Connector Kit”:
The kit comprises two 15 way 'D' connector assemblies and a screened link cable. Fit the
cable assemblies as follows:
Disconnect the power lead prior to commencing any work.
Remove the top panel from the mixer which will be connected to the signal sources.
Remove the blanking cover from the expansion connector mounting holes.
Fit one of the 15 way female connectors to the rear panel using the supplied retention
pillars. The connector must be positioned on the inside surface of the rear panel.
Connect the ribbon cable connector to CON2 marked ‘OUTPUTS'.
Replace the top panel and mark the unit so as to identify it as the signal source.
Remove the top panel from the destination mixer.
Remove the blanking cover from the expansion connector mounting holes.
Fit the second 15 way female connector to the rear panel.
Connect the ribbon cable connector to CON1 marked ‘INPUTS'.
Replace the top panel and mark the CX242 so as to identify it as the destination unit.
The two units can now be connected together and the input signals from the source
CX242 will be connected to the second unit. To achieve matching microphone signal
levels, the rear panel mounted mic gain pre- set controls on the destination CX242 should
be positioned fully anti- clockwise. The line input pre-set gain controls do not interact and
should be set as required.
15/07/02 V4