DR Power Walk-Behind On Board Vacuum Hose (July 2010 and Prior) User Manual
Page 11
CALL TOLL FREE 1-800-DR-OWNER 7
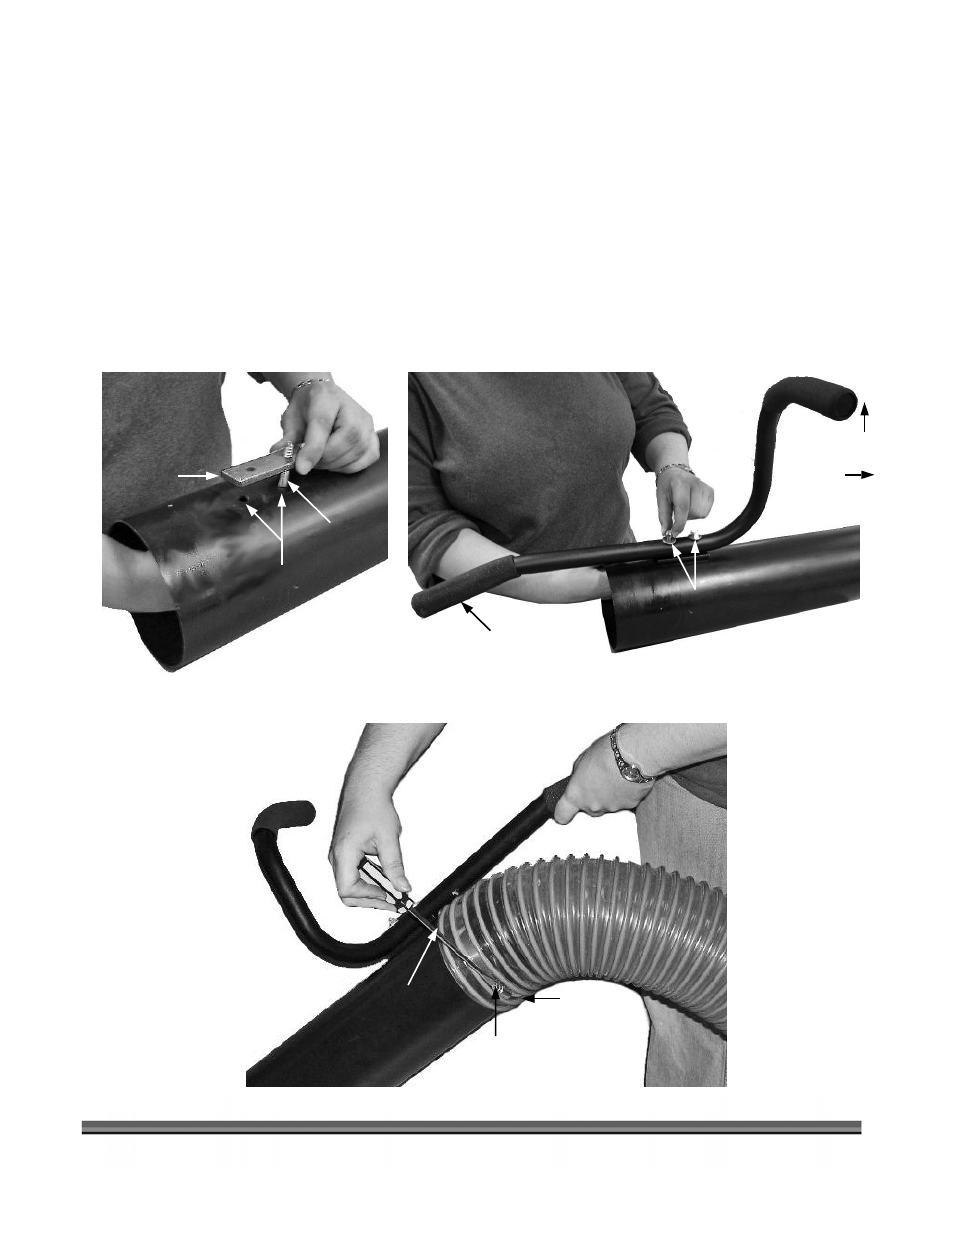
7. Place the Hose Handle Bracket over the pre-drilled mounting holes in the Nozzle (Figure 5a), then
install the two (2) 1/4"-20 x 3/4" Button Head Screws with Fender Washers up through the aligned
holes and through the Handle Bracket (Figure 5a).
8. Place the Hose Handle on the Screws just installed (Figure 5b) and install a 1/4" Flat Washer and 1/4"
Lock Nut on each Screw but do not tighten at this time.
9. Slip a Hose Clamp over the end of the Hose and then slip the Hose onto the Nozzle and push it up
against the Handle Bracket so that the Hose is under the Handle (Figure 6).
Tip: Lubricating the Nozzle end with petroleum jelly will help to slide the Nozzle into the Hose.
10. Slide the Hose Clamp up under the Handle and tighten the clamp (Figure 6) and the remaining
hardware.
11. Reconnect the spark plug wire.
Figure 5a
Figure 5b
Hose Handle
Bracket
Nozzle
Pre-Drilled Holes
Bolt up
through
Nozzle
Hose Handle
Curved End Up
and Facing
Forward
Washer and
Lock Nut
Figure 6
Nozzle
Hose Clamp
Tighten
Hose on Nozzle
up against Bracket