Assembly – DR Power Dual Action 3 pt. Hitch Model (Aug 2011 - Present) User Manual
Page 8
8
DR
®
DUAL-ACTION 3 PT HITCH LOG SPLITTER
Assembly
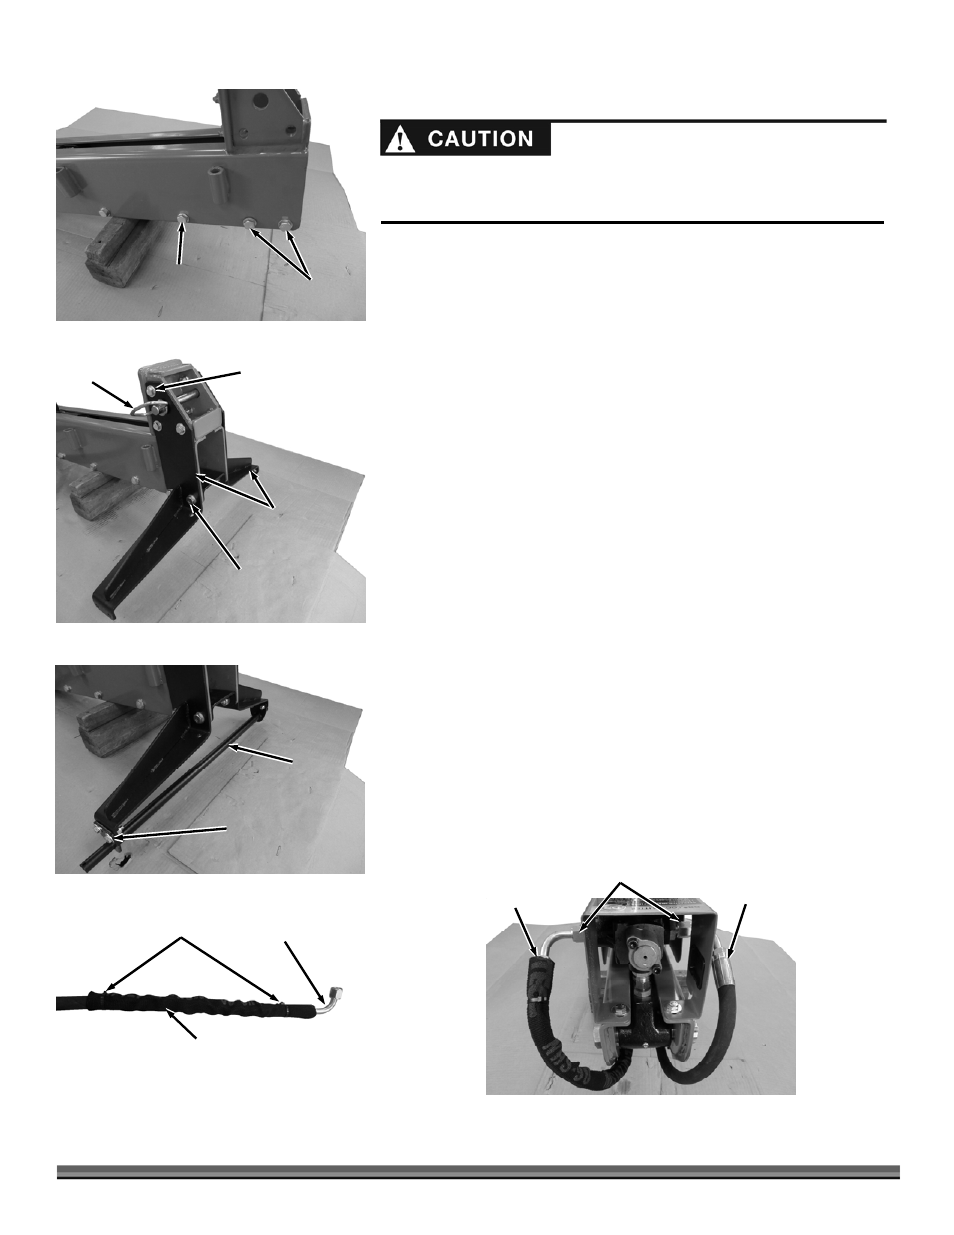
1. Block the rear end of the Beam Assembly up to gain access to the hardware
and remove the first two sets on each side (Figure 3). Tighten the third set on
each side using a 3/4" Wrench.
2. Position the two Mounting Brackets and insert the large Hitch Pin to locate
them (Figure 4).
3. Install the six sets of 3/8" Bolts, Washers (one on bolt side and one on nut
side) and Locknuts by hand.
4. Install the four sets of 1/2" Bolts, Washers (bolt side and nut side) and
Locknuts by hand that you removed in step 1.
Note: As the hardware is tightened in the next step, make sure the Hitch Pin moves
freely in its holes and does not bind.
5. Tighten the 3/8" hardware using two 9/16" Wrenches.
6. Tighten the four 1/2" Hardware with two 3/4" Wrenches.
Note: Install the hardware in the next step with the Bolt threads and Locknuts on
the inside so they will not interfere with arms of your Tractors 3 point hitch.
7. Position the Axle with its mounting ears on the outside of the two Mounting
Brackets and install the Axle with 3/8" Bolts, Washers (one on bolt side only)
and Locknuts using two 9/16" Wrenches (Figure 5).
8. Slide the Sheathing over the long Elbow end of one of the Hoses and secure
it with the two Cable Ties (Figure 6).
Note: Remove protective Caps as needed for the following Hydraulic Hose
connections
9. Install both Hoses onto the Valve angled rearward at a 45 degree angle so it
can be routed under the center of the Beam Assembly (Figure 7). Tighten with a
17mm Wrench.
We recommend two people when handling assemblies during the following
procedures. The assemblies involved are heavy and could cause injury when
lifting or if dropped.
Tighten
(both sides)
Figure 3
Remove
(both sides)
Mounting
Brackets
Figure 4
Hitch Pin
3/8" Bolts, Washers
and Locknuts
(6 places)
1/2" Bolts, Washers
and Locknuts
(4 places)
Axle
Figure 5
3/8" Bolts, Washers
and Locknuts
(6 places)
Cable Ties
Sheathing
Figure 6
Long Elbow
Valve Fittings
Figure 7
Hose with
Sheathing
Hose without
Sheathing