DR Power Hydraulic 4-Ton (January 2008 - Present) User Manual
Page 16
12 WDS 4.4, 4-TON ELECTRIC/HYDRAULIC DR
®
WOOD SPLITTER
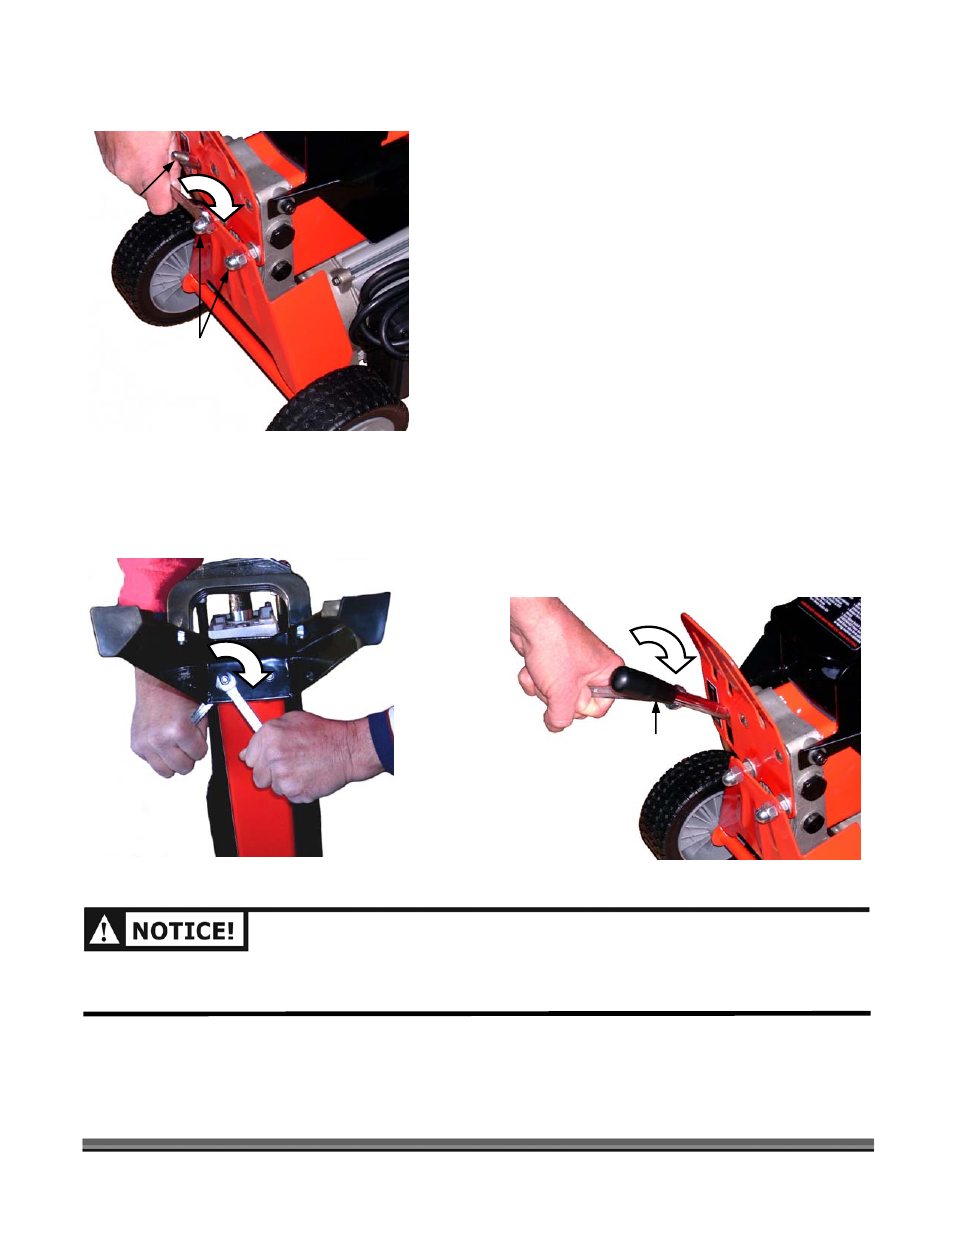
7. With your helper, stand the machine upright and
stabilize it. Using the 16mm Wrench, remove the
two (2) Acorn Nuts from the rear of the machine
and install the Wheel Frame Assembly on the
exposed studs. Reinstall the two (2) Acorn Nuts
and tighten securely (Figure 5).
8. With your helper, lift the front of the machine to an
upright vertical position and stabilize it. Using the
two (2) 10mm Wrenches, remove the two (2)
Mounting Bolts and Lock Nuts from the Front
Support Legs Mounting Bracket (Figure 4 on page
11).
9. Attach the Front Support Legs Assembly to the
Mounting Bracket using the two (2) Mounting
Bolts and Lock Nuts by inserting the Bolts from the
inside of the Bracket. Tighten the mounting
hardware securely using the two (2) 10mm
Wrenches (Figure 6).
10. Install the Operating Handle at the rear of the
machine by screwing it clockwise onto the
Threaded Shaft (Figure 5). Securely tighten the
Handle with the 10mm Wrench (Figure 7).
BEFORE ATTEMPTING TO OPERATE YOUR NEW 4-TON ELECTRIC/HYDRAULIC DR WOOD SPLITTER, READ
THE SECTION TITLED “BEFORE STARTING THE ELECTRIC MOTOR” ON PAGE 13 IN THE
SAFETY
&
OPERATING INSTRUCTIONS
MANUAL.
If you have questions, please visit our website at
www.DRPower.com
or contact one of our
Technical Support Representatives by calling
Toll-Free 1-800-DR-OWNER (376-9637).
Figure 5
Figure 6
Figure 7
Bottom
Acorn Nuts
Threaded
Shaft
Operating Handle