Unpacking and assembling the machine – DR Power Mini Tiller Roto-Hog (January 2015 - Present) User Manual
Page 8
8 DR
®
ROTO-HOG™ Mini Tiller
Unpacking and Assembling the Machine
Parts Supplied in Shipping Carton:
DR ROTO-HOG Mini Tiller
Upper Left Handlebar
Upper Right Handlebar
Middle Handlebar
Battery Charger
Hardware Bag:
-
(4) T-Handle Nuts
-
(4) Curved Washers
-
(4) Handle Clamp Bolts
Stabilize the shipping carton on a flat ground surface before attempting to unpack and assemble the machine. Do not
place the machine on a bench or table where it can fall and cause personal injury or damage the machine.
1. Carefully lift the DR ROTO-HOG Mini Tiller out of the carton and set the machine upright with the Tines and Wheels
on a level surface.
2. Remove the Hardware Bag from the Shipping Carton.
3. Remove any packing material from the machine and cut the Ties holding the Handlebar pieces to the Tiller
assembly.
NOTE: Use care with the Upper Right Handlebar so as not to kink the Throttle Cable or pinch the On/Off Switch Wire; they are pre-
attached to the Engine and Handlebars.
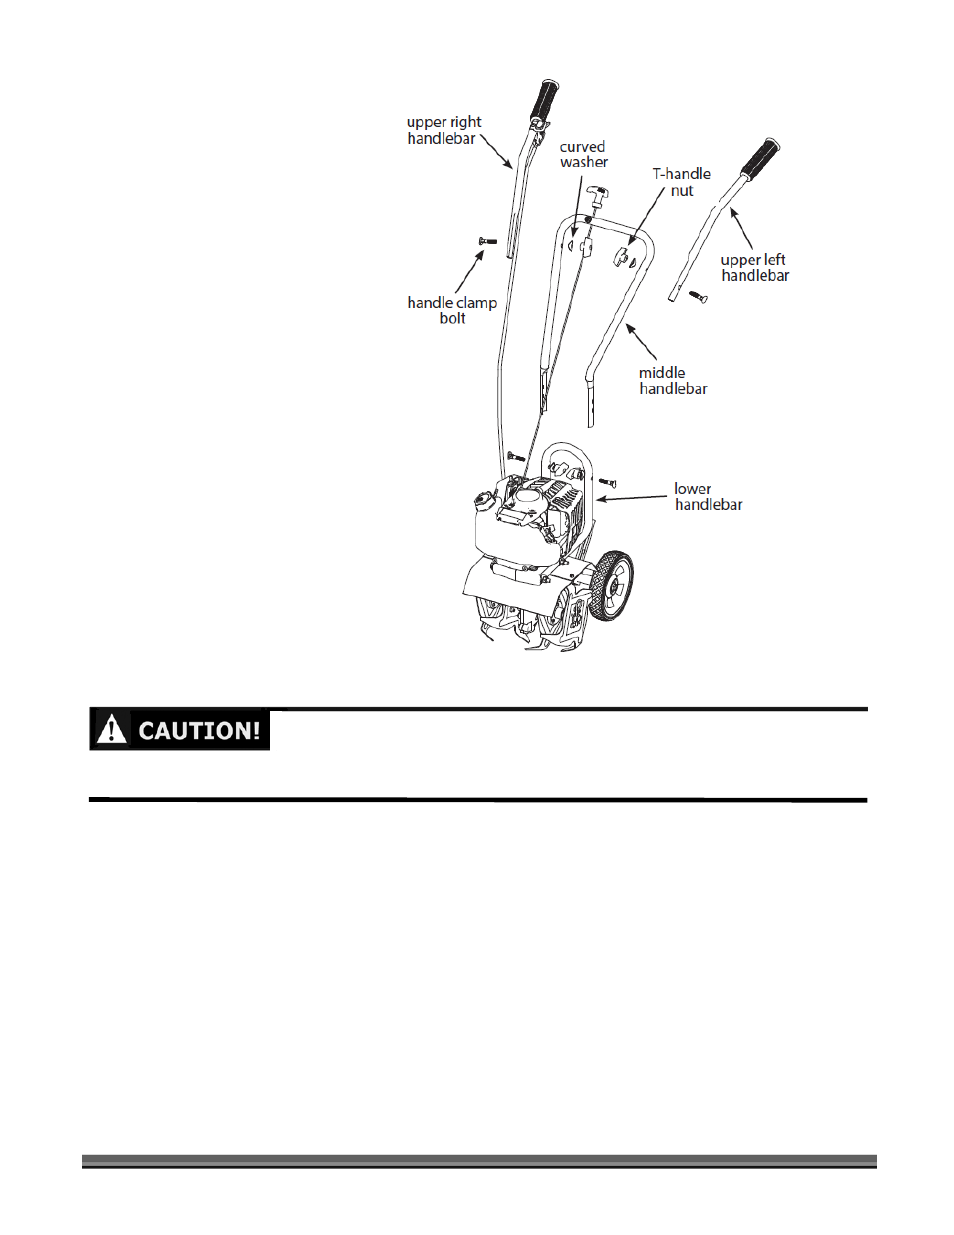
Make sure the pull cord is in the center of the middle handle bar when attaching.
4. Using two T-Handle Nuts, two Handle Clamp Bolts and two Curved Washers, assemble the Middle Handlebar to the
Lower Handlebar already attached to the machine (Figure 2).
NOTE: You can install the Middle Handlebar in either of two (2) positions, one high, and one low. DO NOT over tighten the T-
Handle Nuts.
Figure 2