DR Power LT 1 (1/2-ton) (March 2012 - Present) User Manual
Page 10
10
DR
®
1/2 TON VERSA TRAILER
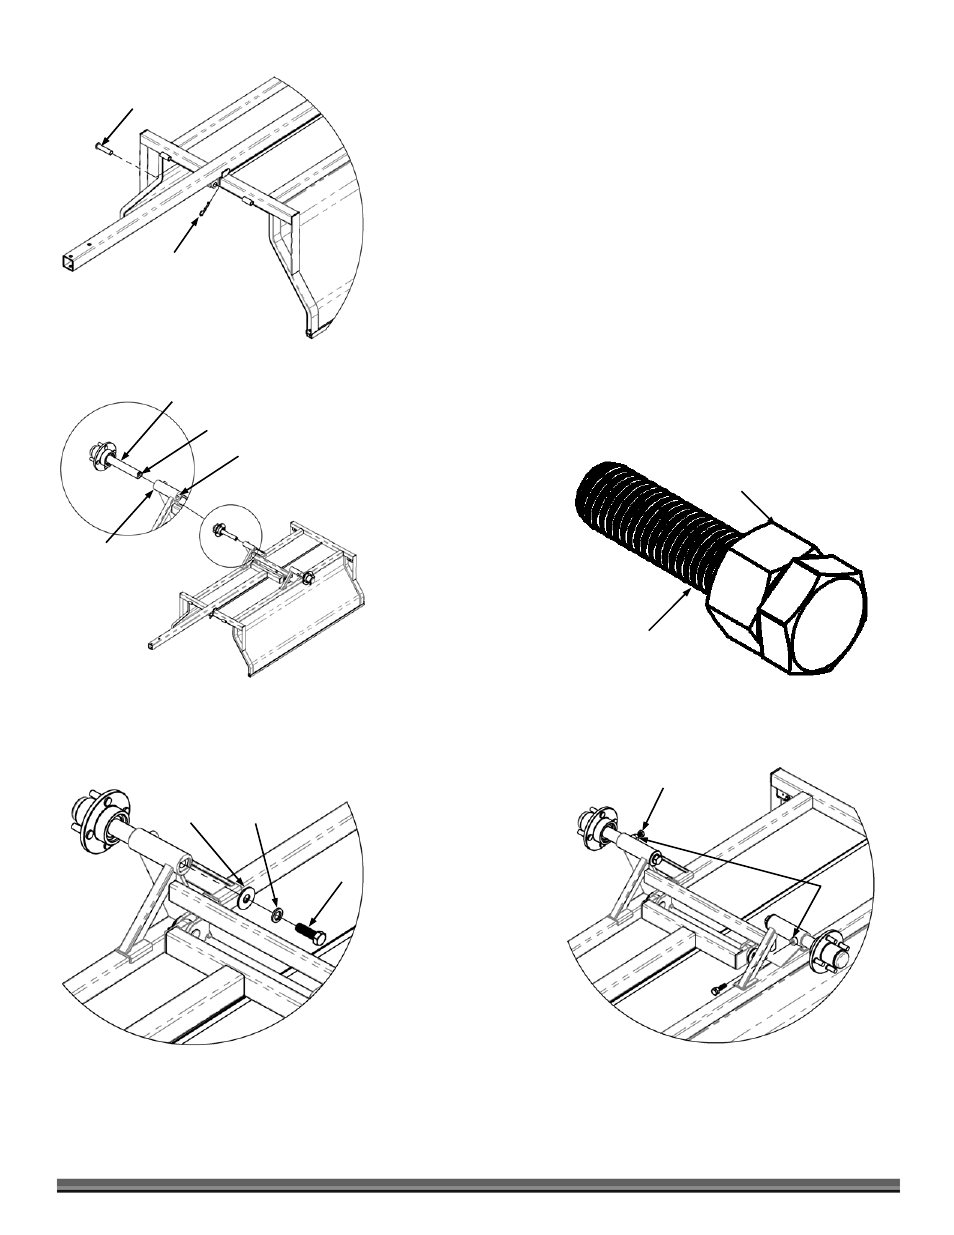
6. Insert the Dump Latch Pin through the Dump Bracket on the Tow Beam and
the Dump Bracket on the Bed and secure with a Hitch Clip (Figure 8).
7. Insert an Axle into the Axle Bracket (Figure 9) with the Keyway on the end of
the Axle aligned with the Key Slot in the Axle Bracket. Repeat for the other
side.
8. Install a M16 x 30mm Axle Bolt, Lock Washer and Flat Washer (Figure 10)
into the Axle End and tighten with a 24mm Socket or Adjustable Wrench.
Repeat for the other side.
9. Back the Jam Nuts on the two M10 x 40mm Retaining Bolts (Figure 11) all
the way to the Head of the Bolts.
NOTE:
You will need to back all Jam Nuts up to the head of the Retaining Bolts
for all hardware shipped in the Hardware Kit prior to installation (Figure 11). Be
sure to tighten the Bolt first and then secure it by tightening the Jam Nut.
10. Insert the two M10 x 40mm Retaining Bolts into the Axle Bracket Boss(es)
(Figure 12) and tighten the Bolt with a 16mm Socket. Tighten the Jam down
against the Boss using a 17mm Wrench.
Flat Washer Lock Washer
Axle Bolt
Figure 10
Figure 8
Dump Latch Pin
Hitch Clip
Jam Nut
Retaining Bolt
Figure 11
Figure 9
Keyway
Key Slot
Axle
Axle Bracket
Bosses
Bolt w/Jam Nut
Figure 12