Tools needed for installation, Installation – Flowserve PSS II Durametallic User Manual
Page 3
3
Tools Needed for Installation
•
5
/
32
",
5
/
16
" and
3
/
32
" or
1
/
8
" T-handle hex key wrenches (supplied with seal)
• An open end wrench for the gland bolts.
• A common screw driver to remove the setting devices and centering
devices.
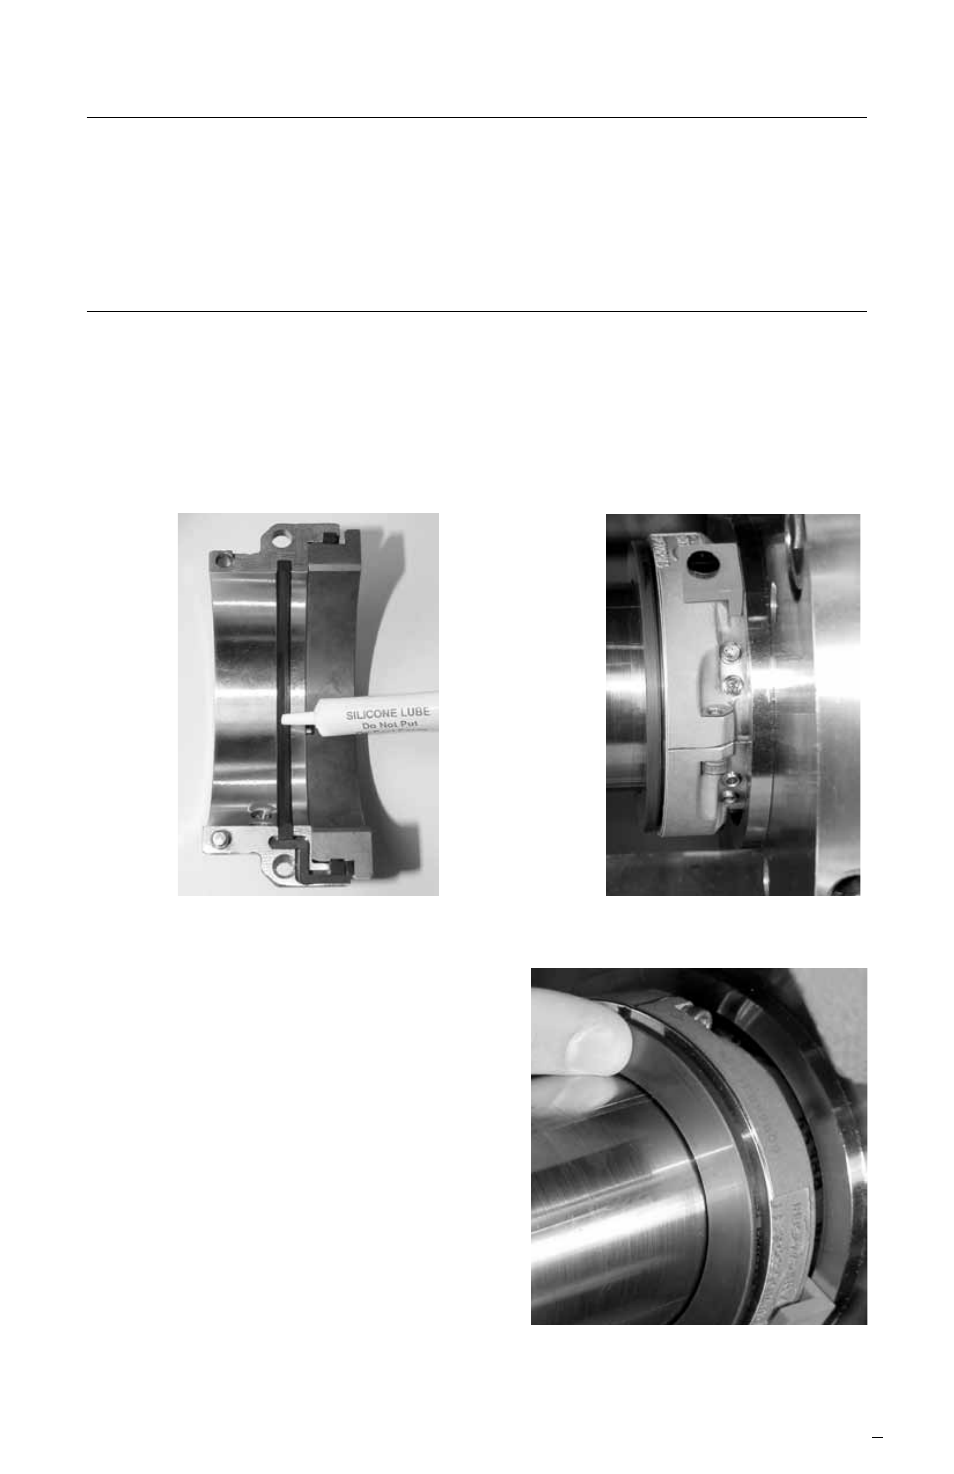
Installation
Step 1 Lubricate the exposed surfaces of the sleeve gasket and sleeve gasket
ends, rotating face gasket ends, and seal drive split joint gaskets with
the enclosed lube.
Step 2 Loosely assemble the seal drive halves around the shaft and slide the
seal drive towards the box until the setting devices contact the box face.
Step 3a With the seal drive still loose, align the rotating face joints so there is no
step at the joints
Step 2
Step 1
b Finish
tightening the seal drive cap
screws to approximately 40 in-lbs.
Recheck the rotating face joints
for flatness. A small mismatch
can be corrected by pushing on
the high side of the joint or gently
prying on the low side.
c The rotating face joints must be flat
and smooth. Any mismatch will result
in leakage. If a mismatch exists,
loosen the seal drive cap screws 1-2
turns and repeat steps a and b.
d Clean rotating face with alcohol.
Caution: Consult material safety data sheets for proper handling of alcohol.
Step 3