0 assembly, Figure 19 – Flowserve Cast Flex Wedge Gate Valve User Manual
Page 28
Cast Flex Wedge Gate Valves FCD ADENIM0010-02
28
7.0 ASSEMBLY
(Continued)
7.1.2 Bonnet
Prior to lowering the bonnet (002) into position, a new gasket should be placed in the gasket groove on the
body flange. Carefully insert the stem into the backseat bushing in the bonnet and lower it into position on
the body. In lowering the bonnet, be careful that neither the backseat nor the stem are scratched or gouged.
Damage to either of these surfaces can impair their sealing ability. If orientation of the actuator is important,
the bonnet should be rotated to its proper position prior to lowering it onto the gasket. With the bonnet in
place, the studs (200) and nuts (230) can be installed. Prior to installation the studs and nuts should be
cleaned and thoroughly lubricated with a high quality lubricant. Any nuts or studs with damaged threads
should be replaced. It is very important that the body-bonnet bolting be torqued to specific values in
accordance with a specific procedure. The torque values are shown on page 9, Table TA-108-2 for various
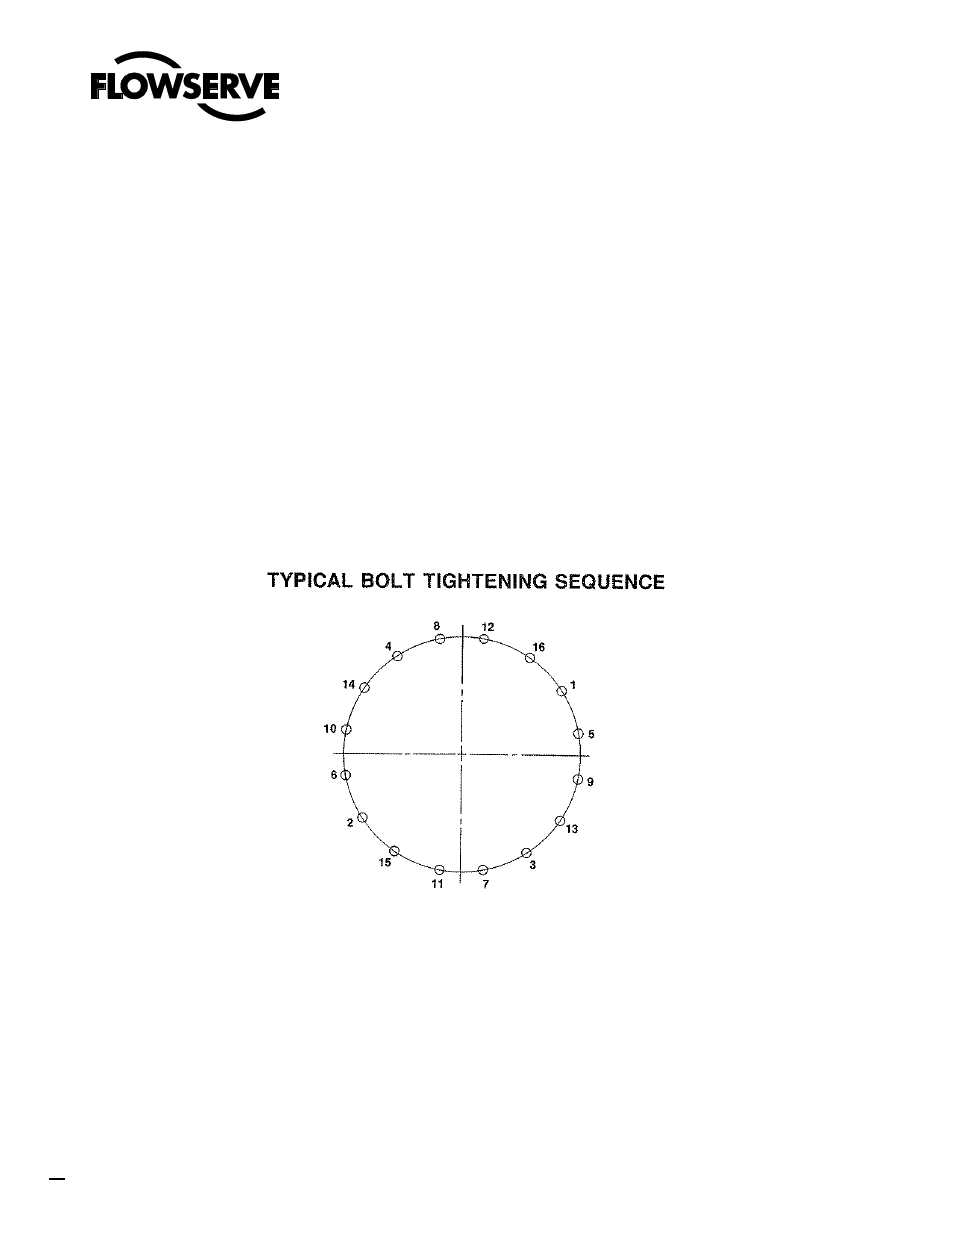
diameter studs. The nuts should be tightened evenly using a criss-cross pattern similar to the one shown in
Fig. 19. Tighten all of the nuts to 1/3 of the recommended valve initially. Then repeat the sequence raising
the torque to 2/3 of the full torque. Finally, torque all the nuts to the recommended value following the criss-
cross pattern. It is essential that the flange faces remain parallel and all the bolting has uniform tension.
Failure to achieve this may cause gasket weepage when the joint is subjected to operating pressures and
temperatures.
7.1.3 Yoke
As with the bonnet, care must be taken in lowering the yoke (011) over the stem. Once it is properly
positioned, the yoke capscrews (217) can be installed and tightened.
Figure 19