Assembly and installation – Flowserve Valtek Mark One and Mark Two Control Valves User Manual
Page 10
®
10
Valtek Mark One and Mark Two Control Valves FCD VLENIM001-01-AQ - 8/14
6.7.
Remove the packing gland bolting, yoke clamps and remove
the actuator.
6.8.
If the seat surfaces need re-machining, both surfaces on
plug and seat ring must be reworked. The seat angle on the
plug is 30 degrees (36 degrees for CavControl and Chan-
nelStream valves); the seat ring, 33 degrees. Lapping is not
necessary if proper assembly procedures are followed.
CAUTION: If re-machining, protect the stem while turning.
Ensure concentration of the seat surface with the plug stem
(or outside diameter of the seat ring, if machining the seat)
6.9.
To replace packing or change the packing box configuration,
push out packing, spacer and guides from underneath the
bonnet with a dowel around 0.13 inch (3.3 mm) larger in
diameter than the plug stem.
WARNING: For valves equipped with separable end flang-
es, do not machine body gasket surfaces. Machining could
cause failure of the separable flange lip causing end gasket
leakage and valve failure.
CAUTION: When using separable end flanges and spiral
wound gaskets, use gaskets with outer backup rings. Failure
to do so could result in excess stress in some applications.
6.10.
Check to see the seating surfaces on both the seat ring and
plug are free of damage to ensure tight shutoff. Make sure
the gasket surfaces on the seat ring, bonnet and body are
clean and undamaged. Examine the plug stem and bonnet
bore for scoring, scratches, pitting or other damage.
6.11.
Refer to the appropriate actuator User Manual for detailed
instructions on actuators.
7. Assembly and Installation
NOTE: Separate User Manuals with instructions on assem-
bling actuators, positioners and other equipment can be
found on www.flowserve.com. Review any relevant User
Manual before proceeding
NOTE: It is recommended that all soft goods are replaced
when rebuilding Mark One and Two control valves. Soft
goods include gaskets, pressure balanced seals, soft seat
inserts, guide liners and packing seats.
Replacing these parts helps to ensure proper functioning of
the control valve.
7.1.
To reassemble the valve body, refer to figures 1, 2 and 6 thru
9 and proceed as follows:
7.2.
If the packing has been removed, refer to the appropriate
packing User Manual (document number VLAIM040) and re-
install the packing and lower guide exactly as shown. Make
sure at least 1/8 inch is left at the top of the packing box for
the top guide to sit into the bonnet. Different packing spac-
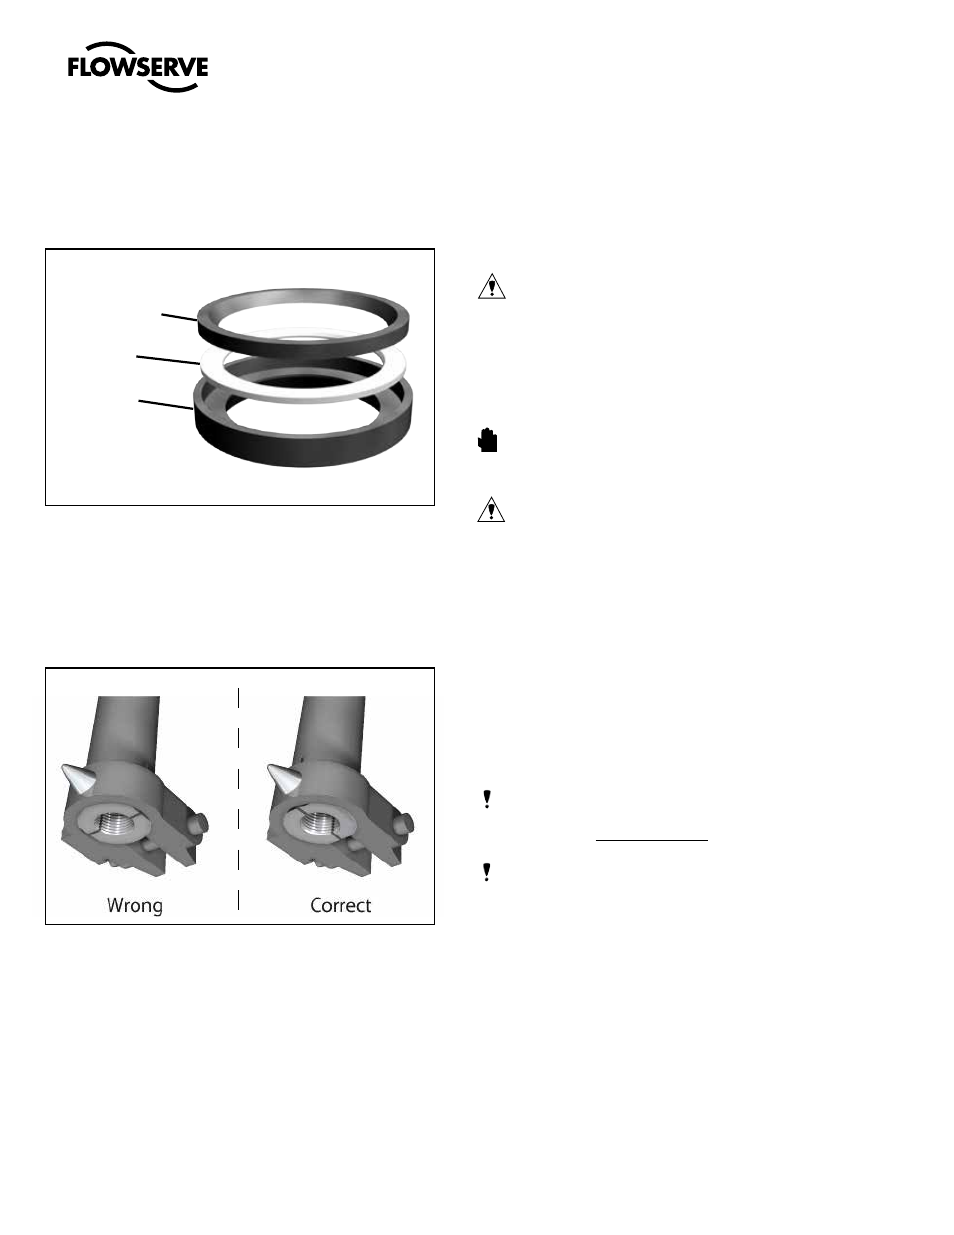
Figure 4: Soft Seat Assembly
Figure 5: Actuator Stem / Stem Clamp Alignment
Soft Seat Retainer
Soft Seat
Seat Ring
STOP!