Flowserve 132000 LinedFlow Linear Lined Globe Control Valve IOM User Manual
Page 9
®
User Instructions LinedFlow - KMENIM3202-02 01/12
9
18
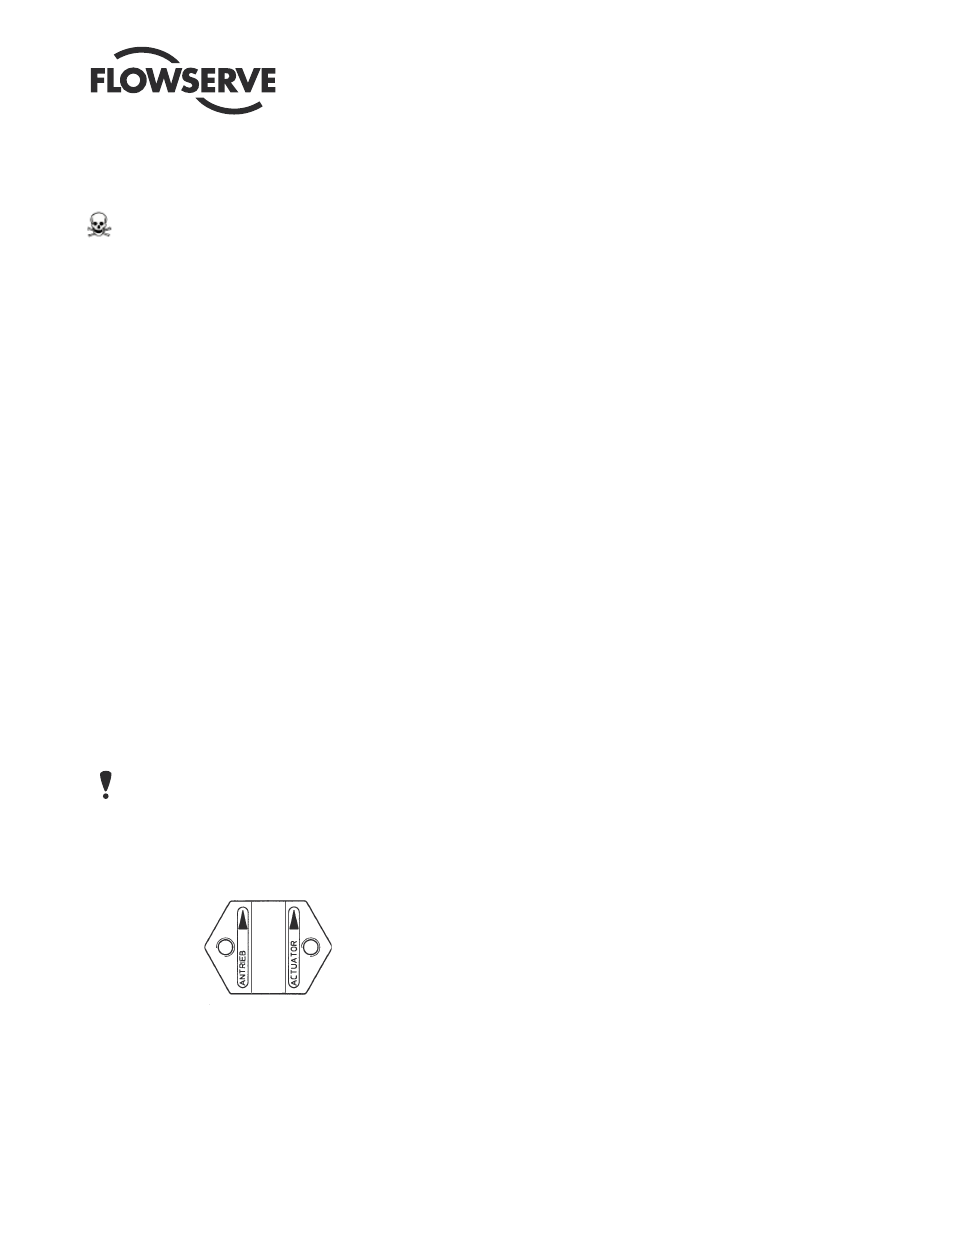
REMOVINg acTUaTOR FROM VaLVE
(See Fig. 1)
18.1 Shut off air supply.
DaNgER:
Ensure that actuator is not under pressure and
drain process medium before performing maintenance
work. Failure to observe can lead to serious injuries.
18.2 Remove piping if required.
18.3 Remove 2 coupling bolts and remove coupling.
18.4 Loosen yoke stem nuts and remove. Carefully remove actu-
ator from valve.
18.5 After loosening counternut, unscrew coupling insert (cau-
tion: hold plug with wrench on coupling insert to prevent
turning).
19
aTTacHINg acTUaTOR TO VaLVE
(see Fig. 1)
The actuator stem must be fully extended:
Actuators with air-to-open action must be fully vented.
Actuators with air-to-close action apply supply pressure.
Manually depress the plug stem to ensure the plug is fully
seated.
The valve plug must make contact in the valve seat, i.e.
press valve stem in all the way by hand.
19.1 Screw coupling insert locknut and coupling insert as far as
possible onto plug stem.
19.2 Place the actuator assembly on the valve engaging the
yoke rod threads in the lower yoke plate and ensuring the
actuator faces in the correct direction.
19.3 Unscrew the coupling insert until the yoke rods are raised
from the lower yoke plate by around 2 mm.
NOTE: Ensure that the plug assembly is not rotated with
the plug seated. This may cause irreparable damage to the
seating faces.
19.4 Refit the coupling, ensuring that the arrows, embossed on
the coupling halves, point upward towards the actuator,
and secure with 2 retaining screws.
9.5
Apply supply pressure resp. vent actuator to half stroke
and refit and tighten yoke rod retaining nuts.
19.6 Reconnect all tubing.