2 reassembling the body, Mark 100 – Flowserve Valtek Mark 100 Control Valve User Manual
Page 8
Flow Control Division
Mark 100
8
Mark 100 Installation, Operation and Maintenance Instructions
FCD FCAIM0100-02
12. If the seat surfaces need remachining, both surfaces on plug
and seat ring must be reworked. The seat angle on the plug is 36
degrees and the seat ring is 33 degrees. Lapping is not neces-
sary if proper assembly procedures are followed.
a
CAUTION: If remachining, protect the stem while
turning. Ensure concentricity of the seat surface with
the plug stem (or outside diameter of the seat ring, if
machining the seat).
13. To replace packing or change the packing box configuration,
push out packing, spacer and guides with a dowel slightly larger
than the plug stem from underneath the bonnet.
6.2 Reassembling the Body
To reassemble the valve body, refer to Figure 1 and 2 then proceed
as follows:
1. Install new bonnet and seat gaskets with the beveled edge up on
fluoropolymer gaskets.
NOTE: All gaskets should be replaced whenever the valve is
disassembled.
2. Relocate the seat ring. Carefully install the cage and then the
sleeve, taking care to ensure they installed with the correct
ends up.
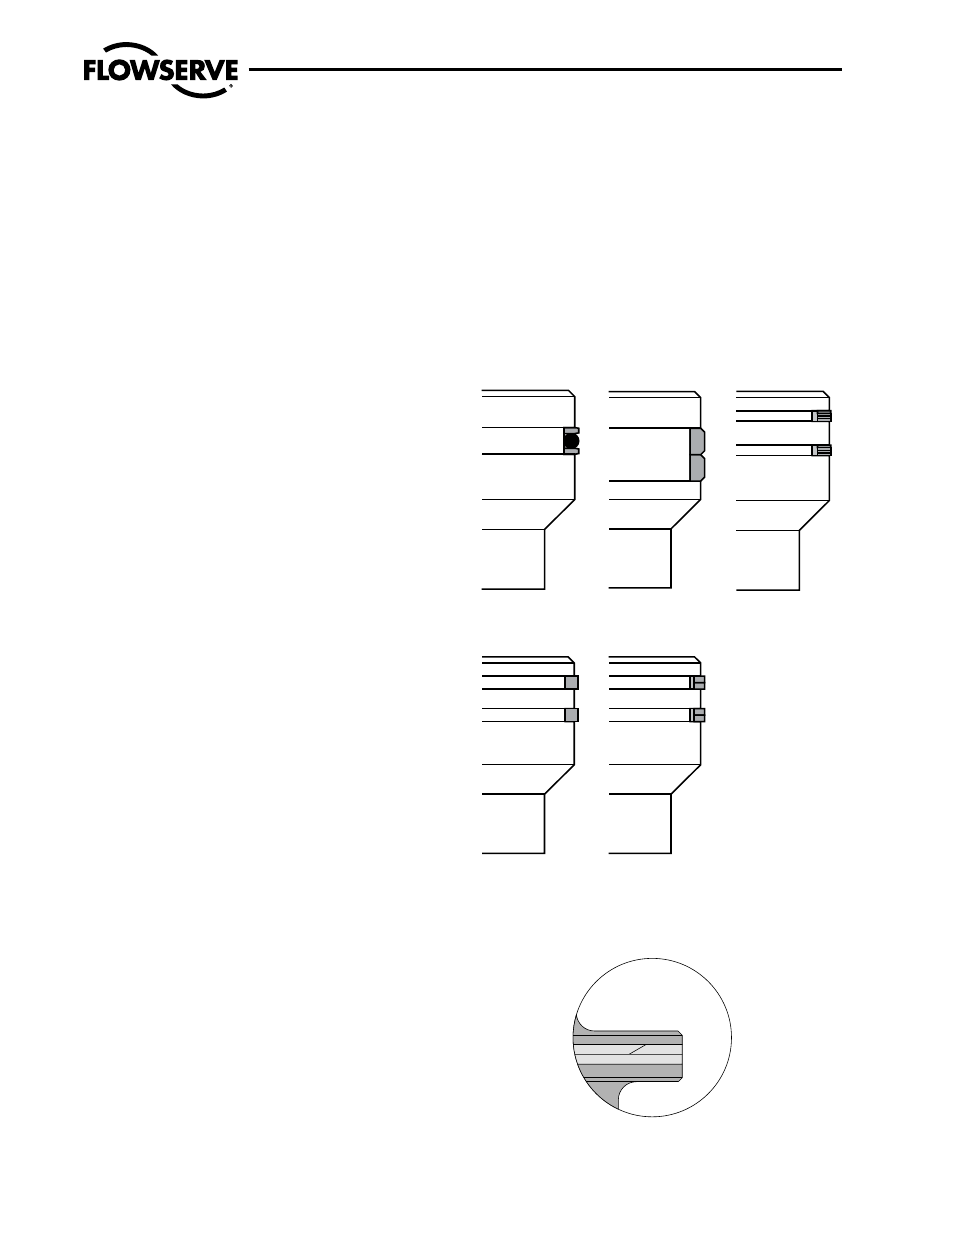
3. Replace the plug seals on the plug, referring to Figure 3 and
observing the following directions:
c
WARNING: Gloves should be worn to help prevent the
hands from being burned.
PTFE Seals Heat one seal to 300°F (150°C) and slip it over the
plug into the seal groove. Thermal expansion causes the ring to
stretch, thereby making it relatively easy to slide over the plug
head.
Care must be taken to prevent the seal from rolling, rather than
sliding over the plug. The second seal can be installed following
the same procedures as the first. If for any reason the second
seal cannot be slipped onto the plug, cut the seal at approxi-
mately a 30° angle (see Figure 4) and place over the plug. Make
certain the cut seal is on the low-pressure side.
Carbon Seals
Single Seals Each seal must be scored with a sharp knife at
two places, 180 degrees apart. Holding the ring gently in a pad-
ded vise, pull gently on the ring, breaking the ring on the score
marks into two equal pieces. Install the two pieces into the plug
seal grooves with the score marks on the pressure side.
Triple Seals Score and break each ring as described for the
single seals. Install the inside ring first, followed by the two
outside rings with joints offset 120 degrees on all three rings.
a
CAUTION: Install rings starting with one end and work-
ing the ring carefully into place. Do not spread ring
more than necessary. Spreading the ring can cause the
ring to break.
Figure 3: Seal Designs
O-ring Seals
Carbon Single Seal
Carbon Triple Seal
PTFE Seals
Metal Multi-Seal
Figure 4: PTFE Seal Cutting Detail