Gladiator GAFP32CBZM New Gladiator Floor Pack User Manual
Page 4
4
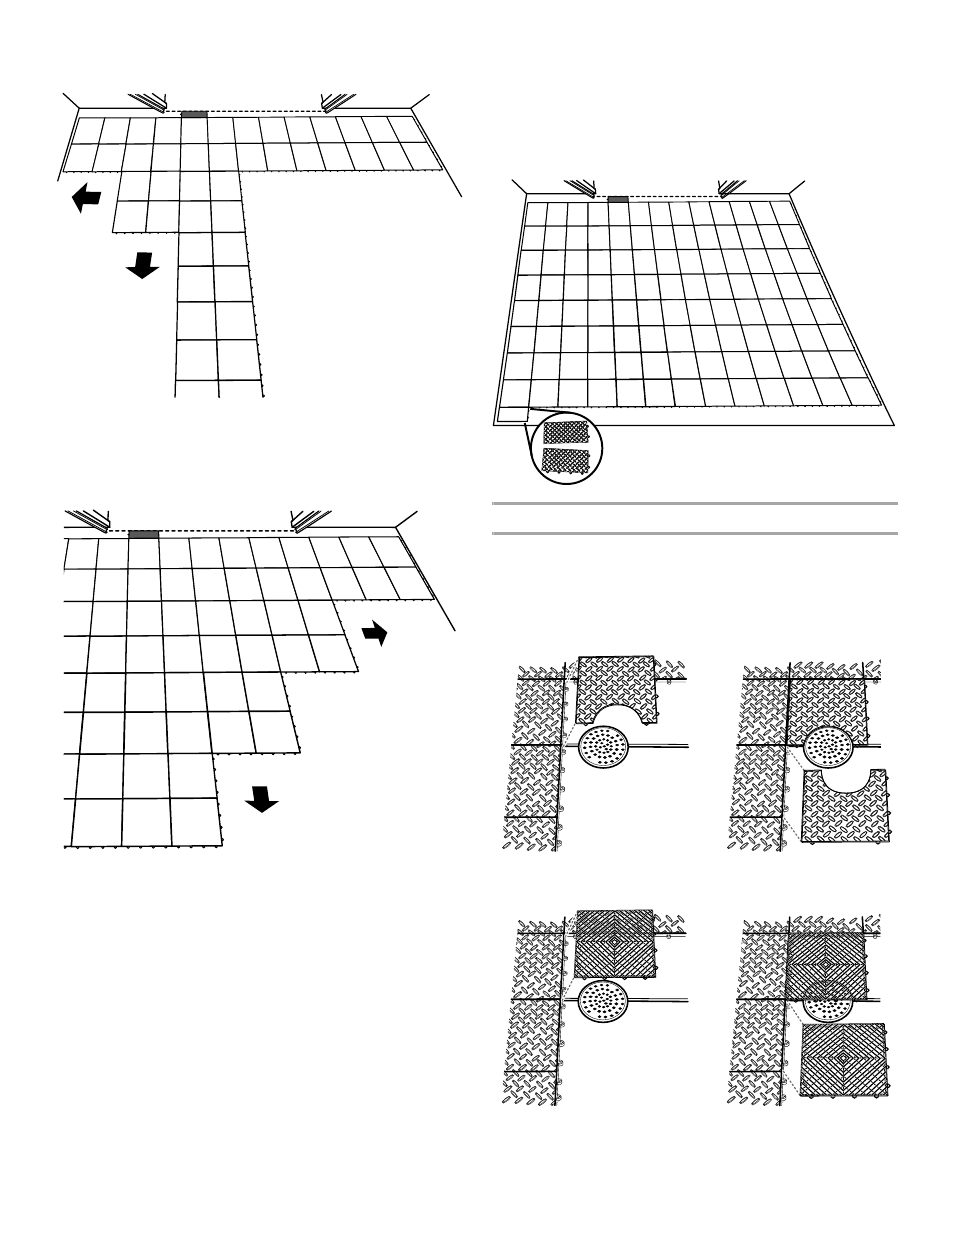
5.
Continue installing the tiles on the left-hand side of the column
working toward the back of the garage until complete.
6.
Connect the remaining tiles on the right of the column and work
toward the back of the garage as shown.
NOTE: If the orientation or placement of the tiles is incorrect due
to misassembly, separate the tiles at the leading edge of the
misassembly. Be sure that the female loops are at the bottom
and right side of each tile. Reconnect the tiles.
7.
If necessary, cut the last row of tiles to fit between the existing
row of tiles and the back wall of the garage.
NOTE: Leave a minimum of
¹⁄₂" (1.25 cm) space between the
edge of the tiles and the perimeter of the garage walls and
around all obstructions, such as drains, stairs and posts. The
spacing is necessary to allow for expansion and contraction of
tiles caused by seasonal temperature fluctuations. The tiles may
buckle if the necessary spacing is not provided.
Obstructions
IMPORTANT:
■
If there are any obstructions in the path of the tile floor such as a
floor drain, support post, or stairs, use a saw to make the
necessary cutouts.
■
There are two ways to cover floor drains.
Style 1: Cutouts of tile floor for the existing drain.
Style 2: Insert one or more Gladiator
®
DrainTiles (optional) over
the existing drain.