Installation requirements, Warning, Tools and parts – Gladiator GAAC68PSZW Workbench Powerstrip User Manual
Page 2: Electrical requirements, Power strip use requirements, Important safety instructions warning, Save these instructions
2
INSTALLATION REQUIREMENTS
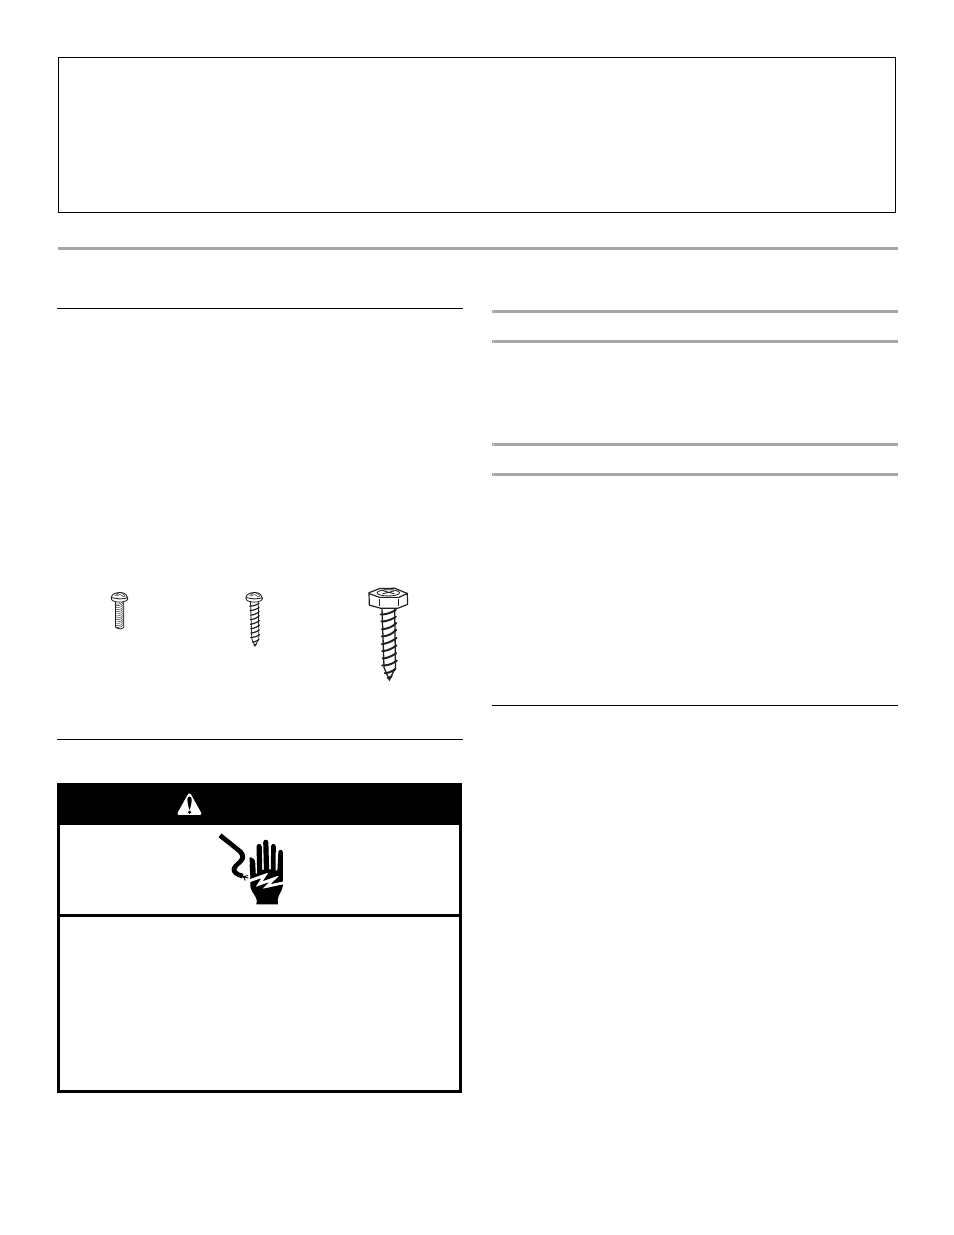
Tools and Parts
Gather the required tools and parts before starting installation. Read
and follow the instructions provided with any tools listed here.
Tools Needed:
Parts Supplied:
Electrical Requirements
IMPORTANT: Be sure you have the proper electrical connection
before you install the power strip on the workbench.
Recommended Grounding Method
A 115 Volt, 60 Hz., AC only, 15-amp, fused, grounded electrical
supply is required. Use an outlet that cannot be turned off by a
switch. Do not use an extension cord.
NOTE: Before moving or cleaning the work bench disconnect the
power strip from the electrical source. When you are finished,
reconnect the power strip to the electrical source.
Over-Current Circuit Protection
The power strip is designed with a visual over-current protection
switch that operates as follows:
Over-current protection switch is in the ON position and
the green light is lit
The circuit has not tripped and the power strip can be used.
Over-current switch has been tripped
The green light will go out, and the over-current protection switch will
move to the OFF position. Unplug all items from the power strip. To
restore power, push the over-current protection switch back to the
ON position. Plug items back in one at a time, while watching to see
if the green light goes out and the over-current protection switch
moves to the OFF position again. If it does, unplug items until you are
sure that the green light is remaining lit and the over-current
protection switch is remaining in the ON position.
Power Strip Use Requirements
■
Intended for use in a garage.
■
The 6 ft (1.8 m) power strip is designed to be permanently
installed on the Gladiator
®
workbench.
■
There are nine electrical outlets on the power strip. All outlets are
connected to the over-current protection switch.
IMPORTANT SAFETY INSTRUCTIONS
WARNING:
To reduce the risk of fire, electric shock, or injury when using your power strip, follow these basic precautions:
SAVE THESE INSTRUCTIONS
■
Plug into a grounded 3 prong outlet.
■
Do not remove ground prong.
■
Do not use an adapter.
■
Do not use an extension cord.
■
Unplug before servicing.
■
Replace all parts and panels before operating.
■
⁷⁄₁₆" Socket wrench
■
³⁄₁₆" Wood drill bit
■
¹⁄₁₆" Wood drill bit
■
Drill
■
Phillips screwdriver
■
Flat-blade screwdriver
■
Tape measure
■
Tool caddies (2)
■
#8 x
¹⁄₄" Phillips-head
screws (4)
■
¹⁄₄" x ³⁄₄" Lag bolts (6)
■
#8 x
¹⁄₂" Phillips-head
screws (2)
#8 x
¹⁄₄" Phillips-
head screws (4)
#8 x
¹⁄₂" Phillips-
head screws (2)
¹⁄₄" x ³⁄₄" Lag
bolts (6)
Electrical Shock Hazard
Plug into a grounded 3 prong outlet.
Do not remove ground prong.
Do not use an adapter.
Do not use an extension cord.
Failure to follow these instructions can result in death,
fire, or electrical shock.
WARNING