Install tool caddies – Gladiator GAAC68PSZW Workbench Powerstrip User Manual
Page 4
4
INSTALL TOOL CADDIES
The tool caddies can either be mounted on the 8 ft (2.4 m) workbench (one caddy on each side of the power strip), or mounted on Gladiator
®
GearWall
®
panels or GearTrack™ channels.
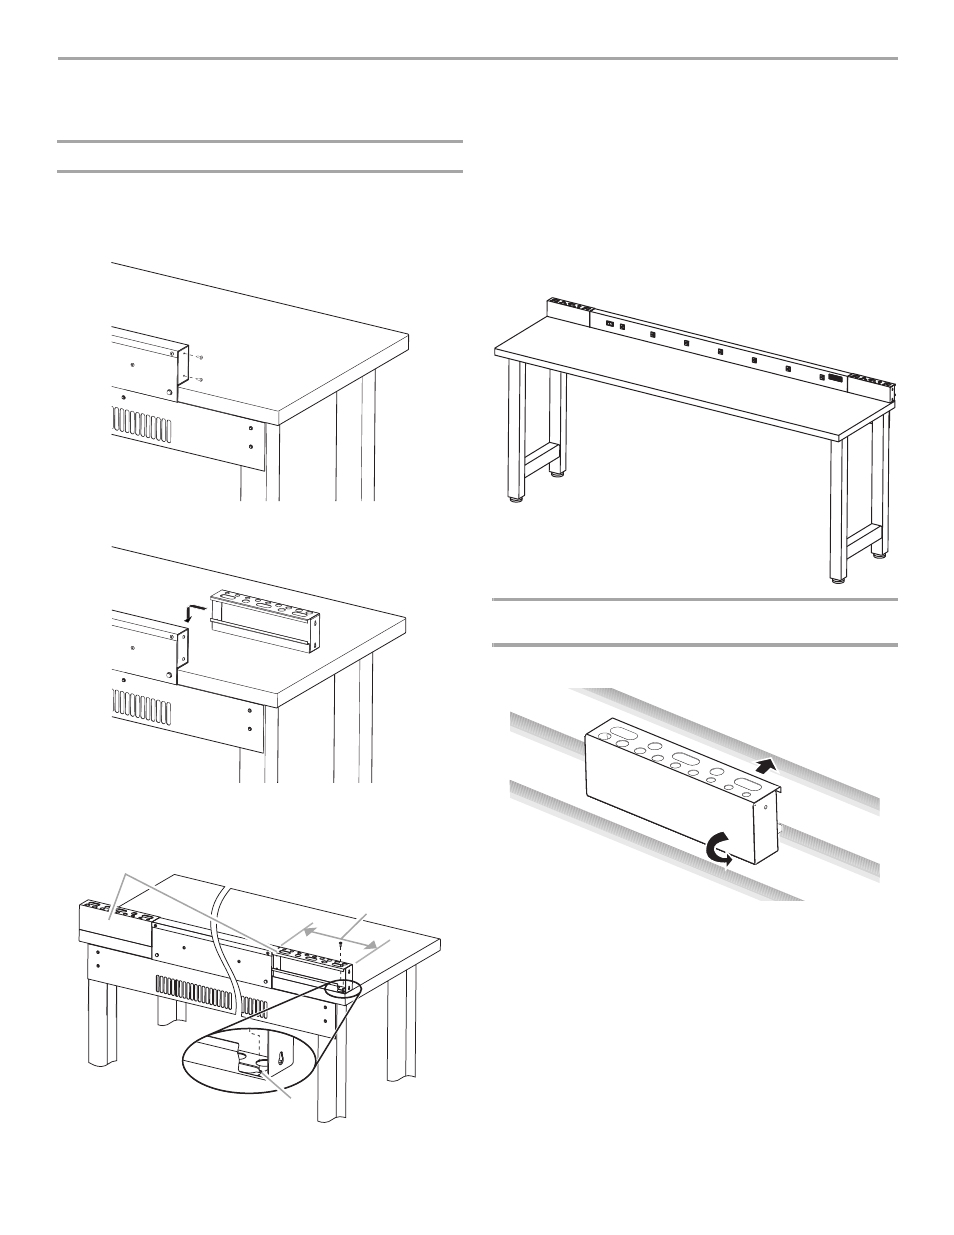
Option 1: Mount on 8 ft Workbench
The tool caddies are reversible. They can be mounted on the
workbench with the larger holes toward the front or back as desired.
1.
Screw the four #8 x
¹⁄₄" Phillips-head screws (provided) into the
two holes on each end of the power strip. Do not completely
tighten.
2.
Align the eyelet holes with the two screws on each side of the
power strip and slide the tool caddies into position.
3.
At the bottom of each tool caddy, locate the eyelet hole closest
to the corner of the workbench. Using the hole as a template,
mark the workbench. Remove the tool caddies.
Before Installation
4.
Using a
¹⁄₁₆" wood drill bit, drill starter holes into the workbench
where marked.
NOTE: While drilling, hold the drill vertical.
5.
Reattach the tool caddies to the power strip by aligning the
eyelet holes with the two power strip screws on each side and
sliding the tool caddies into position.
6.
Screw one #8 x
¹⁄₂" Phillips-head screw (provided), into each
starter hole in the workbench.
7.
Completely tighten all the screws. Do not overtighten.
After Installation
Option 2: Mount on Gladiator
®
GearWall
®
Panels or
GearTrack™ Channels
1.
Insert the bracket top into the wall track.
2.
Push down on the bracket bottom to lock into place.
A. Tool caddies
B. Eyelet hole
12" (30.48 cm)
A
B