Induction Dynamics S1.iw User Manual
Page 11
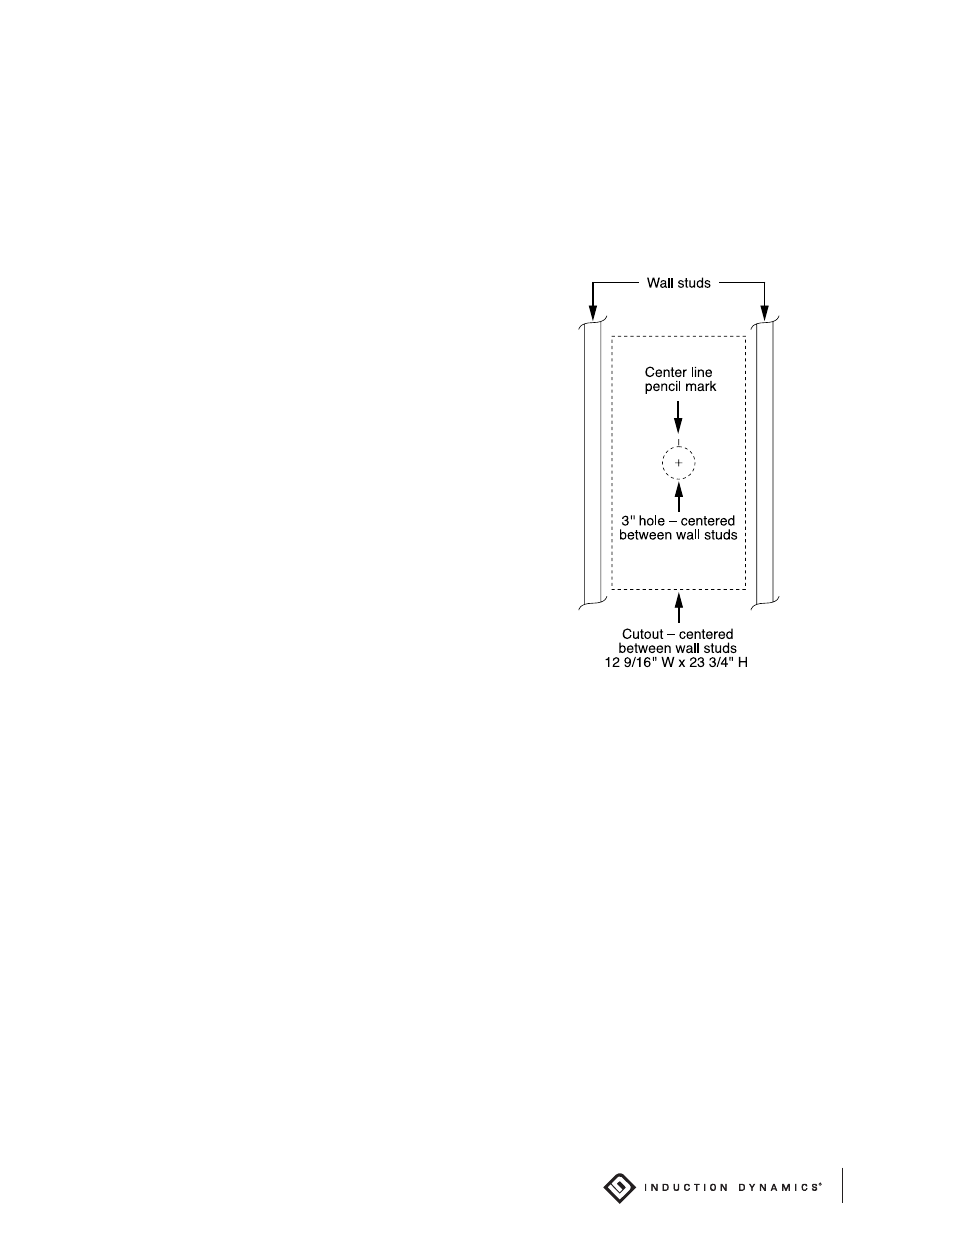
9
Locating the Loudspeaker Mounting Holes
1. To find wall studs, use a stud finder. The S1.iw will mount between two studs and should
be positioned so that the tweeter is at ear level.
2. When you’ve decided on a location, cut a 3”
hole in the approximate center of the proposed
cutout area. Measure the exact distances from the
left and right wall studs from the inside of the wall,
to establish the horizontal center line between the
wall studs and mark this with a pencil.
3. Place the mounting hole template flush against
the wall. The template should be centered between
the wall studs, making sure that the left and right
channels are the same height.
4. Using a drywall knife or keyhole saw, carefully
cut along the drawn line and remove the cutout.
5. Before installing the easy-mount box into the
walls, you will need to bring the speaker wire into
the mounting hole. Be sure to leave plenty of extra
wire coming into the mounting hole, especially if
you are bringing in the wire from below since the
speaker wire access holes are at the top of the easy
mount box.
Installing the Easy-Mount Box Into the Wall
1. The S1.iw is shipped preassembled with the faceplate attached to the easy-mount box
with bolts. In order to install the S1.iw easy-mount box into the wall, you will first need
to separate the faceplate from the box. First, remove the grille mounting flanges, using
the grille mounting flange driver. Note that there may be shims under some of the grille
mounting flanges. You will need to save these shims to use when you reinstall the faceplate.
Then unscrew the faceplate mounting bolts using a 1/4” hex key or driver. You will later
reattach the faceplate with these same faceplate mounting bolts. See illustration on page 11
for an exploded view.