JIMS Box 2 1208-1352 (all models of 120, 131, or 135 Alpha, Beta and Evo Mount Engines) User Manual
Page 7
555 Dawson Drive, Camarillo, CA 93012 Phone 805-482-6913 • Fax 805-482-7422
6
Rev I
8-12
No.1208-1352
A Division of Thiessen Products, INC
IIn
ns
st
tr
ru
uc
ct
tiio
on
n S
Sh
he
ee
et
t F
Fo
or
r B
Bo
ox
x 2
2 1
12
20
0”
”,, 1
13
31
1”
” o
or
r 1
13
35
5”
”
E
En
ng
giin
ne
e A
As
ss
se
em
mb
bl
liie
es
s O
Or
r E
En
ng
giin
ne
e R
Ra
ac
ce
e K
Kiit
ts
s
• Use light pressure as you file, just enough to keep it cutting. Let the file do
the work.
• Clean the ring and re-check the end gap often as you work, especially with
your first ring.
• Deburr the piston ring ends you have modified
• A light back-stroke of the file across a burred corner should knock the burrs
down. See Appendix One. Page 18
• Do not be tempted to use abrasives. Your fine file is good enough.
• When you have finished all the rings, put the file away and thoroughly clean
and lightly oil the piston rings. Be especially careful to remove any magnet-
ic steel particles that may be clinging to the rings. A clean damp cloth works
well.
• If you had to adjust the ring end gaps be sure to deburr the ring ends prior
to installation.
• Cover cylinder and set aside as you proceed to step 5.
STEP 5 Piston Ring Installation See Fig. 18.
• Wash all piston rings in warm water and dish soap prior to installation on
the piston.
• Wear safety glasses while installing all piston rings.
• Install the rings from the top of the pistons.
• Take care not to scratch the piston as you install the rings.
• Place a piston top-end up, skirt-end down on your clean pad.
• Select one set of rings. (A set consists of two oil control rails, one expander
spring, one second ring, and one top ring). See Fig. 19
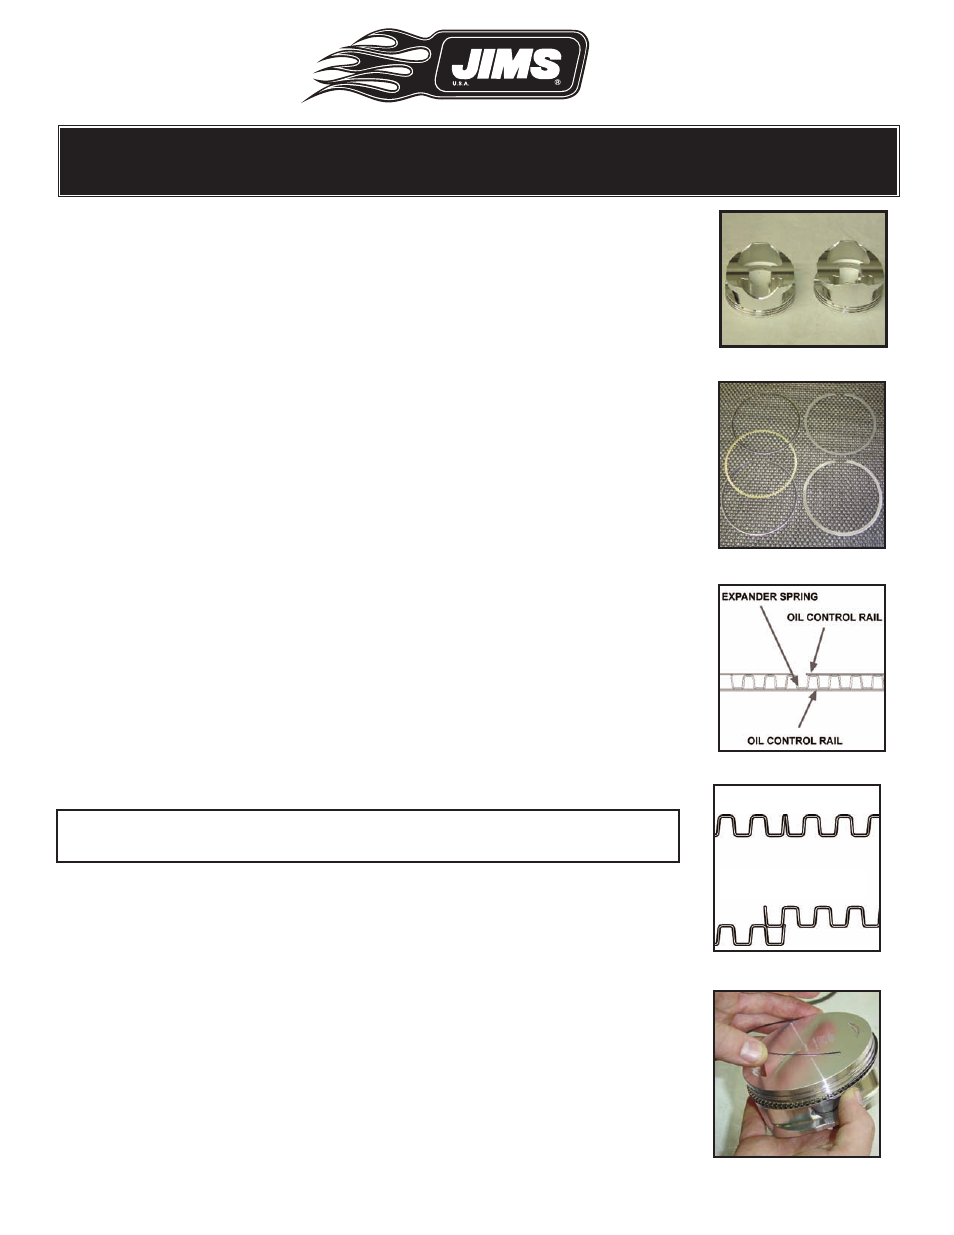
• Installation: Oil Control Ring Sets See Fig. 20
Note: The expander spring can be installed either way; there is no top or
bottom.
• The oil control rails can be installed either way; there is no top or bottom.
• Install the oil ring expander spring.
• Make certain the ends of the expander spring butt against one another and
do not overlap. See Fig. 21.
• Work one of the oil ring rails down over the piston with your fingers.
• It is okay to slightly twist the ring as you do this. Place the first rail on the
lower side of the expander spring. See Fig. 22.
• Position its gap about 90-degrees from where the ends of the expander
spring meet.
Fig.18 - Clean & inspect
Fig.19 - Ring set
Fig.20 - Oil control rings
Fig.21 - Proper ring butt
Fig.22
Incorrect