Assembly instructions – Kawai CA17 User Manual
Page 49
49
A
pp
en
di
x
Assembly Instructions
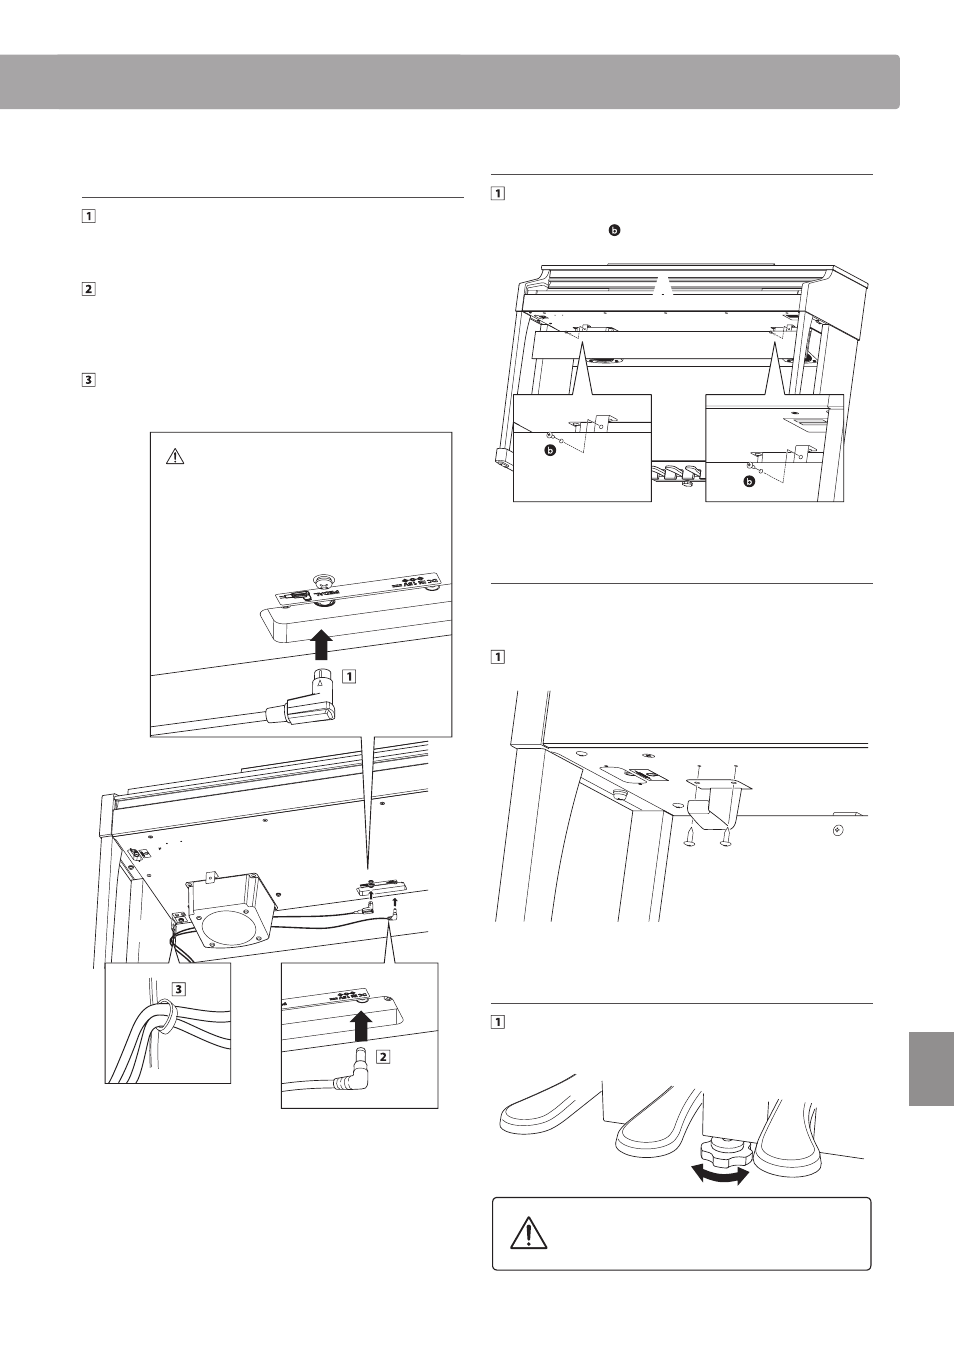
5. Connecting the pedal cable and
AC/DC adaptor
Pass the pedal cable (extending from the rear of the pedal
board) through the aperture to the front of the main body,
and connect to the PEDAL terminal.
Connect the power cable to the AC IN terminal on the
underside of the main body, then pass the cable through
the back board aperture, and out to the rear of the
instrument.
With the power and pedal cables connected, use
the binders to fix the cables in place and tidy their
appearance.
A
B
CAUTION
Ensure that the pedal cable plug is
facing the direction shown and correctly
aligned. Applying excessive force when
connecting the plug may damage pins
inside the plug.
6. Attaching the front under board
Attach the front under board (F) to the metal brackets
located underneath the main body using the two flat
headed screws .
F
A
7. Attaching the headphone hook (optional)
A headphone hook is included with the CA17 digital piano and
can be used to hang headphones when not in use.
If desired, attach the headphone hook to the underside of
the main body using the two tapping screws provided.
8. Adjusting the pedal support bolt
Turn the pedal support bolt anti-clockwise, extending the
bolt until it makes contact with the floor and supports the
pedals firmly.
When moving the instrument, always adjust or
remove the pedal support bolt, then readjust
when the instrument is in its new position.