5 preparing for operation – Kemppi FastCool 10 User Manual
Page 7
EN
2.5 Preparing for operation
NOTE!
Cooling liquid is injurious! Avoid also contact with skin or eyes. In case of injury, seek for
medical advice.
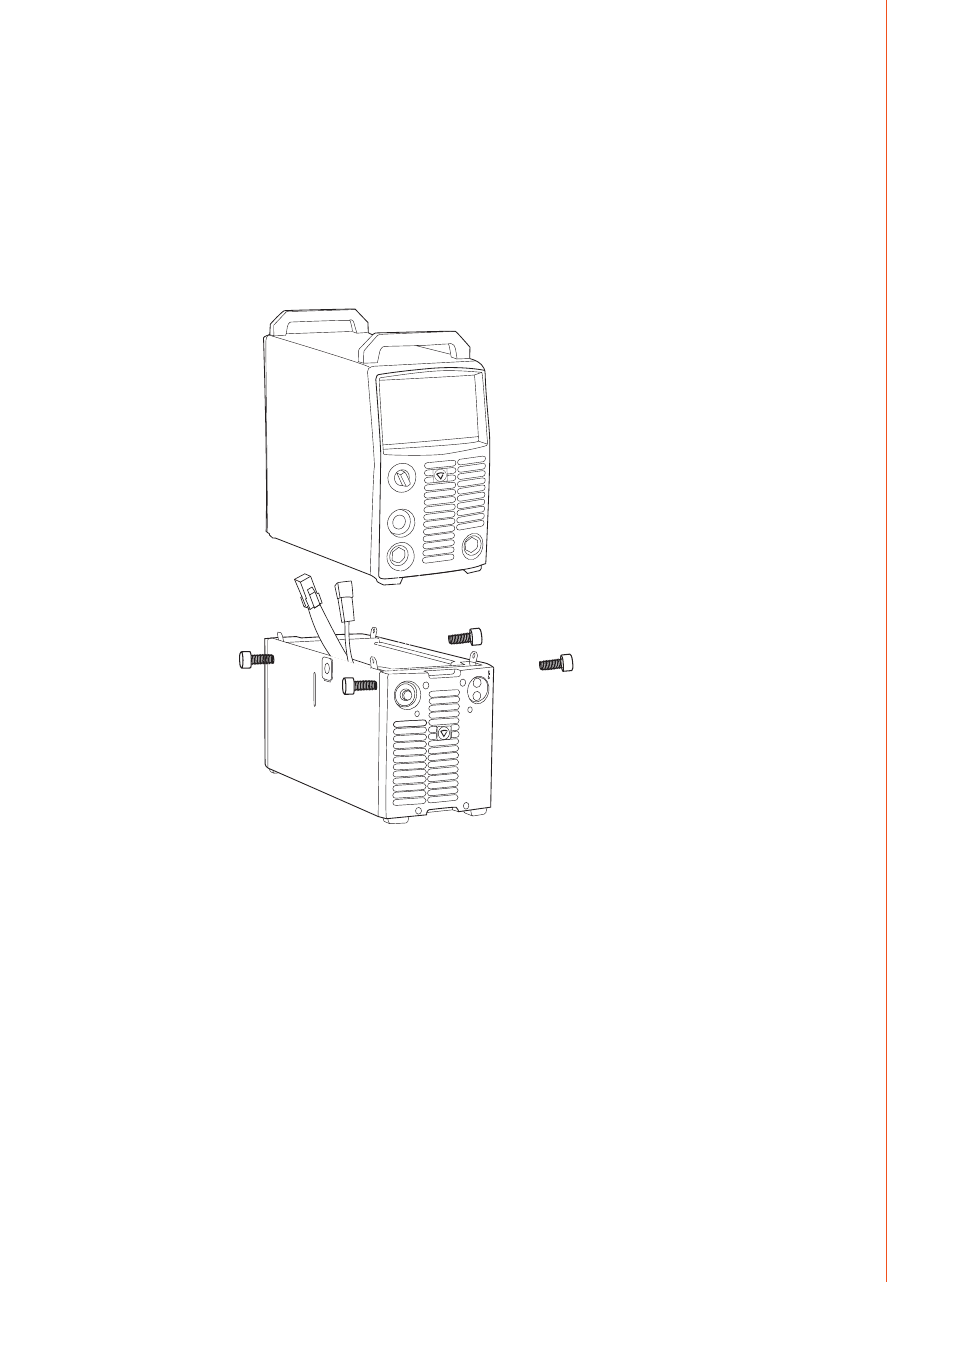
See also 2.4.2. Main parts of cooling unit.
1.
Connect the mains voltage and control connectors of the cooler unit to the corresponding
connectors on the base of the power supply. The connection can be established through
the base of the power supply when the devices are separated or through the right side
of the FastCool 10 by removing the right side plate.
TEST
2.
Attach the power supply on the FastMig 10 cooler.
3.
Connect the cooling water hoses with the wire feed unit, follow colour markings.
4.
Fill the reservoir with cooling liquid. It is preferred to use Kemppi brand cooling liquid.
Also water can be used, if the temperature doesn't go below 0 degrees Celsius. The
capacity of the reservoir is 3 litres.
5.
Switch on the power supply.
6.
Press and hold down the test switch until the torch hoses are filled with liquid.
7.
Depending on the FastMig model in question and the control panel type fitted, please
follow the graphical instruction below in order to deselect or select water-cooling
function. FastMig Pulse or FastMig X operation is set to 'AUTO', FastMig KM, KMS and M
equipment is set as water function ‘ON’ from the factory. If no cooler is fitted, deselect
the cooler function as instructed. Welding will be prevented if cooler function is enabled
and no cooler is fitted.
NOTE!
When FastCool 10 is connected to the FastMig power source for the first time, the cooler
function is normally active. To deselect the cooler function, follow the instructions below
depending on the power source type in use.
5
© Kemppi Oy / 1515