Kleenmaid CW2399 User Manual
Page 50
50
10.0 Slow pressure reduction
Remove the pressure cooker from the heat source and allow it to cool
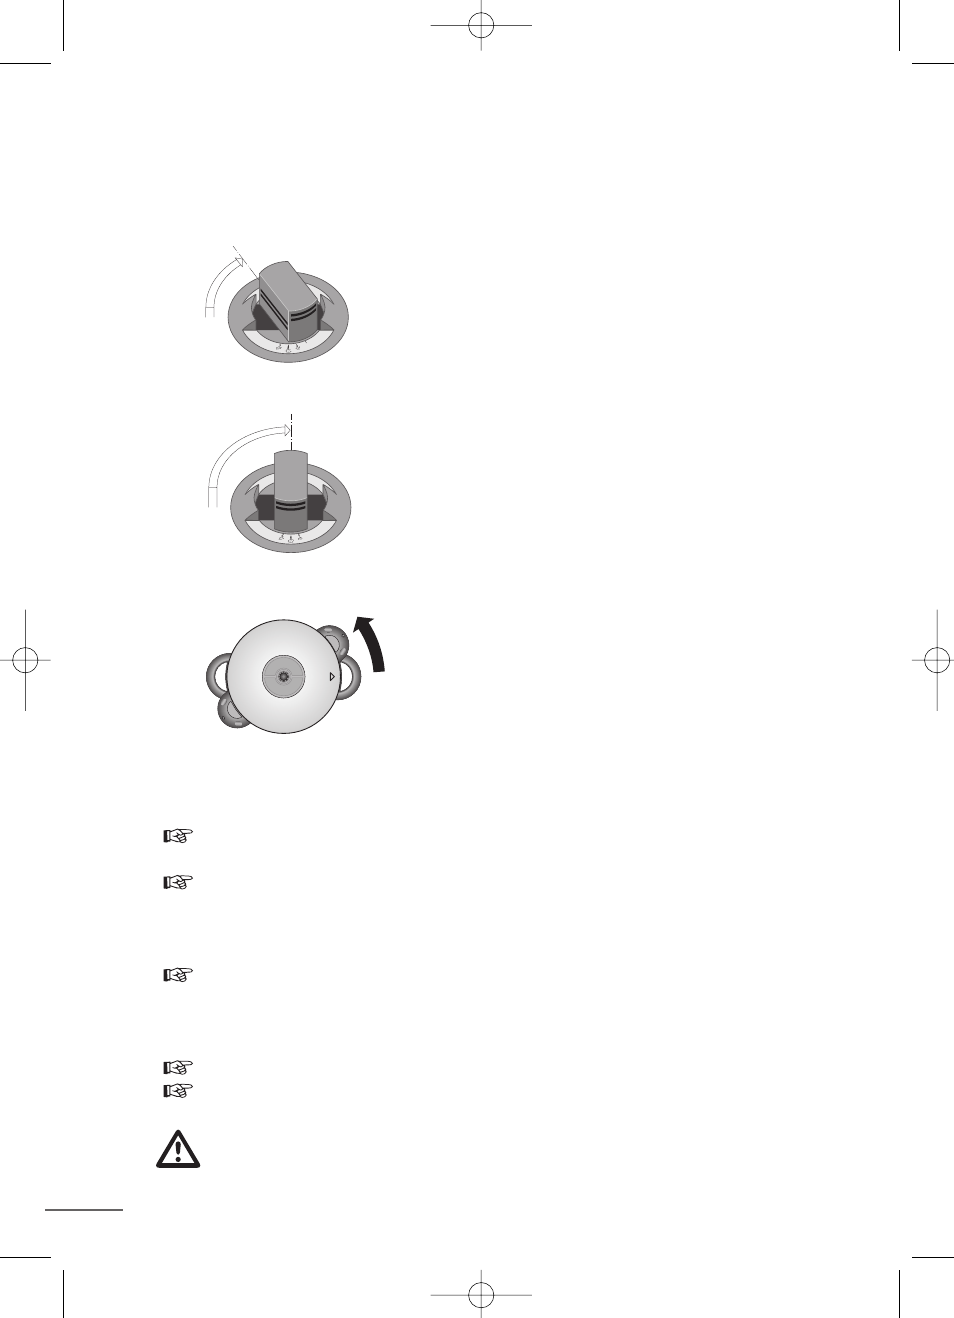
10.1 Normal automatic pressure reduction
Lift the valve cap slightly and rotate
by 75° until it engages the first time
(stage 1).
10.2 Rapid automatic pressure reduction
Lift the valve cap slightly and rotate
by 90° until it engages the second time
(stage 2).
10.3 Completed Pressure Reduction
There is no more pressure in the cooker when
the pressure indicator stem remains in its lowest
position. To open the cooker, slide the handle or
grip anti-clockwise in relation to the pan handle
or grip until the are once again aligned. The lid
can now be easily removed.
Pressure reduction tips for specific foods:
Foods with a short cooking time: Use fast pressure reduction as otherwise foods
can become overcooked.
Vegetables with a long cooking time / soups / meats, completely
covered by liquid / potatoes / cereals / dried pulses:
Use slow pressure reduction. Do not use water to cool!
(Potatoes could otherwise fall apart).
Meat / vegetables / frozen vegetables / fresh fruits / dried foods (excluding pul-
ses): Use normal or fast pressure reduction (for ready-prepared meals, allow the
pressure cooker to stand beside the heat source for one minute before reducing
pressure).
Fish / risotto: Use fast pressure reduction.
Foods with a high fat content or mash-type foods (e.g. dried pulses):
Use slow pressure reduction.
After cooking meat with a skin (e.g. ox tongue) which may swell under
the effect of pressure, do not prick the meat while the skin is swollen
as you might be scalded.
Stufe 1
Stufe 2
Stage 1
Stage 2
Handleiding Snelkoker 28/01/05 14:41 Page 50