Troubleshooting – Kleenmaid CW2399 User Manual
Page 52
52
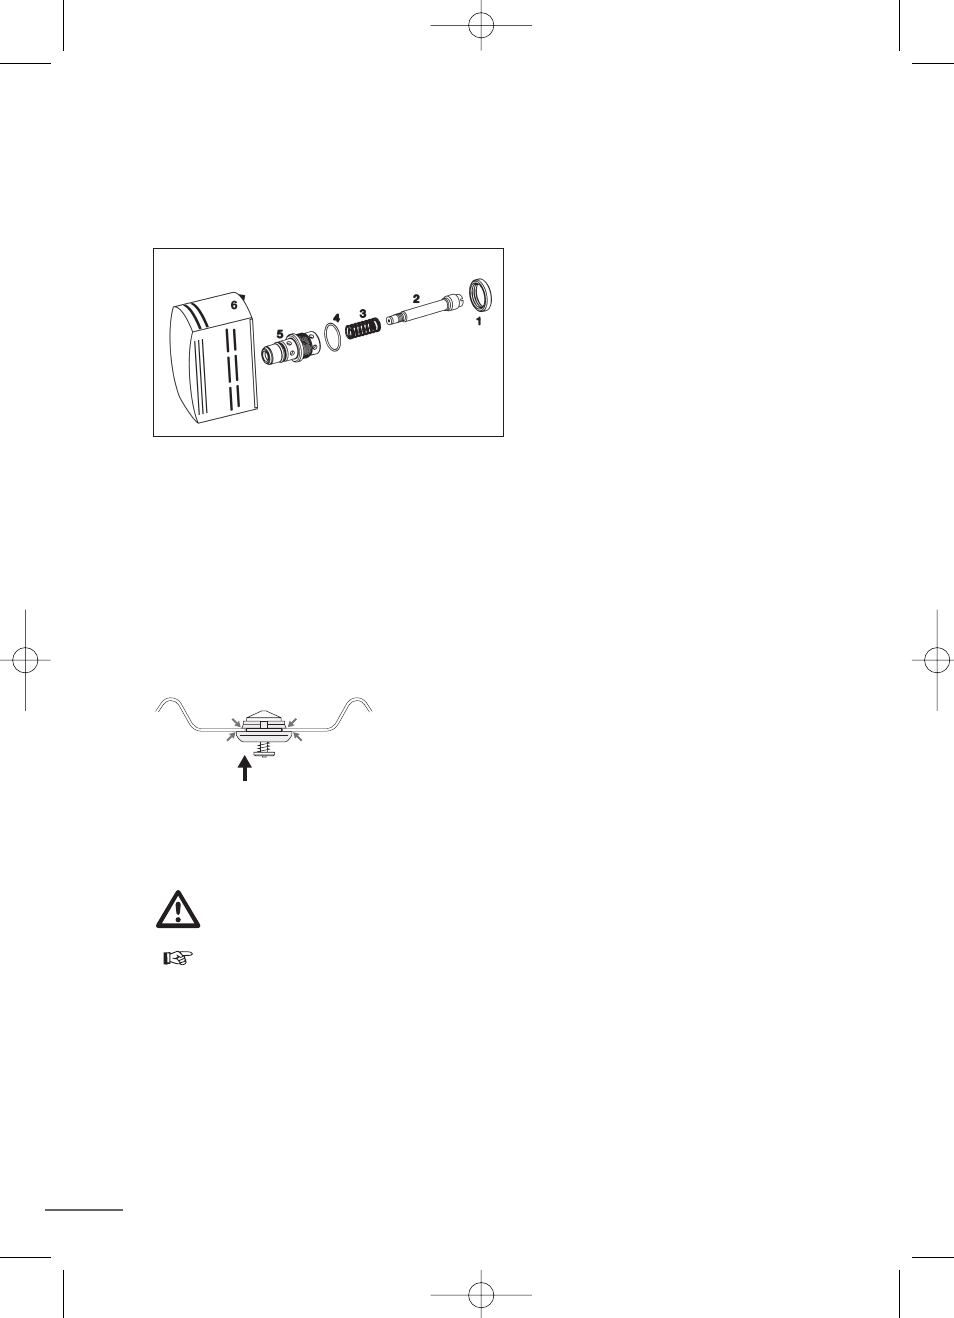
11.1.2. Dismantling the valve
To dismantle this valve, undo the valve screw with integral pressure indicator (2) on the
lid indside using a screwdriver.
1 Counter nut
2 Pressure indicator
3 Valve spring
4 Valve seal
5 Valve socket
6 Valve cap with integral
pressure indicator
11.1.3. Cleaning and re-assembling the valve
a. Disassemble the valve and clean it. Never use any abrasive cleaners.
b. During re-assembly, ensure that the valve cap is securely fastened to
the pressure indicator stem and that the valve screw has been fully
tightened by hand.
c. Check for proper valve operation after assembly (see section 7).
11.1.4. Fitting the SI valve (secondary safety device)
Press the valve in by hand from the inside of the lid.
Check: Blue rubber seal must fit tightly against
the lid, all the way around, on the outside and
inside of the lid.
Spring must be visible on the inside of the lid.
A
A = Lid inside
12. Troubleshooting
If you are unsure about using your pressure cooker or the safety
devices, do not use it and contact your retailer or DEMEYERE (see section 14).
Is the pressure cooker leaking?
- Check that the rubber gasket is properly located (section 8);
- Lubricate the gasket lightly with cooking/vegetable oil or moisten with a little
water;
- Or, if necessary, replace.
If effort is required to open or close the lid even after the gasket has been
lubricated with a little cooking oil, then the lid or pan may be deformed. The pressure
cooker must be taken to Demeyere for inspection (see section 14).
Handleiding Snelkoker 28/01/05 14:41 Page 52