Kleenmaid OMFFS9010 User Manual
Page 12
IMPORTANT
Do not use excessive water when cleaning the oven and avoid
water passing through the fan grill or ducts in the oven back .
Avoid letting grease deposit collect around the upper heating
element: it will cause smoking and may start a fire.
CAUTION:
Do not use rough or abrasive materials or sharp metal scrapers
to clean the glass doors of the oven since they may scratch the
surface and cause the glass to break.
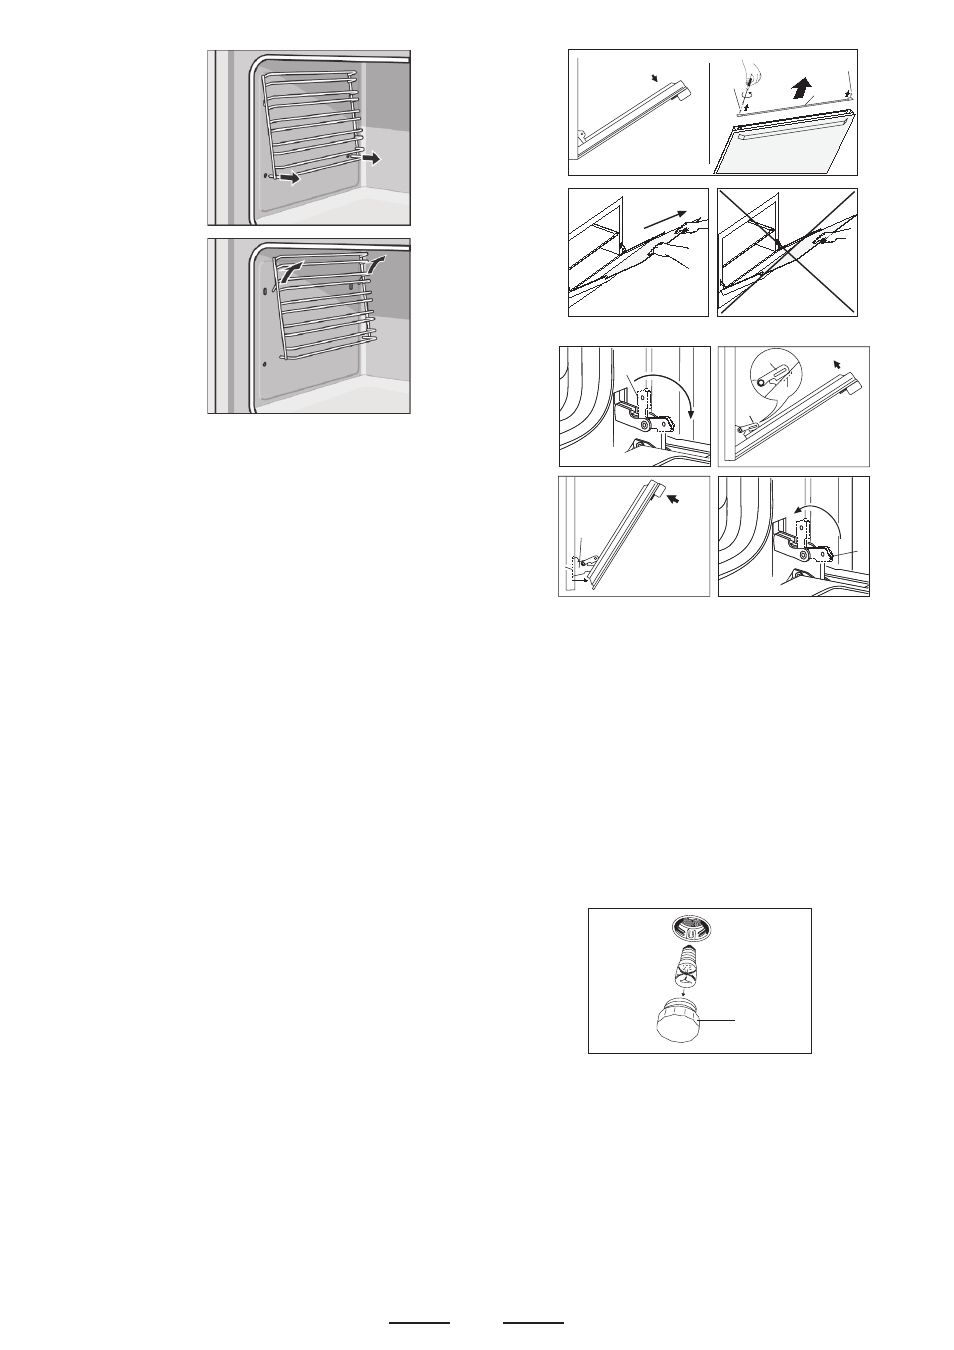
Fig. 6
Fig. 7
Removal of oven door
In-depth cleaning of the oven becomes more convenient if the
door is removed following the instructions below:
1 open the oven door completely.
2 flip the hinge hooks "A" outwards (see fig. 9B).
3 shut the oven door slowly until it reaches hooks "A", making
sure these are locked into slots "B" of the oven door, as shown
in fig. 9C. Remove the glass FIg. 9A (only for models where
present).
4 Using both hands, push the oven door lightly inwards, toenable
the door hinges "C" to come away from the slots "D" (see fig.
9D) and pull the door towards you until it is released from the
oven.
After cleaning it, reposition it correctly following the abovesteps
in the reverse order and flipping hooks "A" inwardsbefore you
shut the oven door (fig. 9E).
The interior glass of the oven
The interior glass of the oven door can be removed:
with the door in a semi-open position, remove the screws A and
B and the profime C as shown in fig. 9
Use both hands to remove the glass as shown in figures 9A.
After cleaning, refit the glass by proceeding in reverse order.
Fig. 9A
Fig. 9
B
A
C
WARNINGS
Before performing any repair or operation, switch the
appliance off and close the gas tap.
The manufacturer declines all responsibility for any damage to
persons, animals or things caused by failure to observe the rules
indicated above. In case it is necessary to repair or replace the
inside components, act as follows:
WARNINGS
Isolate the cooker from the electricity supply before attempting
to replace the oven lamp.
The oven lamp used is of a special type withstanding high
temperatures. To replace it, act as follows: disassemble the
protecting glass (A) and replace the burnt lamp with one of the
same type (Type E14 threaded clear lamp 230/240 V. 25 watt
T 300°C). Reassemble the protecting glass.
Interior: the oven shelf
carriers and the back
fan cover can be
removed for easier
cleaning. To do this,
remove all the shelves
and spring off the side
carriers (Fig. 6 - 7).
Replace in a similar
manner.
A
12
A
A
A
B
A
C
D
A
Fig. 9C
Fig. 9B
Fig. 9D
Fig. 9E