Kleenmaid IC57 User Manual
Page 6
6
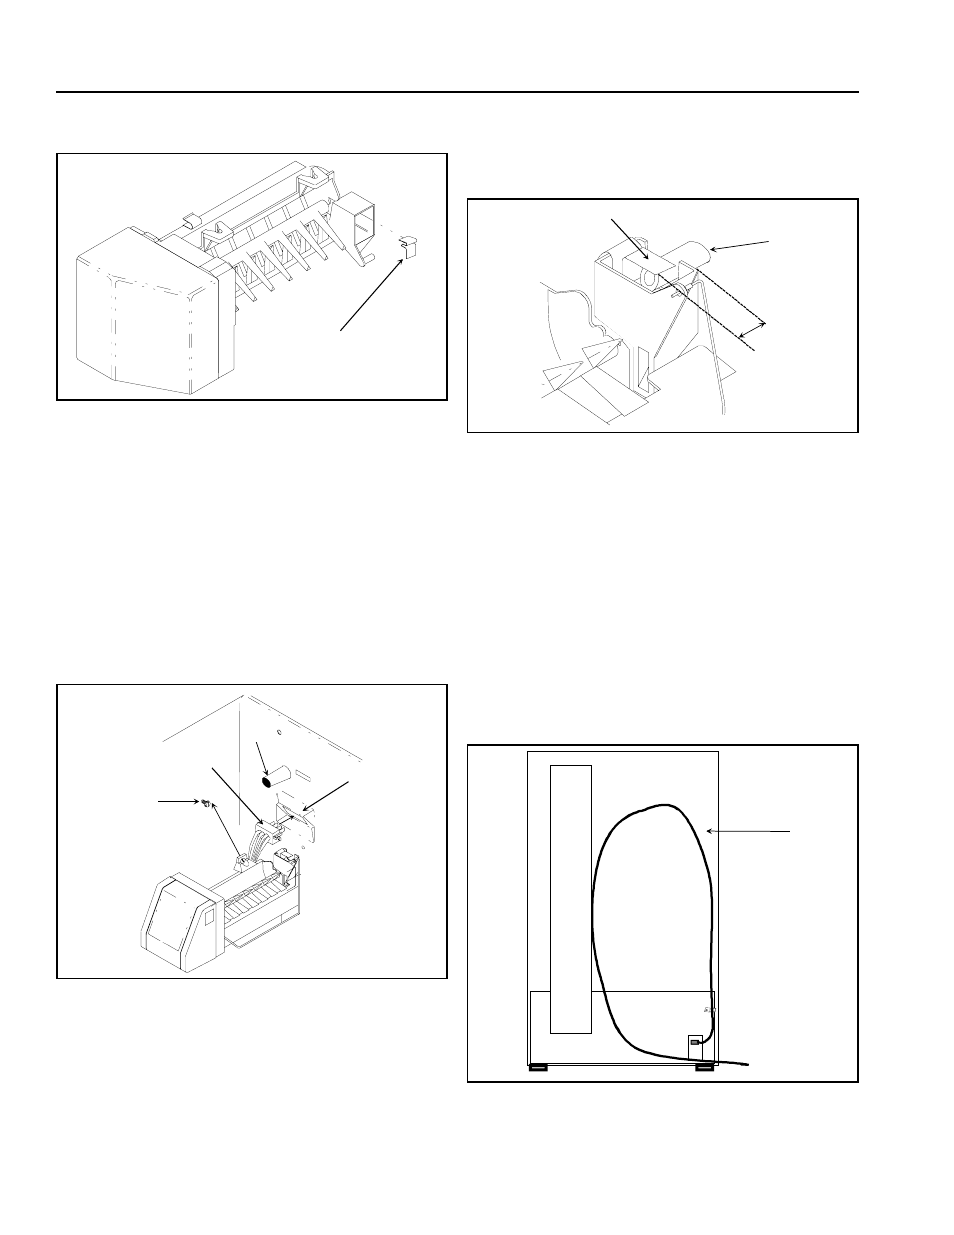
20. Slide stainless steel clip over wall of ice maker water
cup.
A
A. Stainless steel clip.
21. Remove 3 button plugs from left freezer wall with a
knife covered with masking tape. Discard plugs.
22. Start 15 mm sheet metal screw in top front hole on
left wall with a 6.35 mm (
1
/
4
") hex nut driver. Leave
head out approximately 9 mm.
23. Hold ice maker in position. Ice maker can only be
installed one way. Do not drill additional holes. Insert
wire harness plug into receptacle on rear wall until
locking fingers on top and bottom of plug snaps into
place. Slide ice maker hanger over sheet metal
screw. Ease ice maker water cup toward end of water
fill tube elbow.
B
D
C
E
B. Wire harness plug
C. Water fill tube
D. Wire harness receptacle
E. 15 mm Sheet metal screw
Water fill tube fits under stainless steel clip. Water
fill tube must not be kinked. Water fill tube should
extend approximately 9 mm into ice maker water cup
and must be secured under stainless steel clip.
F
G
H
F.
Stainless steel clip
G. Water fill tube
H. 9 mm into water cup
24. Insert and tighten remaining 15 mm sheet metal
screws with a
1
/
4
" (6.35 mm) hex nut driver.
25. Replace freezer shelf by sliding in until back locks in
place. Replace wire basket by sliding in. Position ice
storage bucket on wire section of freezer shelf under
ice maker. Confirm bucket is in the proper position.
26. Check for leaks at household water connection and
water valve. Correct any leaks.
27. Create a minimum of 2 meter service loop using
extreme care to avoid kinks. Secure copper tubing
to refrigerator cabinet using “P” clamp.
I
I. Service loop.
28. Move refrigerator in place and level if necessary.