Procedure, Warning, Caution – Kleenmaid IC56 User Manual
Page 4
4
WARNING
!
To avoid electrical shock which can cause severe
personal injury or death, ground wire must be properly
attached to both bracket and water valve.
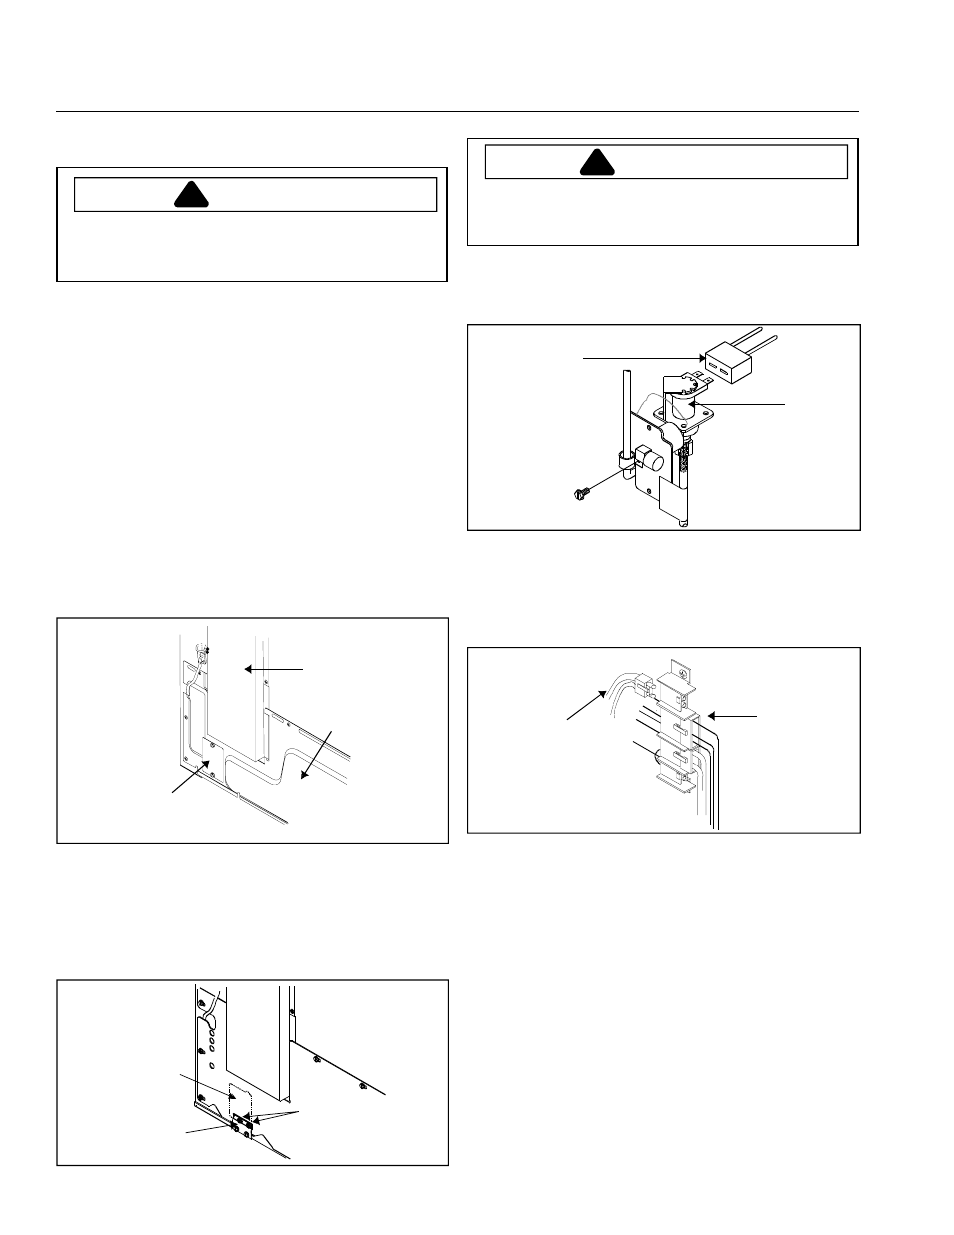
6.
Connect water valve wires to water valve. Route water
valve wires through rectangular opening. Do not bend
existing opening.
Water
valve
Water valve
wires
7.
Plug wire connector into terminal board. Plug water
valve wire connector into terminal board at points on
top left position, marked
1 and 2 across from A and B
stamped on terminal board. Locking finger must snap
in place to secure connection.
Terminal
board
Water valve
wire connector
Important
Water valve wire connection can be installed one way.
Terminal board fin prevents improper connector
installation. Do not remove terminal fin.
8.
Secure water valve to horizontal bottom cover of
refrigerator. Reinstall original water valve screws using
6.35 mm (
1
/
4
") hex nut driver to electrically ground
water valve.
9.
Remove tape from end of copper tubing. Put end of
copper tubing into sink or bucket. Partially turn on
water supply to refrigerator. Water will be under
considerable pressure. Allow water to run through
copper tubing for 1 minute to flush out copper tubing.
Turn off water supply to refrigerator when flushing is
complete.
Procedure
1.
Turn off water supply to refrigerator.
CAUTION
!
To avoid property damage, protect soft vinyl or other
flooring by adjusting leveling legs up, off of floor before
moving refrigerator.
2.
Move refrigerator away from wall.
3.
Seal open end of copper tubing with masking tape to
keep inside of tubing clean. Route copper tubing up to
refrigerator through floor or interior wall behind
refrigerator providing 9.65 mm (
3
/
8
") holes as required.
Copper tubing route must be above 2°C (35°F) to
prevent water line from freezing.
4.
Remove vertical cover. Remove and retain lower
vertical cover screws and bottom 2 upper vertical
cover screws on refrigerator cabinet using 6.35 mm
(
1
/
4
") hex socket and driver. Remove lower vertical
cover. Retain cover.
5.
Remove water valve cover plate. Remove and retain
screws from water valve cover plate using 6.35 mm
(
1
/
4
") hex socket and driver. Remove and discard water
valve cover plate.
Remove vertical
cover
Metal bottom
cover
Remove water valve
cover plate
Refrigerators with plastic back covers
Remove 2 upper mounting screws using
1
/
4
" hex nut
driver. Create water valve opening by cutting along
perforations and removing cutout. Secure water valve
to mounting plate using 2 original upper mounting
screws.
Water
valve
cutout
Mounting
screw
Water
valve
mounting
plate