Kleenmaid IC56 User Manual
Page 5
5
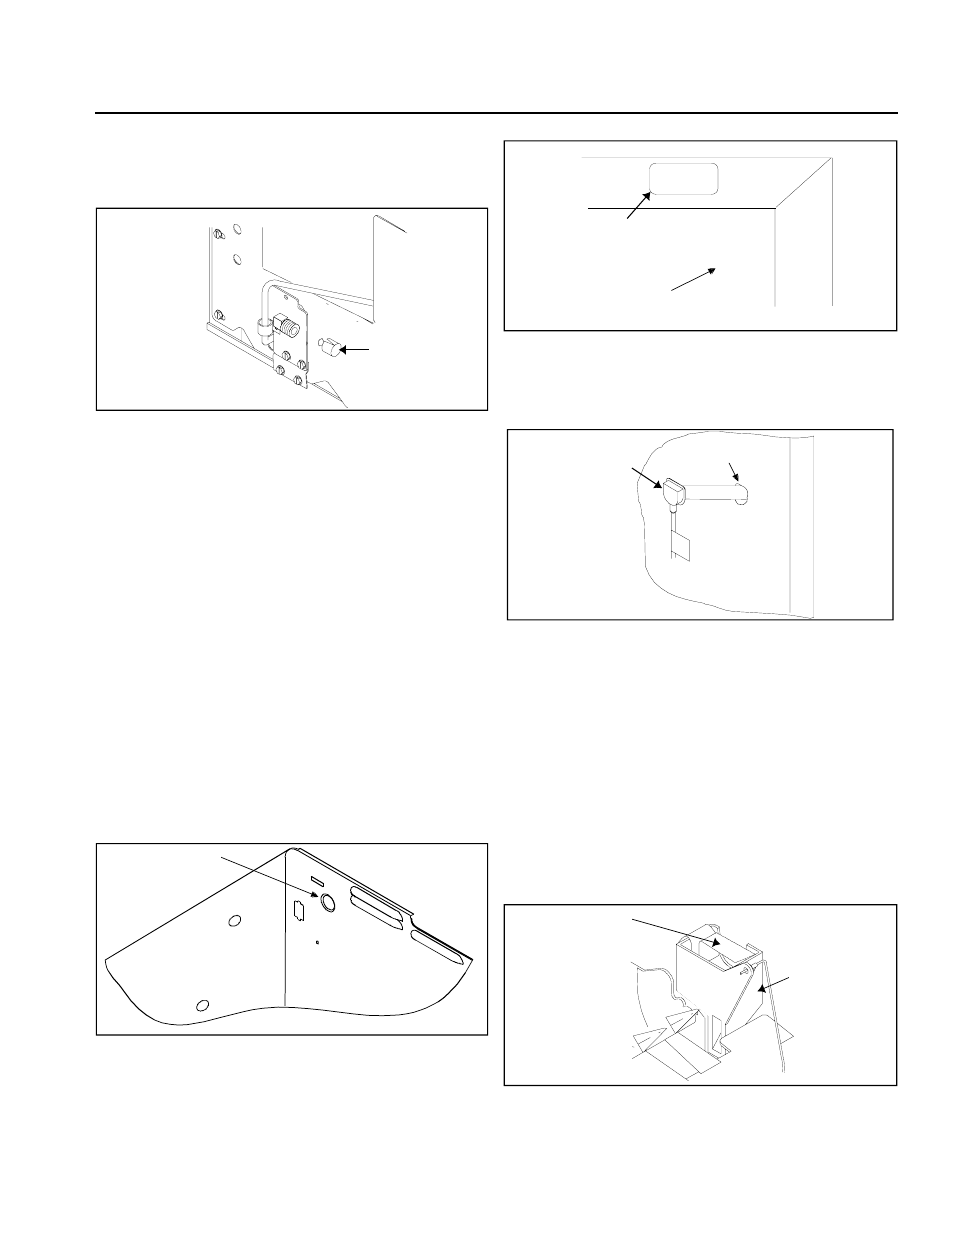
10. Remove plastic cap from water valve tube fitting.
Connect copper tubing service loop to water valve with
nut and sleeve.
Plastic
cap
11. Insert copper tubing completely into water valve inlet
port. Start nut by hand to prevent cross threading.
Firmly connect brass nut on copper tubing to water
valve inlet port fitting using two 12.7 mm (
1
/
2
") open
end wrenches. Confirm copper tubing is secure by
pulling on copper tubing. Do not overtighten.
12. Partially turn on water supply to refrigerator and
check for leaks. If leaks are found turn off water
supply to refrigerator and correct any leaks. Repeat
this process until no leaks are found, then completely
turn on water supply to refrigerator.
13. Gently pull ice service rack out of freezer (some
models). Remove screws using a 6.35 mm (
1
/
4
") hex
nut driver. Insert provided plugs into screw holes.
14. Remove electrical and water connection cover using
6.35 mm (
1
/
4
") hex nut driver to remove screw then
rotate cover upward to remove. Electrical and water
connection cover is located in top left corner of rear
freezer wall. Remove sealing tape from water inlet
tube hole located on interior back freezer wall with
utility knife.
Remove sealing
tape from here
15. Remove water tube inlet hole plug on rear of
refrigerator cabinet using a flat blade screwdriver with
masking tape covering blade.
DO NOT REMOVE
THIS COVER UNLESS
INSTALLING AN
ICE MAKER
Rear of
refrigerator
Water fill tube
inlet hole plug
16. Cover end of water fill tube elbow with masking tape to
prevent insulation beads from entering water fill tube
elbow. Push water fill tube elbow through "U"-shaped
hole.
"U"-shaped
hole
Water fill
tube elbow
17. Pull water fill tube elbow through hole in freezer. Push
gently on water fill tube elbow while twisting elbow
slightly until elbow is firmly seated inside "U"–shaped
hole in back of refrigerator. Remove masking tape
from end of water fill tube elbow.
18. Remove ice maker from shipping carton and discard
packing material.
Important
Ice maker is shipped with arm down. This is correct
position for ice production. Do not force arm up or
down.
19. Slip stainless steel clip over rear wall of ice maker
water cup.
Water
cup
Stainless
steel clip
20. Remove and discard 3 button plugs from left freezer
wall using flat blade screwdriver with blade covered
with masking tape.