Koga GENERAL INSTRUCTION User Manual
Page 11
C
B
A
A
A
B
2. Turn the adjustment nut
clockwise to the desired
clamping stress (4B).
3. Turn the quick release lever
(4A) so that it flips exactly
vertically downward,
4. Flip the quick release lever
(4A) fully closed.
Flip the Q-Guard
quick release vertically
downward, fully shut.
Only in this position
will the quick release
lever also function as
protection.
The Q-Guard’s quick
release lever is located
at the side of the
derailleur.
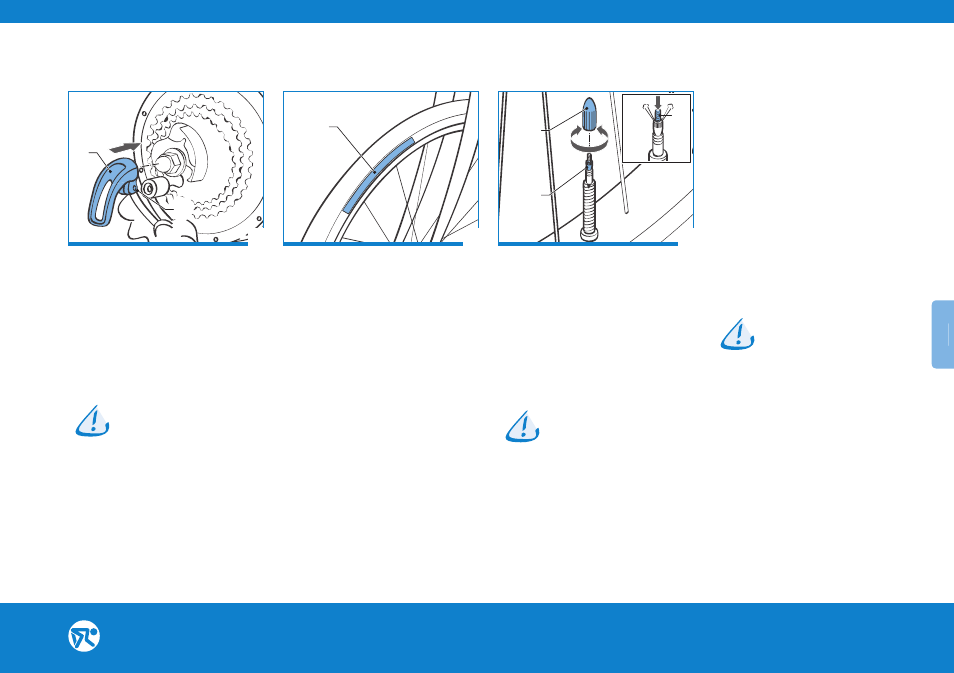
E-Guard
An ‘E-Guard’ rear derailleur
protector (5A) is fitted on some
Koga E-bike models.
You can fit this by pushing the
E-Guard onto the rear wheel axle
and securing it with the Allen bolt
(5B).
Tires
Never pump the tyre harder
than the maximum allowable air
pressure. The maximum allowable
air pressure is shown on the outer
tyre (6A).
Almost all Koga bicycles are
fitted with Sclaverand or French
valves (7). A few Koga bicycles
have Dunlop, or normal, valves.
Adapters are available for sale.
Pumping the tyres
1. Remove the valve cap (7A).
2. Loosen the nut (7B).
3. Press the top of the valve
briefly and allow a little air to
escape (7C).
4. Pump the tyre to the correct
air pressure.
The air pressure
must be maximum
for bicycles with
suspension.
5. Tighten the nut (7B).
6. Replace the valve cap (7A)
Maintenance
Regularly check the tyre pressure
If the tyre is too soft, it
can cause irreparable
damage to the tyre and
the rim.
Regularly check the tread depth
of the tyres.
11
www.koga.com
UKUK
7
6
5