3 system diagram – Lumens Technology CL510 Installation User Manual
Page 12
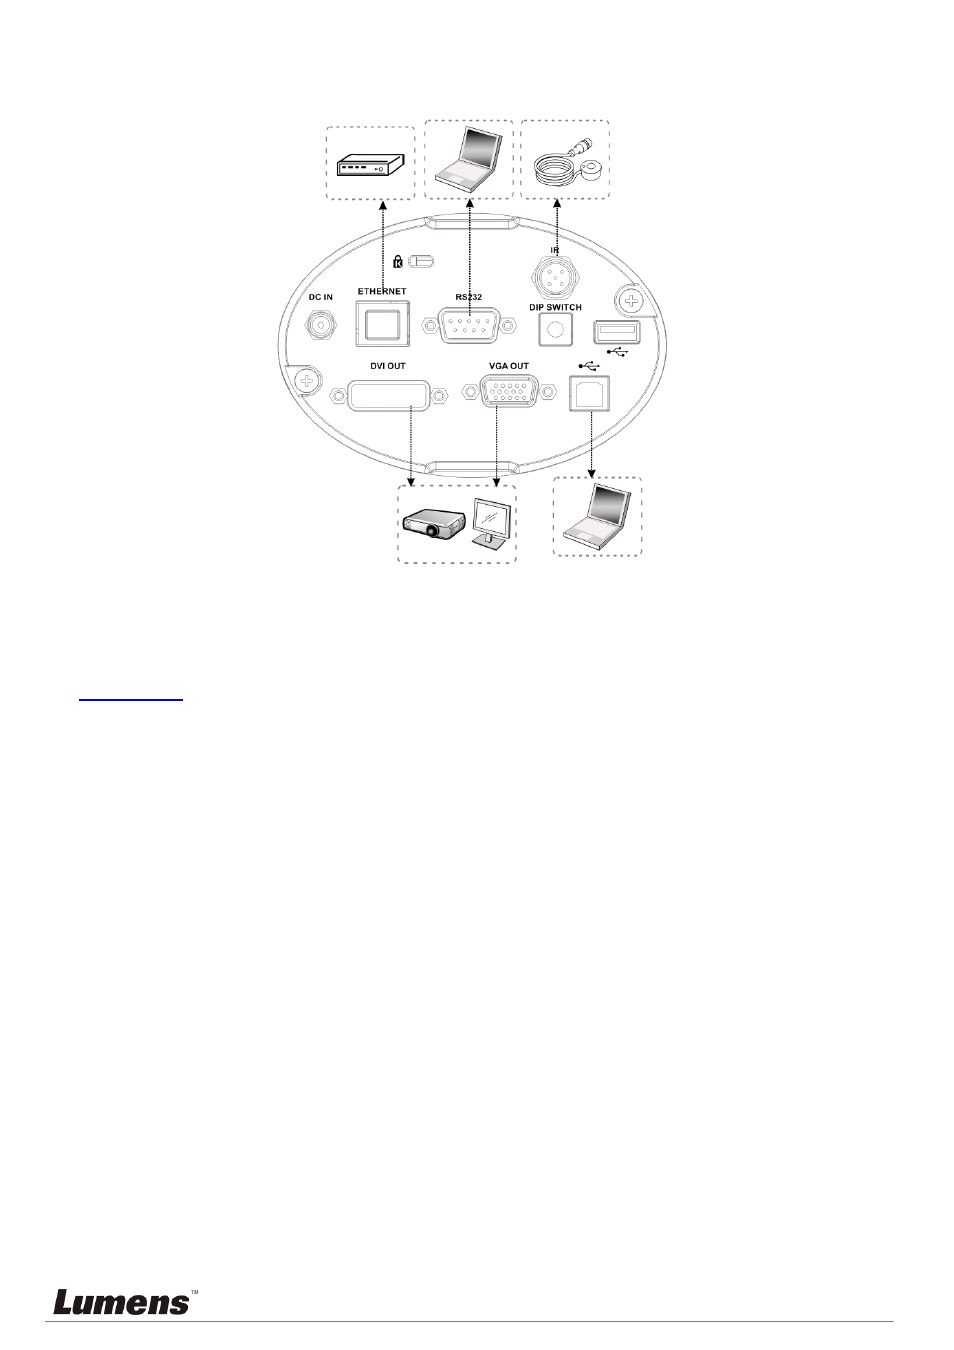
English - 11
4.3 System diagram
4.4
Set up the power frequency
Set the applicable power frequency depending on different regions. Please refer to
Appendix 1
for applicable frequency.
4.4.1 After using the remote control to turn on the power, press [MENU] on the remote control to
enter the Service Menu.
4.4.2 Press [ ] or [ ] to the [Advanced] menu.
4.4.3 Press [ ] to the [Power Frequency].
4.4.4 Press [ ] or [ ] to adjust the frequency.
4.4.5 Press [MENU] to exit.
4.5 Set the position of the object to be captured (Laser mark)
4.5.1 Prepare a cross point screw driver.
4.5.2 After using the remote control to turn on the power, press [LASER] on the remote control to
enable the laser mark (the red cross round box).
4.5.3 Press [FREEZE] -> [DEL] -> [ ] on the remote control to enable the center positioning mark
(the blue round box).
4.5.4 Use a cross point screw driver to adjust the laser knob of the machine (the adjustment
should be made at the place marked by the red box in the following figure).
Router or
hub
IR extender
Computer
(1)
Projector or
monitor
Computer
(2)