Lynx Studio LT-ADAT User Manual
Page 6
6.
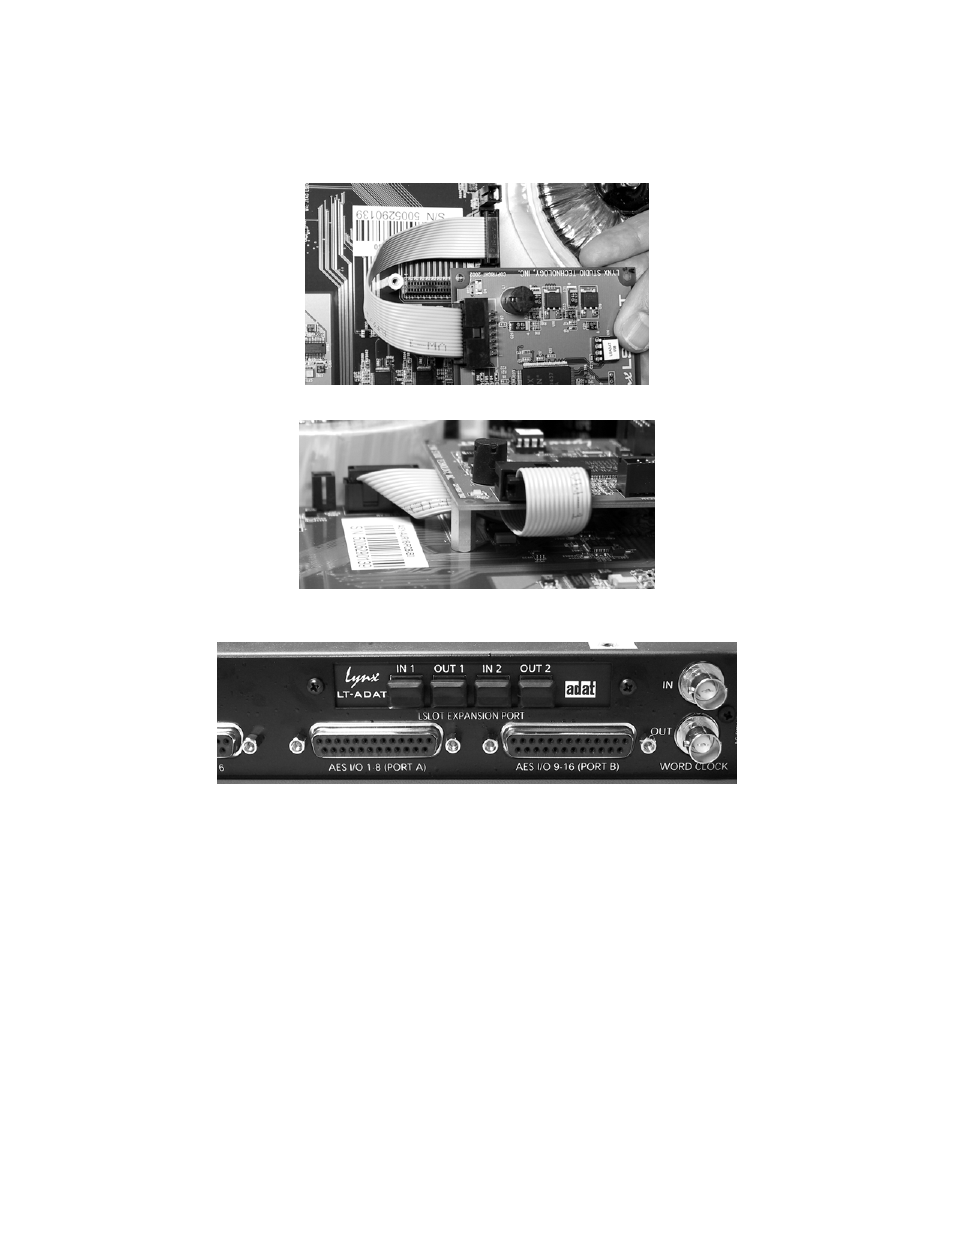
Attach one end of the included ribbon cable to the 14-pin header labeled “JP2” on the LT-ADAT. Insure
that the ribbon cable is exiting the top side of JP2. Attach the other end of the cable to the LStream port
labeled “JP3” on the Aurora main board. Note: The red stripe on the end of the ribbon cable will face the
back of the Aurora.
7.
Carefully route the ribbon cable underneath the LT-ADAT and inside of the standoff.
8.
Secure LT-ADAT with three screws; one on the standoff and two from the back panel of Aurora. Keep
screws loose until LT-ADAT is properly aligned, then tighten snugly, but do not overtighten.
9.
Plug in and power up the Aurora using the front panel standby switch. If the green LED on the LT-ADAT
lights up, proceed to step 10. If the LED does not light, unplug Aurora and check the cable connections to
and from the LT-ADAT. Then plug in and power up again. If the green LED still does not light, contact
Lynx Customer Support.
10.
Remove the power cord from Aurora and reinstall the Aurora top panel using the eight screws. Do not over
tighten the small screw near the center of the front faceplate as it is easily damaged.
Page 4