Rying, Ccessories, Warning – Maytag MDG9800AWQ User Manual
Page 23
D
RYING
A
CCESSORIES
22
I
NSTALLING THE
D
RYING
R
ACK
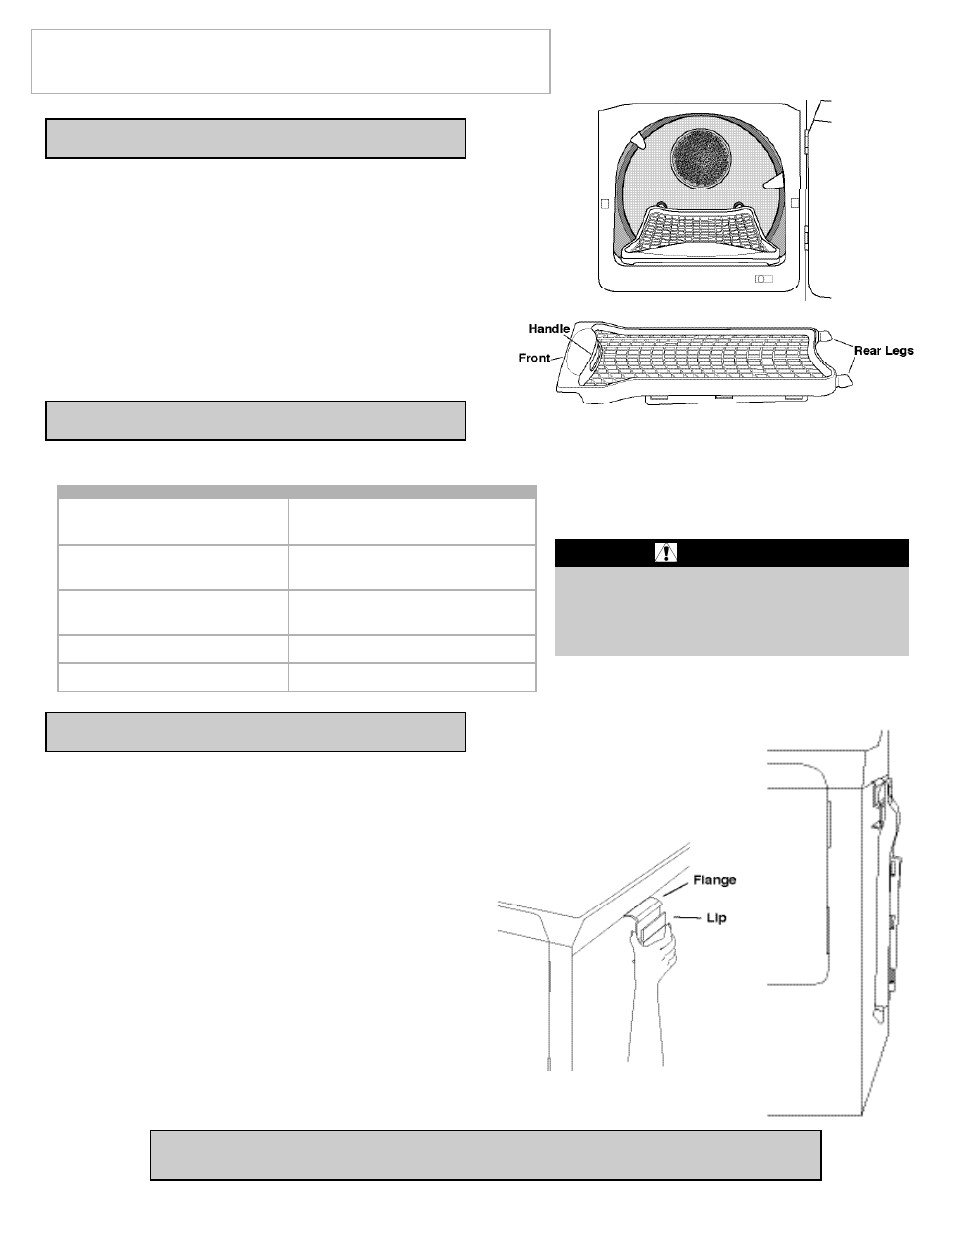
1)
Open dryer door.
2)
Position drying rack in tumbler placing the two rear legs in the
two recessed areas in the back wall of the dryer.
3)
Place the front lip of the drying rack on top of the lint filter.
4)
Place items to be dried on the rack, leaving space between them
so air can reach all the surfaces.
5)
Close the dryer door.
6)
Use the “time dry” cycle. Select time according to moisture
and weight of item. Start the dryer. It may be necessary to reset
the timer if a longer drying time is needed.
U
SING THE
D
RYING
R
ACK
On Dryer Sides:
The drying rack hanger fits between the dryer top and the dryer
cabinet.
1)
Place the flange on the hanger in the seam between the top and
the cabinet. Push all the way in.
2)
Face the top of the drying rack toward the side of the dryer
cabinet.
3)
Place the drying rack handle over the lip of the hanger.
On Dryer Back:
1)
Place the drying rack hanger between the dryer top and the
dryer cabinet just below the back of the control panel.
2)
Place the flange in the seam and push all the way in.
3)
Face the top of the drying rack toward the back of the dryer
cabinet.
4)
Place the drying rack handle on the lip of the hanger.
Heat
Heat
Air Fluff
Air Fluff
Air Fluff or Heat
Washable sweaters (block to
shape and lay flat on rack)
Stuffed toys (cotton or
polyester fiber filled)
Stuffed toys (foam or
rubber filled)
Foam rubber pillows
Sneakers
S
UGGESTED
I
TEMS
S
UGGESTED
T
EMP
. S
ETTINGS
NOTE: If not included with your dryer, contact your Maytag dealer for the accessory kit MAL1100AXX
or call 1-877-232-6771 USA or 1-800-688-8408 Canada.
S
TORING THE
D
RYING
R
ACK
Drying foam rubber, plastic or rubber on a heat
setting may cause damage to the item and
could lead to a fire hazard.
WARNING