Installation, Door and drawer removal, Warning – Maytag MBF1956HEB User Manual
Page 5: Caution
4
Installation
C
C
A B
A
B
4. Select models also have rear adjustment screws
(B). Using the hex head driver, turn each of these
adjustment screws (B) to raise or lower the rear of
the refrigerator.
5. Using the carpenter’s level, make sure front of
refrigerator is
1
⁄
4
” (6 mm) or
1
⁄
2
bubble higher than
back of refrigerator and that the refrigerator is level
from side to side.
6. Turn stabilizing legs (C) clockwise until firmly
against floor.
7. Freezer drawer models only: Turn adjustment
screws (A) counterclockwise to allow the full
weight of the refrigerator to rest on the stabilizing
legs.
8. Replace bracket cover(s).
• Position cover into the outer edge of the hinge.
• Swing the cover toward the cabinet and snap it
into place.
9. Replace the toe grille.
To avoid electrical shock which can cause severe
personal injury or death, observe the following:
• Disconnect power to refrigerator before removing
doors or drawer. Connect power only after
replacing doors or drawer.
WARNING
To avoid damage to walls and flooring, protect vinyl
or other flooring with cardboard, rugs or other
protective material.
CAUTION
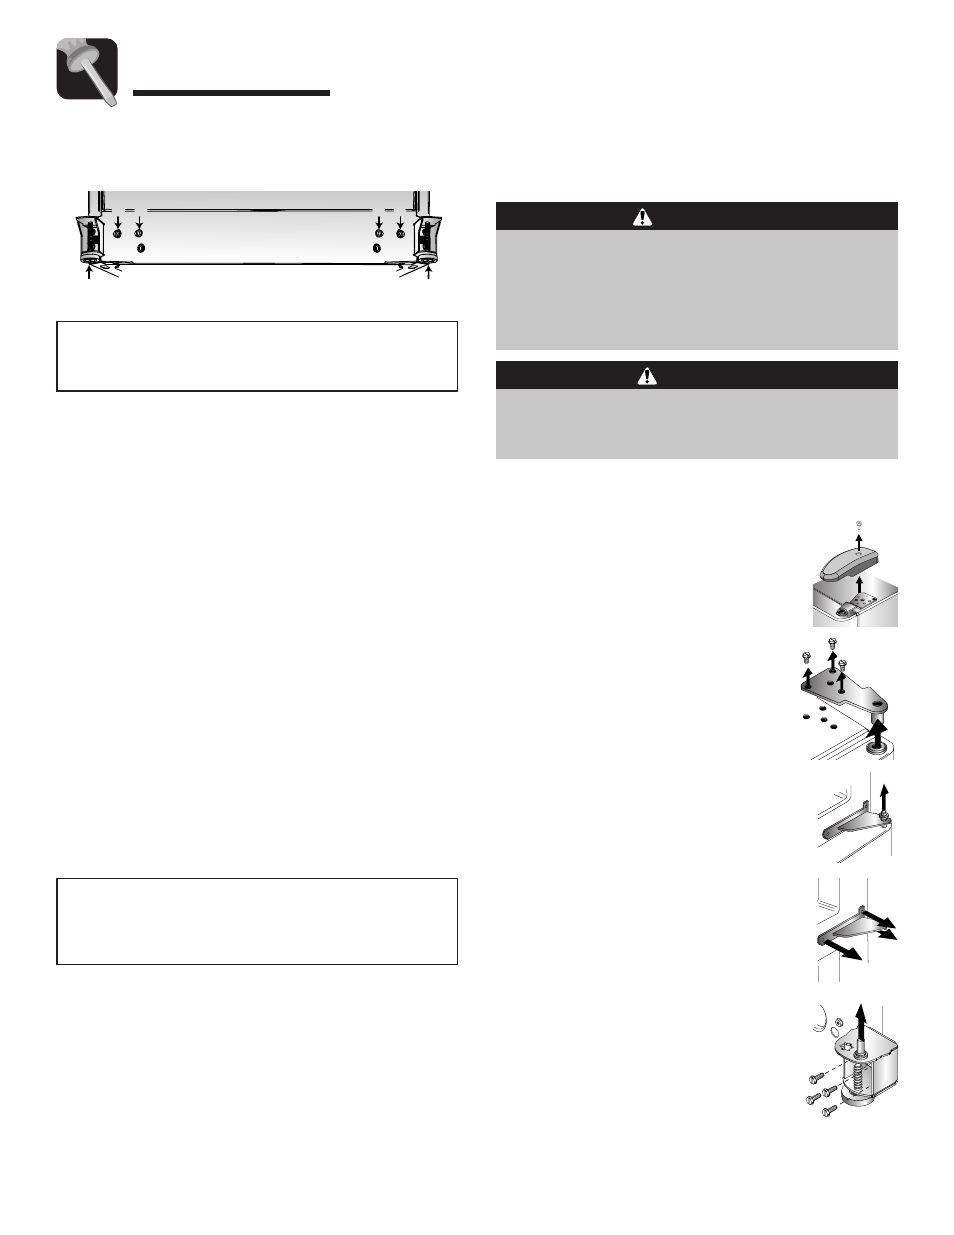
1. Unplug power cord from power source.
2. Remove toe grille and bottom bracket
cover(s) (see page 3).
3. Remove top hinge cover from
refrigerator door by removing Phillips
screw and retain screw and cover for
later use.
4. Unscrew
5
⁄
16
” hex head screws from
top hinge to remove hinge and retain
all screws for later use.
5. Lift refrigerator door from center
hinge pin.
6. For swing freezer door models
only: Hold freezer door while removing
hinge pin with a
5
⁄
16
” hex head driver.
Remove door from bottom hinge and
retain hinge pin for later use.
For pullout freezer drawer models
only: Remove plastic sleeve, if
present. Remove center hinge pin with
a
5
⁄
16
” hex head driver. Retain hinge pin
and plastic sleeve for later use.
7. Remove Phillips screws to remove
center hinge and retain all screws for
later use.
8. Remove bottom hinge or stabilizing
bracket with
3
⁄
8
” hex head driver and
retain screws for later use. Lift out
bottom hinge pin (on freezer door
models).
9. If your model has a pullout freezer drawer, see
page 5 for drawer removal instructions.
Note
• For proper reinstallation, ensure the “top” marking
on the interior of the toe grille is oriented correctly.
• Align the toe grille mounting clips with the lower
cabinet slots.
• Push the toe grille firmly until it snaps into place.
Note
• Some models only have adjustment screws “A.”
Door and Drawer Removal
Some installations require door/drawer removal to
transport the refrigerator to its final location.
3. Using hex head driver, turn the front adjustment
screws (A) on each side to raise or lower the front
of the refrigerator.