Warning, Install oven – Maytag CWG3600AAS Installation User Manual
Page 7
7
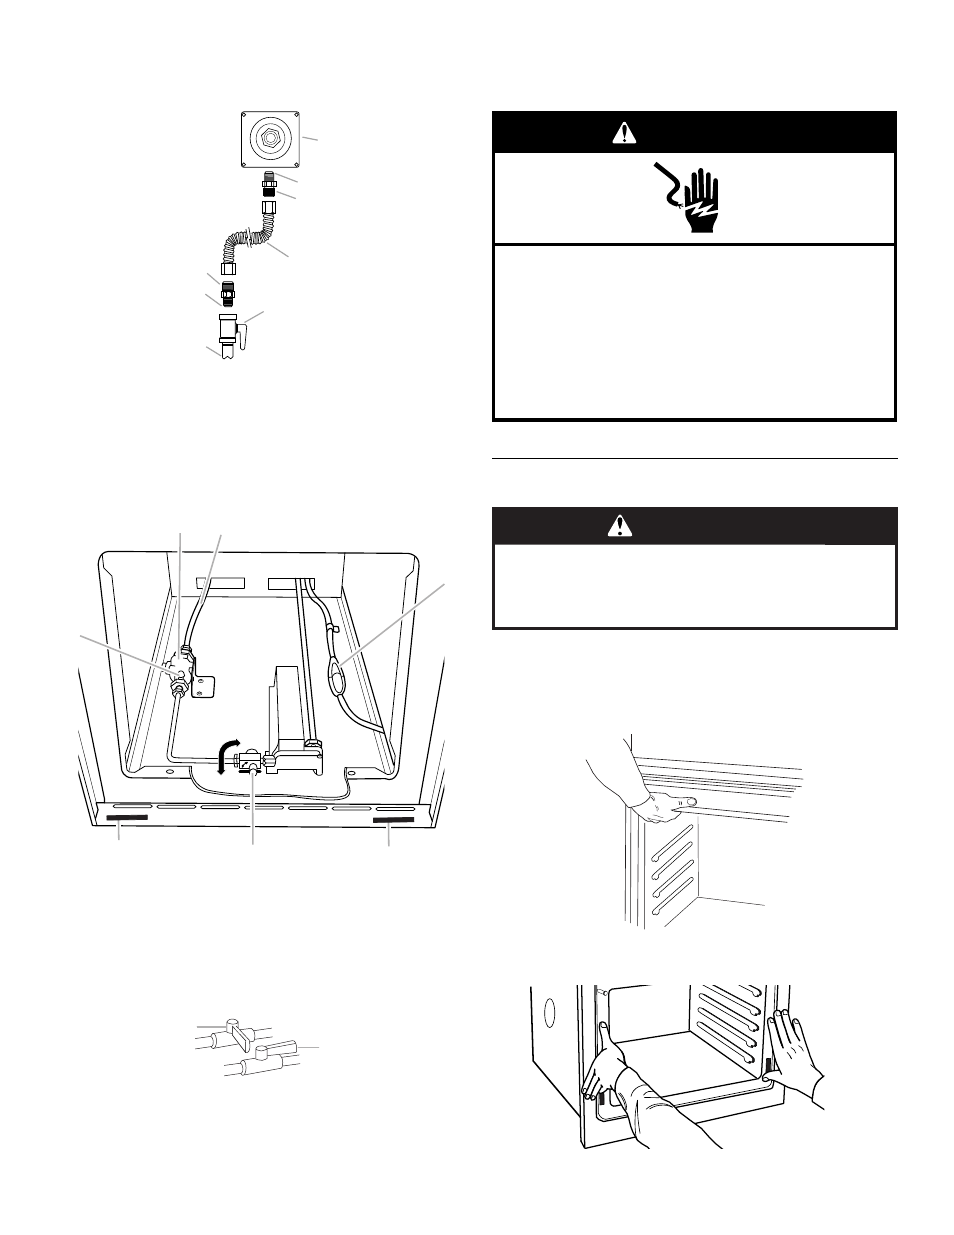
3.
Use a ¹⁵⁄₁₆" combination wrench and an adjustable wrench to
attach the flexible connector to the adapters. Check that
connector is not kinked.
4.
Gas supply pipe must be located within clearance area as
shown in the “Cabinet Dimensions” illustration in “Location
Requirements” section.
Complete connection
1.
Open the manual shutoff valve in the gas supply line. The
valve is open when the handle is parallel to the gas pipe.
2.
Test all connections by brushing on an approved
noncorrosive leak-detection solution. If bubbles appear, a
leak is indicated. Correct any leak found.
3.
Plug into a grounded 3 prong outlet.
Install Oven
1.
Using 2 or more people, lift oven partially into cabinet cutout.
Use the oven opening as an area to grip.
NOTE:
Push against seal area of oven front frame when
pushing oven into cabinet. Do not push against outside
edges.
2.
Push oven completely into cabinet and center oven into
cabinet cutout.
A. Gas pressure regulator
B. Use pipe-joint compound.
C. Adapter (must have ½" male
pipe thread)
D. Flexible connector
E. Manual gas shutoff valve
F. ½" or ¾" gas pipe
G. Use pipe-joint compound.
H. Adapter
A. Gas pressure regulator
B. Gas supply line
C. Electrical disconnect
D. Serial plate
E. Manual oven valve
F. Burner rating plate
G. Manifold pressure tap
A. Closed valve
B. Open valve
A
B
C
D
E
F
G
H
A
B
C
D
E
F
G
A
B
Electrical Shock Hazard
Plug into a grounded 3 prong outlet.
Do not remove ground prong.
Do not use an adapter.
Do not use an extension cord.
Failure to follow these instructions can result in death,
fire, or electrical shock.
WARNING
WARNING
Excessive Weight Hazard
Use two or more people to move and install oven.
Failure to do so can result in back or other injury.