Measurement Computing WaveView User Manual
Page 45
05-22-01
WaveCal, pg. 5
3.
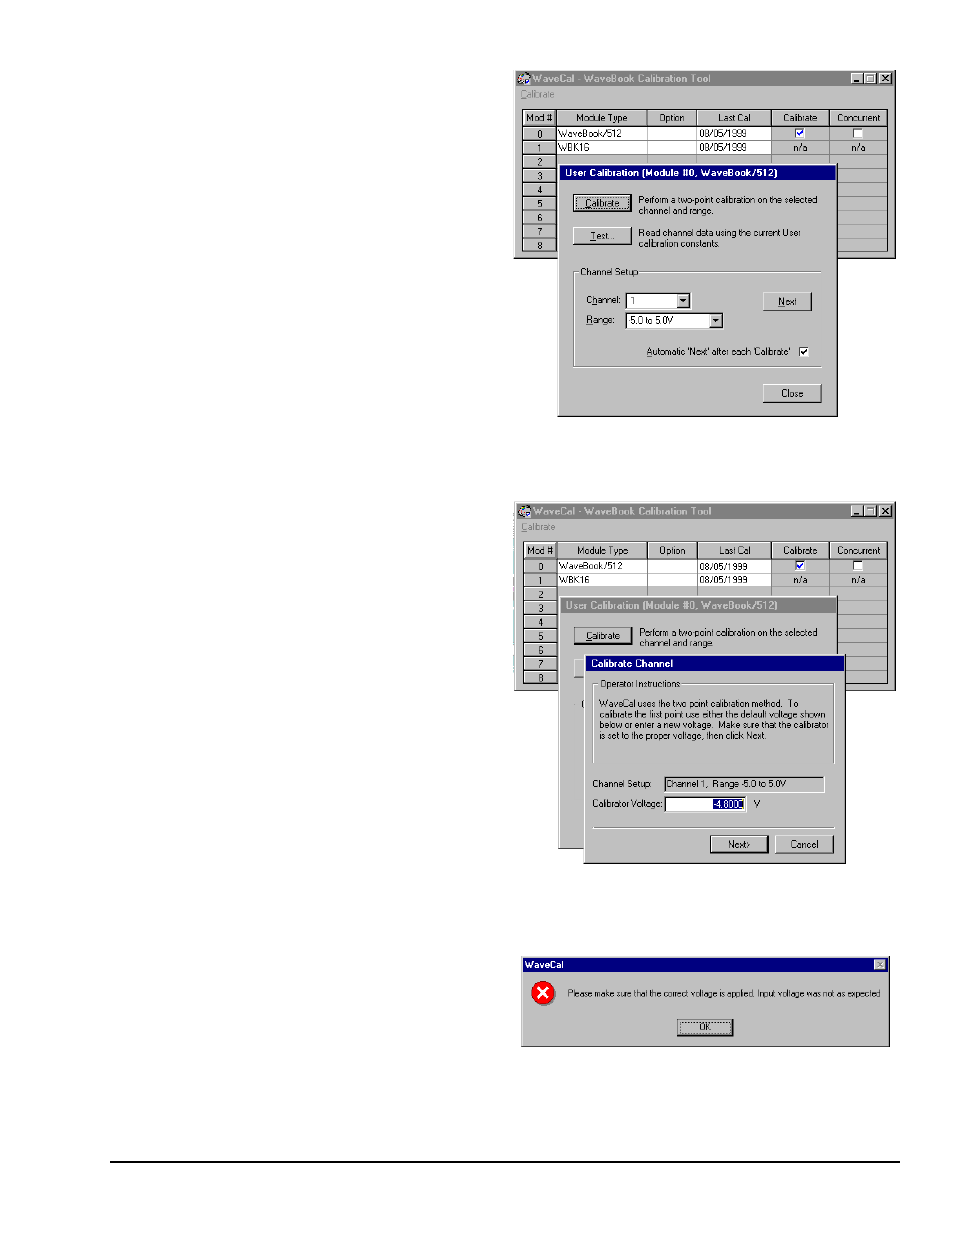
The User Calibration dialog box
indicates the Channel and the Range
that are currently scheduled for
calibration.
Notice that we have elected to use the
Automatic “Next” feature by placing
a checkmark in the feature’s selection
box.
At this point, click your keyboard’s
<ENTER> key to continue.
Note that using your keyboard’s
<ENTER> key has the same result as
if you where to click on the
“on-screen” Calibrate button.
After hitting <ENTER>, the Calibrate
Channel box appears for First Point
calibration (see figure for step 4).
The User Calibration Dialog Box Showing
Channel 1, Range –5.0 to 5.0 V
Currently Scheduled for Calibration
4.
Adjust the Calibrator Voltage to the
recommended value.
In the example we have a range of
-5.0 to +5.0 Volts.
We have set our Calibrator Voltage to
- 4.8 Volts, as recommended.
5.
Hit <ENTER> on your keyboard, or
click on the screen’s Next button.
The Calibrate Channel box appears
for the “Second Point” as indicated in
the step 6 figure.
Channel 1, Range –5.0 to 5.0 V
Scheduled for
First Point Calibration Using –4.8 V
Note: If you input an unacceptable
voltage value, such as -4.8 Volts
when +4.8 Volts is expected,
WaveCal notifies you with a message
box, as seen to the right.
Message Resulting from Attempting to
Enter an Unacceptable Voltage