Measurement Computing WaveView User Manual
Page 46
WaveCal, pg. 6
05-22-01
6.
Apply the recommended calibrator
voltage for the range, then hit
<ENTER> on the keyboard (or the
Finish button on your screen).
WaveCal is now ready for the “first
point” calibration of the next range
(as indicated by the figure for step 7.)
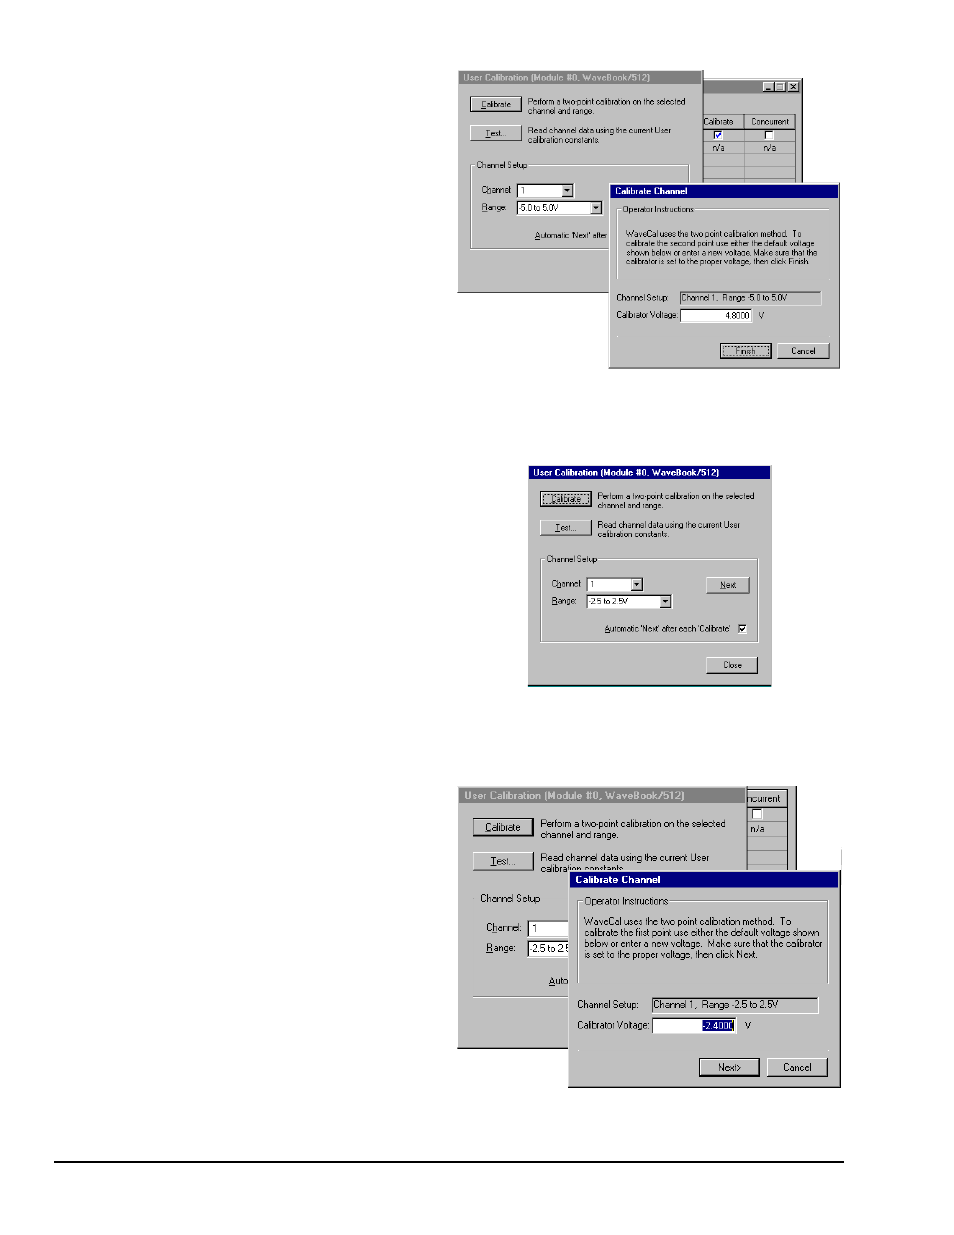
Channel 1, Range –5.0 to 5.0 V
Scheduled for
Second Point Calibration using +4.8 V
7.
WaveCal displays the channel setup
for the next two-point calibration. In
our example this is:
Channel 1, range -2.5 to +2.5 Volts.
8.
Hit <ENTER> on your keyboard, (or
use an on screen button if preferred).
After hitting <ENTER>, the
Calibrate Channel box appears for
First Point calibration (see figure for
step 9).
The User Calibration Dialog Box Showing
Channel 1, Range –2.5 to 2.5 V
Currently Scheduled for Calibration
9.
Adjust the Calibrator Voltage to the
recommended value.
In the example we have a range of
–2.5 to +2.5 Volts.
We have set our Calibrator Voltage to
–2.4 Volts, as recommended.
10.
Hit <ENTER> on your keyboard, or
click on the screen’s Next button.
The Calibrate Channel box appears
for the “Second Point” as indicated in
the step 11 figure.
Channel 1, Range –2.5 to 2.5 V
Scheduled for
First Point Calibration Using –2.4 V