Post assembly – Metro Professional's Choice Wall Mounted Shelves User Manual
Page 3
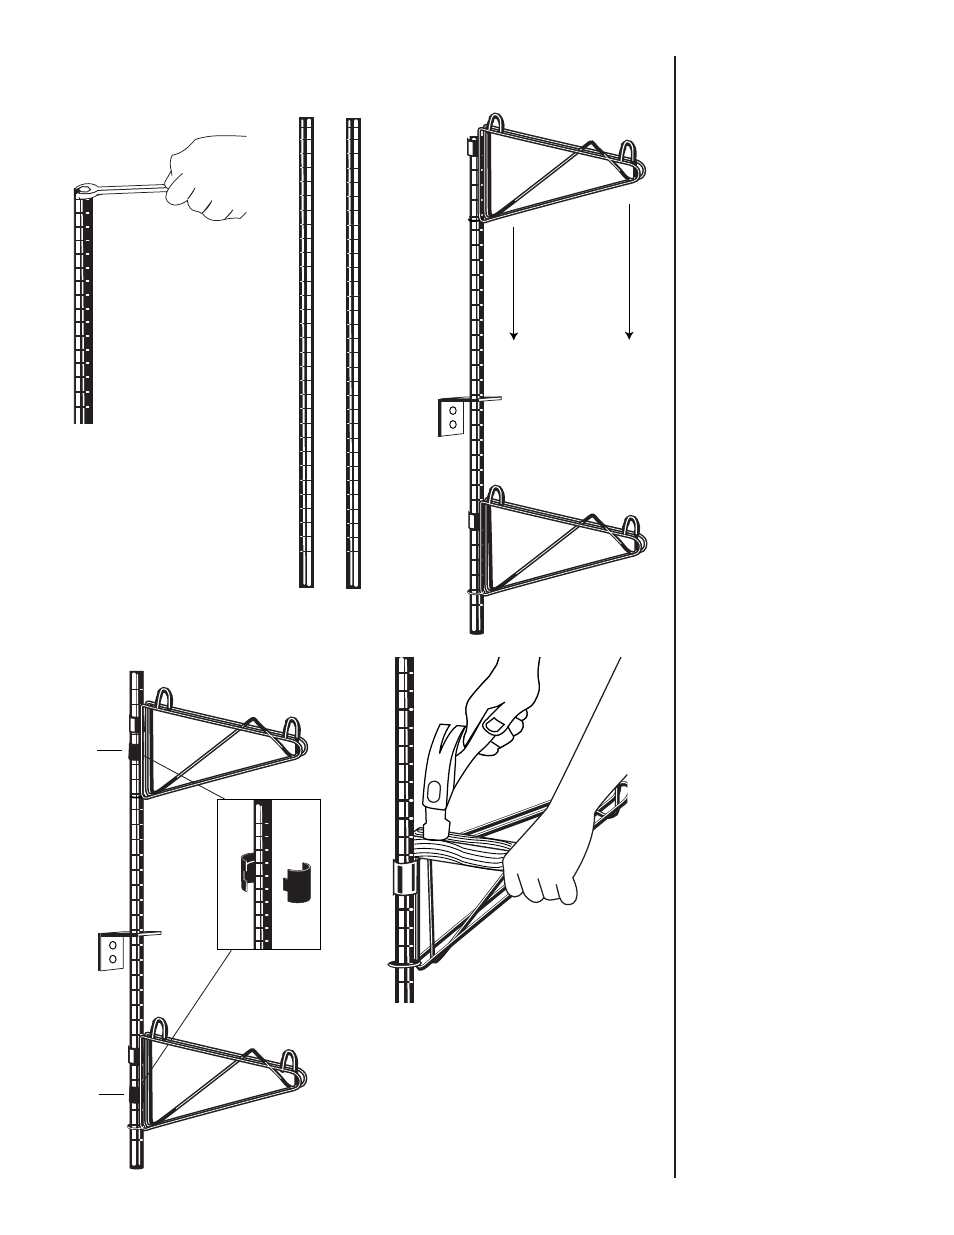
POST ASSEMBLY
1. Remove bolts from
posts.
Use an adjustable wrench
to remove bolt from each
end of both posts. Set all
four bolts aside for later
use.
2. Arrange posts.
Note the grooves in each
post. The groove closest to
the end (about 1/2") will be
the “top” of the post.
Arrange both posts so the
“top” of each post is point-
ing in the same direction.
3. Assemble shelf sup-
ports and center
support brackets
onto posts.
From top of post, slide a
shelf support, a center sup-
port bracket, and another
shelf support onto post as
shown. Slide shelf supports
so hooks are up. Be sure
each center support brack-
et has the bent end facing
down. Repeat for second
post.
4. Attach split sleeves.
Turn posts to find numbers
along each groove. Locate
grooves which represent “7”
and “29.” These are recom-
mended shelf locations. (If
adjusting shelf locations,
allow enough room for all
brackets.) Center shelf sup-
port over specific groove.
Note ridge on inside of each
split sleeve. Turn each split
sleeve so ridge is toward top
of post. Align each split
sleeve so the inner ridge fits
into the selected groove and
snap into place.
5. Secure shelf support
onto split sleeve.
Slide shelf support “collar”
over attached split sleeve.
Be sure both shelf supports
are aligned. Use a hammer
and a block of wood to
secure shelf support onto
split sleeve.
#29
#7
1
2
3
4
5
_
3