Microcom 400 User Manual
Page 19
Chapter 2
Basic Operation
400 Operators Manual
11
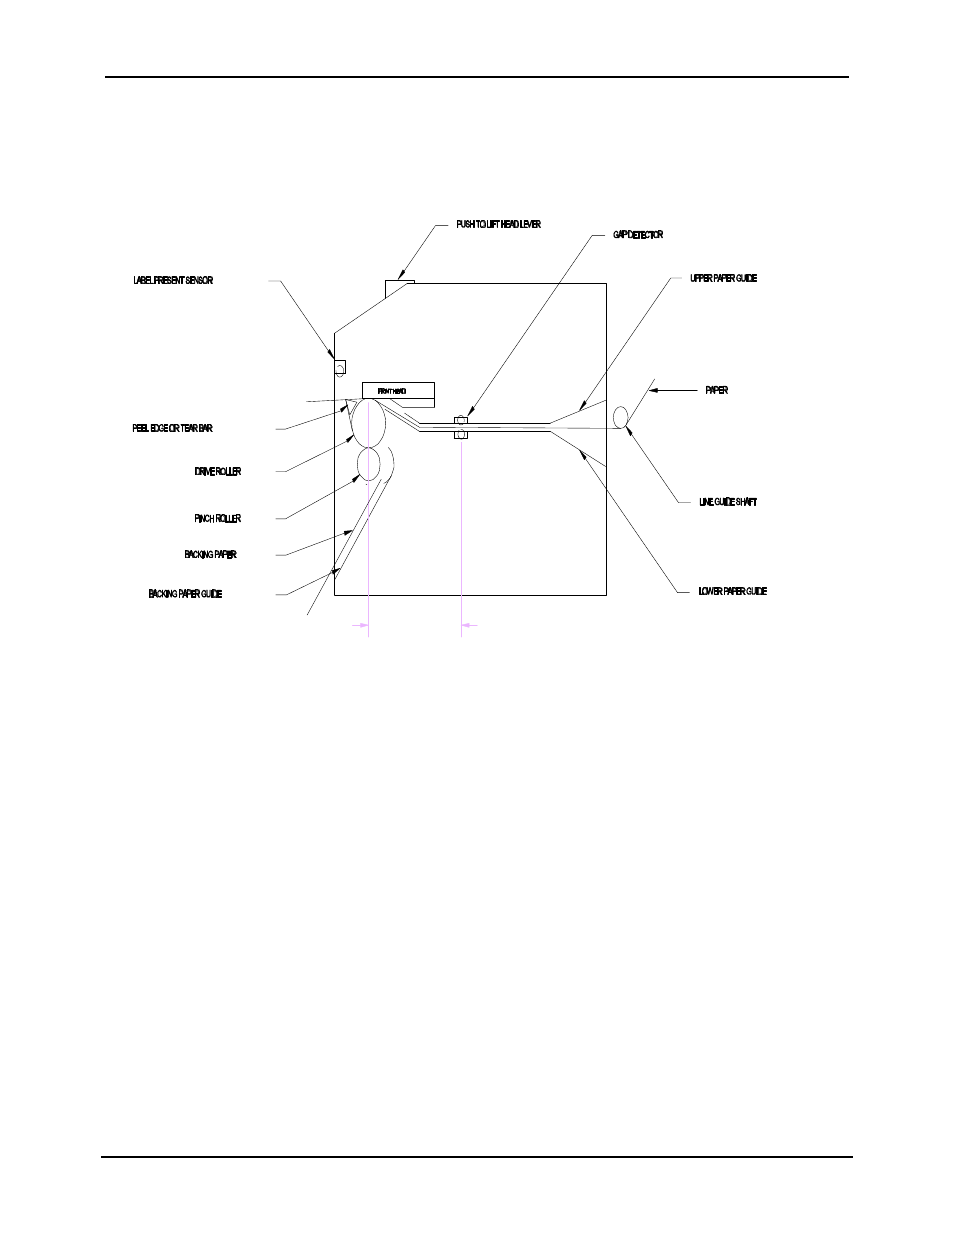
2.7
LOADING PAPER
Part of the 400's versatility is in the different ways it processes labels. The following two
sections explain the dispensing modes. Refer to figures 1, 2 and 6 for the printer components.
Printer Feed Mechanism
Figure 6
2.7.1 NORMAL AND TAG/TEAR MODES
Unwind about two feet of stock from the paper supply roll of paper. Set the roll behind the
printer on the table. Remove the label supply shaft. Insert the paper with the thermally
sensitive side up, under the rear threaded paper guide shaft, and into the printer until the
paper stops. Turn the paper guide adjust knob at the rear of the printer until the paper guides
are slightly wider than the label stock. Continue to apply pressure on the paper with your left
hand. Press and hold the front panel button with your pointing finger until the paper has
advanced to a point past the printhead. To align the paper, press down on the head lift lever
and move the paper until the desired alignment is reached. Replace the label supply roll shaft
and stock onto the wire rack. You are ready to print.
2.7.2 PEEL-AND-DISPENSE MODE (optional)
1.
Follow the paper loading in the normal and tag mode directions.
2.
Remove enough labels to expose about two feet of backing paper.
3.
Insert the stock into the printer and allow about three inches to protrude out of
the front.
4.
Make sure the leading edge of the backing paper is square and straight. (Tear
at perforation or cut if necessary)