Nortec On Digital Duct Humidistat User Manual
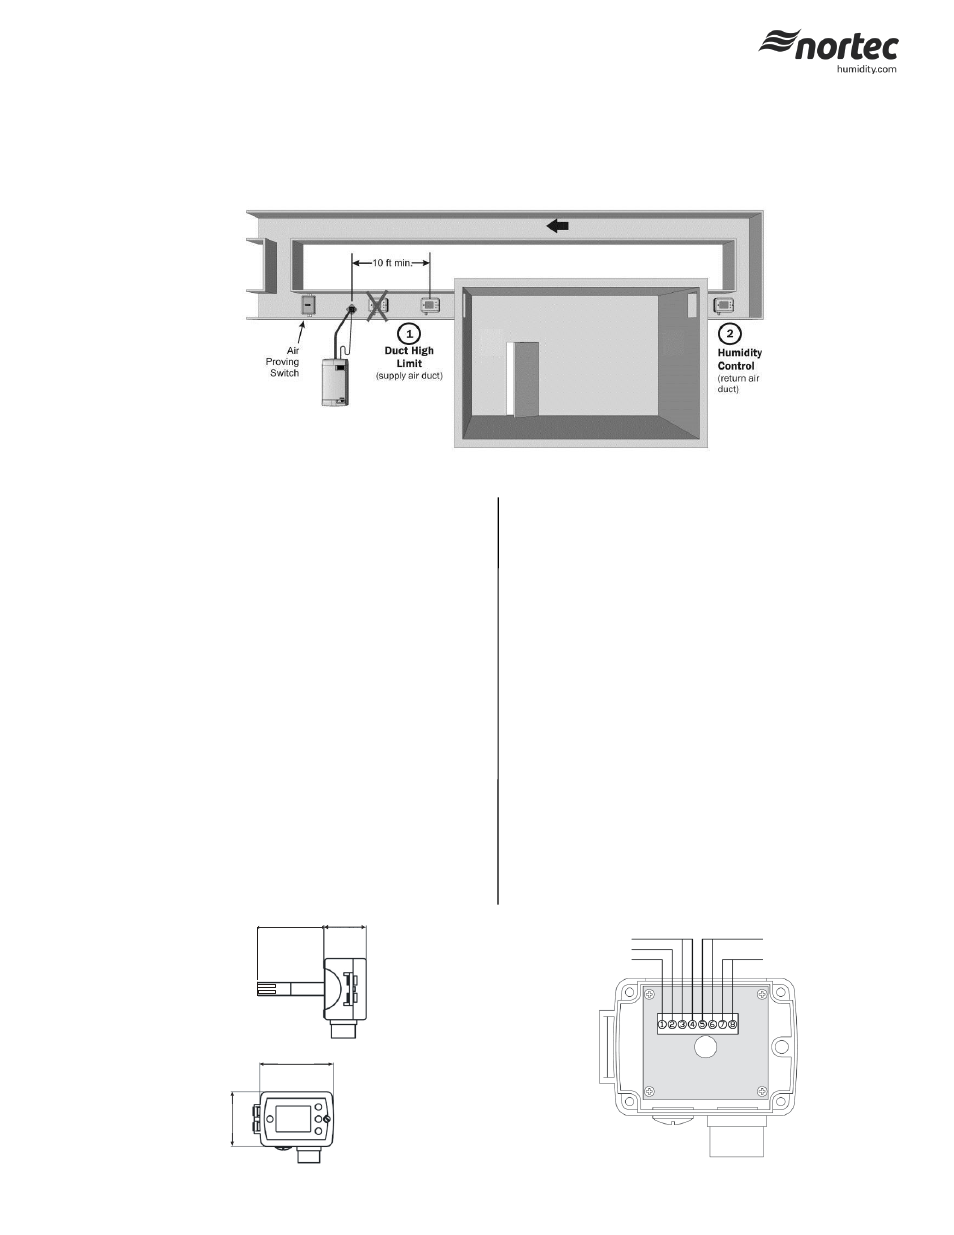
1 - duct high limit installation, 2 - humidity control installation
2549737-D | 22 July 2014
Introduction | 1
1 - Duct High Limit Installation
When installed as a high limit, the humidistat prevents over humidification as
well as wetting of the supply duct. Do not use fan relay when configuring as a
high limit.
Location:
1 Install directly on the supply duct in an area where the air is well mixed with
uniform flow.
2 Install downstream of the steam distributor at a distance 1.5 times the
absorption distance (typically 10-12 feet or 3-3.7 m). Must be in a location to
sense high humidity in addition to sensing when representative air is over
humidified or approaching saturation.
Installation:
1 Use the provided humidistat template and small level to mark outline of
humidistat body and location of probe hole. Ensure template is level before
marking.
2 Open the housing by removing the screw securing the face of the housing.
3 Drill a 5/8” (16 mm) hole in the duct at the marked location for probe
insertion.
4 Insert the probe into the air stream and place humidistat against duct wall.
5 Secure the duct humidistat to the duct using 4 sheet-metal screws (#6 x 3/4”
Phillips).
6 Wire as per wiring diagram 2548733 in this document.
7 Close the cover and secure using the screw removed in step 2.
Configuration:
1 Using keypad, set humidity to specified level (85% maximum) as a safety to
prevent saturation.
On/Off Digital Duct Humidistat Installation Instructions
This document covers the operation and installation instructions for the following digital humidistat:
Part #: 2548732
Description: On/Off Duct Humidistat
The humidistat can be configured for either humidity control or as a high limit safety device:
76 (3.0)
47 (1.9)
91 (3.6)
6
8
(2
.7
)
Humidify Relay
24 Vac
Com
Fan (Furnace)Relay
NTC Sensor
Figure 2: Dimensions
Figure 3: Terminal Strip
Figure 1: Duct Humidistat Installation Locations
2 - Humidity Control Installation
When configured as a humidity controller, the humidistat provides
accurate control of the RH in a return duct and will activate/deactivate
a furnace or circulation fan.
Location:
1 Install on the return air duct, close to the air inlet but upstream from
a return fan if one is present.
Installation:
1 Use the provided humidistat template and small level to mark outline
of humidistat body and location of probe hole. Ensure template is
level before marking.
2 Open the housing by removing the screw securing the face of the
housing.
3 Drill a 5/8” (16 mm) hole in the duct at the marked location for
probe insertion.
4 Insert the probe into the air stream and place humidistat against
duct wall.
5 Secure the duct humidistat to the duct using 4 sheet-metal screws
(#6 x 3/4” Phillips).
6 Wire as per wiring diagram 2548733 in this document. Figure 3
outlines the terminal layout.
7 Close the cover and secure using the screw removed in step 2.
Configuration:
1 Using keypad, set specified humidity level. For general health and
comfort, a humidity setting of 50% is recommended.
2 See Table 3 for outdoor temperature setback configuration, if
optional outdoor temperature sensor is supplied (P/N 2520263 or
2553858).