OpenEye CM-511 User Manual
Page 44
44
Set Mask
After pressing <ENTER> to enter the sub-menu of SET MASK, the dome will memorize the present
position as a privacy mask position; up to 16 masks can be set. The camera restricts the mask zones to
be set too close with each other.
Note
The available area for setting a privacy mask is restricted within tilt angle 45°, and two mask
zones are allowed to set in a view area.
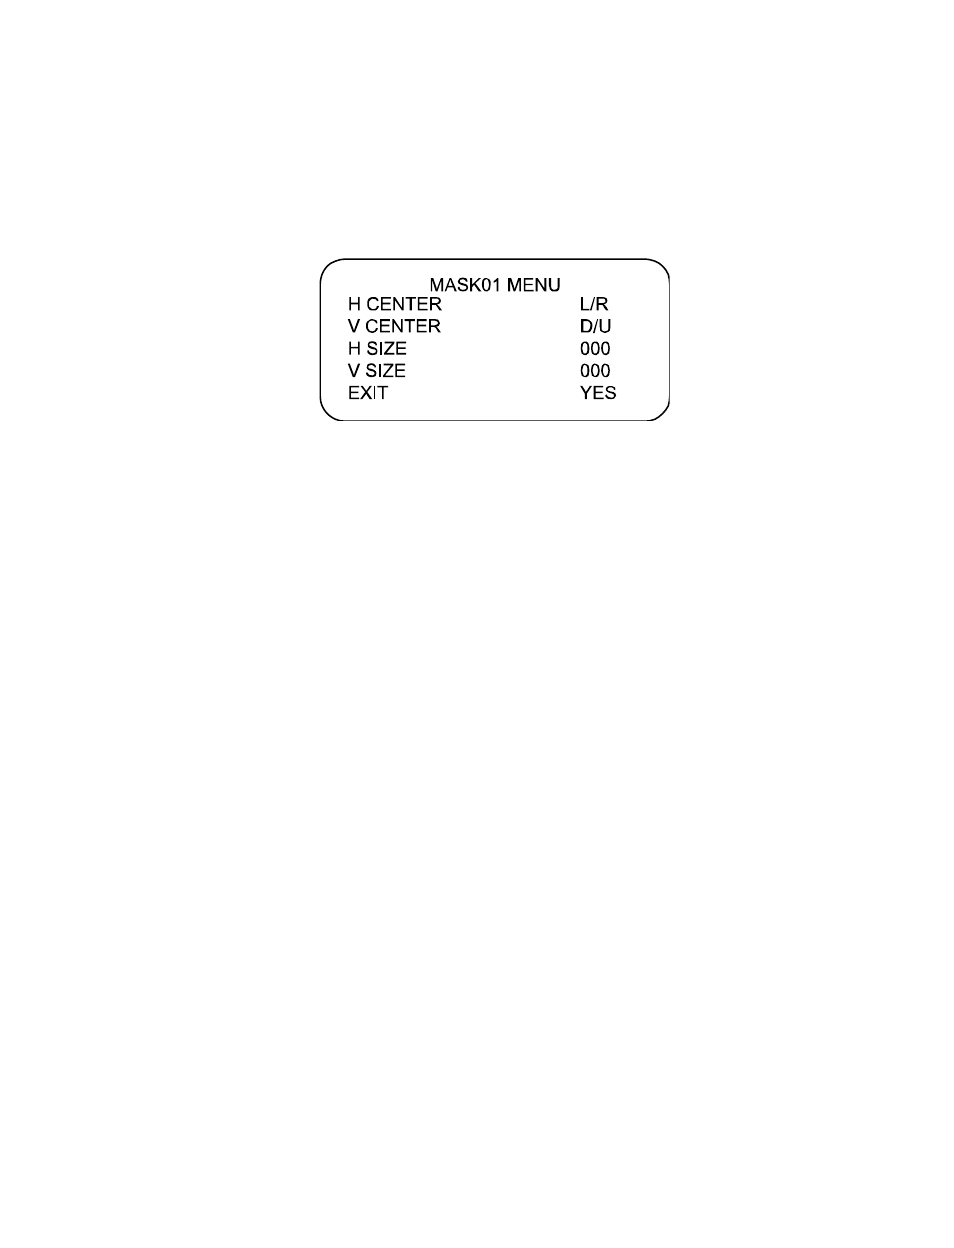
H CENTER - The original center of a mask zone is the center of a screen. Users can move the center of a
mask zone to another position through adjust this value by pressing the LEFT/RIGHT keys on the
keyboard.
V CENTER - The original center of mask zone is the center of screen. User can move the center of mask
zone to another position through adjust this value by pressing the LEFT/RIGHT keys on the keyboard.
H SIZE (000~080) - Users can adjust the horizontal size of a privacy mask through this item. Setting the H
and V size to 0 can also delete the selected mask.
V SIZE (000~060) - User can adjust the vertical size of a privacy mask through this item. Setting the H
and V size to 0 can also delete the selected mask.
Note
A mask’s size should be limited within the screen, whatever the optical zoom is.
Clear Mask
Users can delete a preset mask zone:
1. Select the mask zone that will be erased (e.g. 01).
2. Press <ENTER> to confirm the selection. Consequently, the screen will display the instructions to
reset after the mask is cleared.
3. Select <RESET> under the CLEAR MASK item and press <ENTER> to proceed with resetting.
Exit
Exit
the
PRIVACY MASK menu and go back to the MAIN PAGE 3 to continue setting up time related
options.