Test firing – Skutt Firebox 8 User Manual
Page 5
5
5
K
iln
s
eTup
i
nStall
t
herMOcOuple
and
p
yrOMeter
Install the Thermocouple Flange by placing it over the hole on the left side of the kiln and lining up the screw holes with
•
the holes in the base of the flange. Use a Phillips head screwdriver to attach the flange to the side of the kiln using the
screws in your goodie bag.
Remove the pyrometer and thermocouple from the box and place the 9 volt battery in the pyrometer. Attach the thermo-
•
couple to the pyrometer as pictured. Be sure the “+” and “-” symbols on the plug of the thermocouple match those found
on the face of the pyrometer. Hold the tip of the pyrometer over a flame to make sure the meter is operating. If the con-
nection is reversed the temperature will fall when it should be climbing.
The stand included with the pyrometer can be either wall mounted or set on the table next to the kiln. In either case be
•
sure that the pyrometer is at least 8 inches (20 cm) from the kiln to prevent overheating. If you are mounting the pyrom-
eter to the wall, fasten the stand to the wall using the screws included in the pyrometer stand box. Tuck the top of the py-
rometer under the flange on the top of the stand. If you wish to have the stand just set on the table next to the kiln simply
tuck the top of the pyrometer under the flange on the top of the stand and set it at least 8 inches (20 cm) from the kiln.
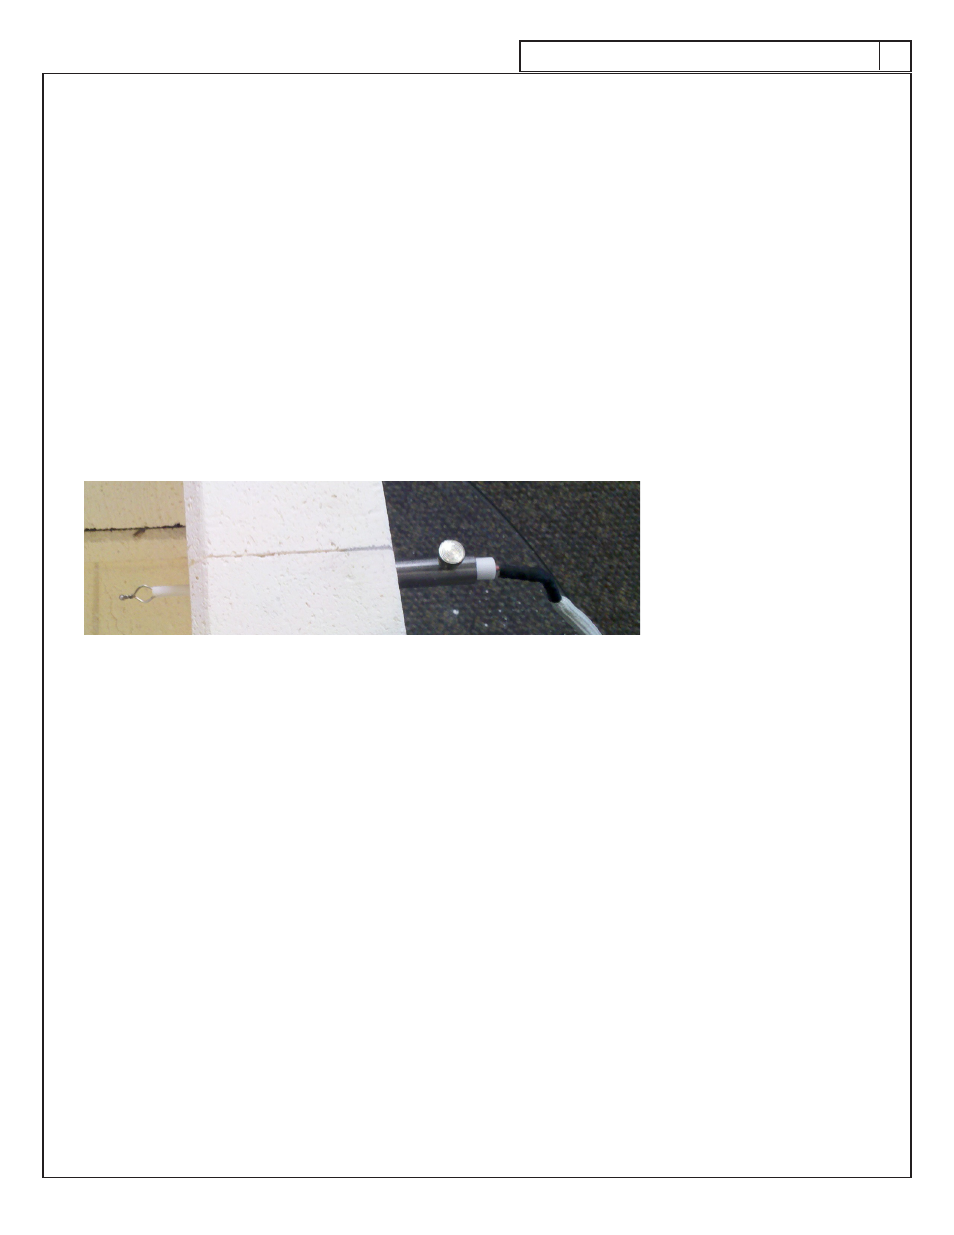
Insert the pyrometer thermocouple through the flange and side wall of the kiln so that the tip of the thermocouple is in-
•
side the kiln 1 inch. The larger ceramic insulator should be about halfway into the flange, tighten the set crew so it is just
snug. Overtightening may crack the insulator. As the thermocouple ages it will become more fragile, so exercise extreme
caution when removing and inserting the thermocouple. See picture for proper installation.
S
eating
the
e
leMentS
The elements of your kiln need to be properly seated into the grooves of the brick. Elements have stress in them much
like glass before it is annealed. This stress is caused by winding and stretching the elements. By bringing the elements up to
a minimum temperature you allow the elements to settle into the grooves and relieve this stress. After the elements have been
seated, the element is more stable and less likely to pop or crawl out of the grooves.
Before you test fire the kiln read the section on Kiln Operation to gain a firm understanding of how the kiln operates.
To seat the elements fire the kiln up to 1650 ºF (899 ºC) and hold at this temperature for 15 minutes. After 15 minutes
turn the switch to off and let the kiln cool back down to room temperature. The first time the elements are fired they will give
off some smoke. This is normal and expected. It is also common for hairline cracks to appear in the floor of a kiln. This is
caused by the expansion and contraction of the mortared brick and is considered normal. It will not affect the firing of your
kiln nor the life of the kiln floor.
t
eSt
F
ire
p
rOcedure
• Post up a shelf in the kiln chamber using 1” (2.5 cm) posts. Fuse with the shelf in this position relative to the ther-
mocouple whenever possible for accurate and consistent results.
• Place a sample glass project using scrap fusible glass in the kiln. Fire the kiln to the temperature recommended for a
fused or tac-fused project.
• Let the kiln fire and then cool to room temperature before opening the lid. If the project is fused or slumped to
your satisfaction the kiln is operating correctly. Each kiln will fire slightly different and it is normal to make slight
adjustments to your switch setting to attain the results you are looking for.
Congratulations you are now ready to use your kiln!
Test Firing