Front bay – Teac MX-2424 Installation v1.00 User Manual
Page 4
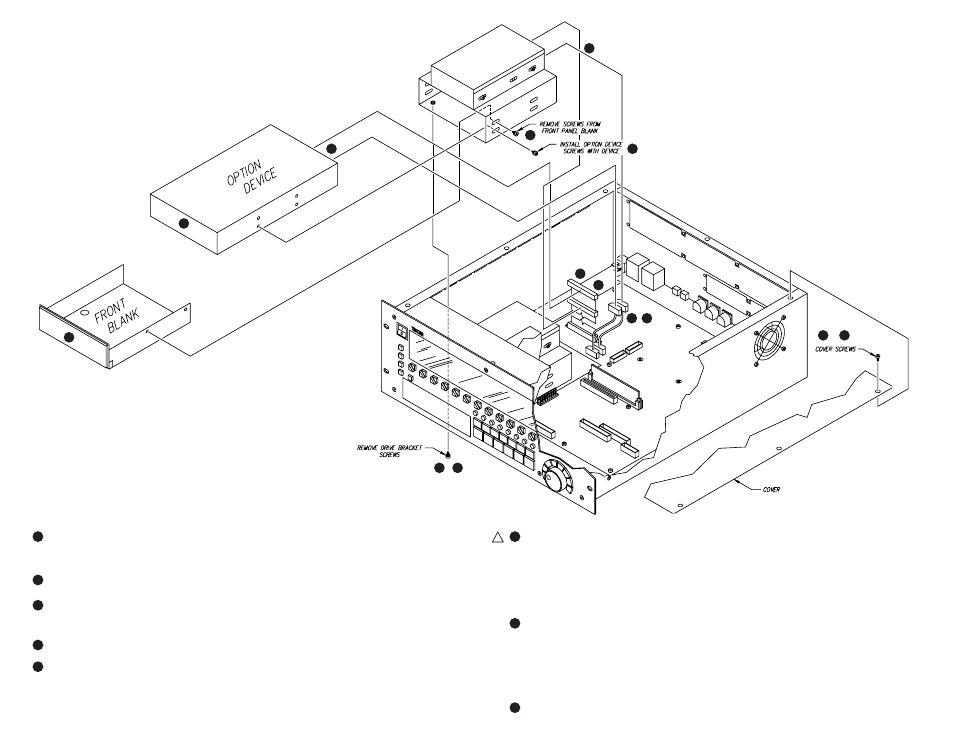
Turn off the power and unplug the MX-2424.
Remove the eight screws from the top cover and put them in a safe place.
Reinstall the top cover and screws.
1
2
3
4
5
6
7
8
Remove the cables attached to any installed drives.
Remove the four screws from the bottom of the unit that hold the drive
bracket in place. Lift the drive bracket out.
Unscrew and remove the front panel blank and save it.
Install the new option device into the drive bracket and replace the screws.
Re-install the drive bracket into the MX-2424 and replace the screws on the
bottom of the unit.
Be sure to set the SCSI ID of the new option device according to the
instructions provided with that device. The internal drive is preset to
SCSI ID 0. Termination mus t be disabled on the new option device
since the SCSI bus on the MX-2424 is already terminated. If installing
a DVD-RAM or tape drive connect the supplied 68-50 pin adapter.
Attach the power cables to the original drive and the new option device.
Attach the SCSI cable to the original drive and the new option device.
The SCSI cable is labelled "FIXED DISK" (this attaches to the internal
hard disk) and "BAY DISK" (this attaches to the new option device).
This cable already has a terminator attached that should not be removed.
!
1
8
2
2
2
3
4
5
4
5
7
7
7
5
Front Bay